
To create a Windows 11 bootable USB, download Microsoft’s official Media Creation Tool on any working PC, plug in a blank USB drive of at least 8 GB, choose the option to create installation media for another PC, and let the tool write it. Then restart the gaming PC, open the boot menu, and pick the USB drive to start setup.
The process takes roughly half an hour, most of it download time, and it erases everything on the USB drive. This guide walks through the official method, the alternative with an ISO file, what to prepare for a gaming build specifically, and the mistakes that cause a PC to ignore the stick or fail partway through installation. Exact menu names change between Windows releases and motherboard brands, so treat the labels here as a guide and check Microsoft’s support pages if something looks different.
What You Need Before Starting
The USB drive
Microsoft lists 8 GB as the minimum for the installation media, and a 16 GB drive gives more room. A USB 3.0 port and drive make writing and installing noticeably quicker than an old USB 2.0 stick. Everything on the drive will be deleted, so copy off anything you need first.
A working PC and a stable connection
The tool downloads several gigabytes of files, so use a wired connection if possible. Any Windows PC works for creating the media, including the one you plan to reinstall, as long as you finish before wiping the drive.
Hardware that meets the requirements
Windows 11 expects a 64-bit processor, 4 GB of RAM, 64 GB of storage, UEFI firmware with Secure Boot capability, and TPM 2.0. Most gaming PCs built in recent years meet these, but TPM or Secure Boot may be turned off in the firmware settings. Check the current requirements on Microsoft’s website before you begin.
Method 1: Media Creation Tool (Simplest)
- Go to Microsoft’s official Windows 11 download page and choose the option to create installation media.
- Run the downloaded tool and accept the license terms.
- Confirm the language and edition, or keep the recommended options for this PC.
- Select USB flash drive when asked which media to use.
- Choose the correct drive from the list. Double check the drive letter and capacity so you do not erase a different disk.
- Wait while the tool downloads Windows and writes it to the drive. Do not remove the stick until the tool says it is ready.
When finished, the drive contains the setup files and is ready to boot on a UEFI machine. You can reuse the same stick for several PCs.
Method 2: Using an ISO File
If the tool fails, or if you prefer more control, download the Windows 11 disc image from Microsoft and write it yourself. The popular utility Rufus can write the ISO to a USB drive, and it lets you pick the partition scheme and target system. For a modern gaming PC, choose the GPT partition scheme with UEFI target, which matches how current motherboards boot.
Why partition scheme matters
Older PCs boot in legacy BIOS mode and use MBR, while current gaming PCs use UEFI and GPT. A mismatch can cause the stick not to appear in the boot menu, or can lead to an installation that refuses to proceed. If you are unsure, look in the firmware setup for the boot mode setting.
A note on file size
Standard FAT32 drives cannot hold a single file larger than 4 GB, and the main Windows image can exceed that. The official tool and Rufus both handle this, so you do not have to split the file yourself. Dragging ISO contents onto a drive by hand is where people run into this limit.
Preparing the Gaming PC
Back up your data and game saves
A clean install erases the target drive. Copy documents, game saves, and screenshots to a separate drive or cloud storage. Many launchers sync saves, but not all games do, so check before you wipe.
Collect drivers on a second drive
Download the chipset, network, and graphics drivers from the motherboard and GPU maker websites and save them to another USB stick. Windows will fetch many drivers through Windows Update, but a missing network driver can leave you without internet during setup.
Disconnect extra drives
If you have several drives installed, unplug or disable the ones you want to keep untouched so you cannot select the wrong disk when setup asks where to install. Reconnect them afterward.
Checking Firmware Settings First
Many installation failures come from firmware options rather than the USB drive itself. Enter the firmware setup by tapping the key shown on the startup screen, usually Del or F2, and look at three settings before you launch setup.
TPM and Secure Boot
On many boards, TPM appears under a name such as fTPM, PTT, or Security Device Support, depending on whether the chipset is from AMD or Intel. Secure Boot sits in the boot or security menu and may need the boot mode set to UEFI first. If setup rejects the PC, these are the first places to look.
Boot order and fast boot
Leaving the USB drive first in the boot order can cause the PC to loop back into setup after the first restart, so return the internal drive to the top once files are copied. A fast boot option can skip USB detection, so turn it off temporarily if the drive does not show up.
Storage mode
If you have an NVMe drive and setup cannot see it, check whether the board uses a RAID or Intel Rapid Storage mode. Switching that mode, or loading the vendor storage driver, usually makes the drive visible. Note the original setting before you change it, because changing it on a PC that already has Windows installed can stop that copy from starting.
Booting From the USB Drive
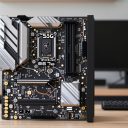
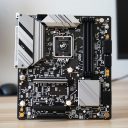
Insert the drive directly into a motherboard USB port on the back of the PC, not a front-panel header or hub. Restart and tap the boot menu key during the logo screen. Common keys are F12, F11, F8, Esc, or Del, but they differ by brand, so check your motherboard manual.
Select the entry that names your USB drive. If two entries appear for the same drive, pick the one labeled UEFI. Setup should then start, and you can pick the language, choose a custom installation for a clean install, select the target drive, and follow the prompts.
| Problem | Likely cause | What to try |
|---|---|---|
| USB not shown in boot menu | Wrong boot mode or partition scheme | Recreate the drive as GPT for UEFI, or enable USB boot in firmware |
| Setup says PC cannot run Windows 11 | TPM or Secure Boot disabled | Enable them in firmware and retry |
| No drives found in setup | Storage driver missing | Load the driver from the second USB stick |
| Setup freezes while copying | Faulty USB drive or port | Try a different drive and a rear port |
After Installation
Once Windows reaches the desktop, install chipset and graphics drivers first, then run Windows Update until it reports nothing pending. Reinstall launchers and check that storage and monitor settings such as refresh rate are correct. Your Windows activation is normally tied to your hardware and Microsoft account, so a reinstall on the same machine usually reactivates by itself once online.
Before You Start Checklist
- USB drive of at least 8 GB with nothing important on it.
- Game saves and files backed up elsewhere.
- Chipset, network, and graphics drivers saved on another drive.
- Boot menu key found in the motherboard manual.
- TPM and Secure Boot status confirmed in firmware.
Common Mistakes
- Writing the image to the wrong drive and erasing a data disk, so always verify capacity and letter.
- Creating a legacy MBR drive for a UEFI-only gaming PC, which then does not show in the boot menu.
- Plugging the stick into a front-panel port or hub that is not recognized during boot.
- Skipping the driver download, then having no network driver after installation.
- Pulling the stick out before the tool says it has finished, which leaves the media corrupt.
Related guides
- Aio Liquid Coolers For High Performance Gaming
- Wireless Gaming Headsets Under 100 For Pc
- Ssds For Large Video And Raw Photo Files
Frequently Asked Questions
How big does the USB drive need to be?
Microsoft lists 8 GB as the minimum, and 16 GB is a safe choice. Smaller drives will not hold the installation files.
Can I make the bootable USB on a Mac or Linux PC?
Yes, but the official Media Creation Tool runs only on Windows. On other systems you download the disc image from Microsoft and write it with a compatible tool, then confirm the partition scheme is GPT for UEFI.
Will I lose my games when I install from the USB drive?
A clean install formats the target drive, so games installed on it are removed. Games stored on a separate drive remain on disk, though you may need to point your launcher to them again.
Do I need a product key?
Often not, if the PC previously ran an activated copy of Windows, since the license is tied to the hardware. If setup asks for a key, check Microsoft’s activation help for your situation.