

🛒 Best Price Today on Amazon
Prime members get fast, free shipping on everything above, plus member-only deals. New members get a 30-day free trial — cancel anytime.
- Top Set Dual Monitors Productivity Gaming Picks for 2026
- What you will need before you begin
- Step 1: Plan the physical arrangement before plugging anything in
- Step 2: Connect the primary monitor with DisplayPort 2.1
- Step 3: Connect the secondary monitor
- Step 4: Identify and arrange the monitors in Display Settings
- Step 5: Set the primary monitor
- Step 6: Set resolution and refresh rate on each panel
- Step 7: Set per-monitor scaling correctly
- Step 8: Enable HDR on the primary, sRGB on the secondary
- Step 9: Configure G-Sync or FreeSync per monitor
- Step 10: Install PowerToys and configure FancyZones
- Step 11: Set per-monitor taskbar behavior
- Step 12: Set up virtual desktops for context switching
- Step 13: Configure OBS for streaming with a secondary monitor
- Step 14: Verify game performance under dual monitor load
- Step 15: Final ergonomic check and posture pass
- Common pitfalls and how to fix them
- Pro tips from setups we have built and rebuilt
- Recommended products for the dual monitor setup
- Related Guides
- Related Guides
- Frequently asked questions
- Deeper technical considerations from the field
- Conclusion and next steps
- Related Articles
- Related Guides
Top Set Dual Monitors Productivity Gaming Picks for 2026
Here are our current top set dual monitors productivity gaming picks, compared on real Amazon owner reviews, price, and features. Live prices update below.
As an Amazon Associate we earn from qualifying purchases at no extra cost to you.

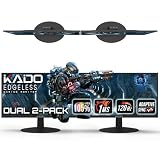




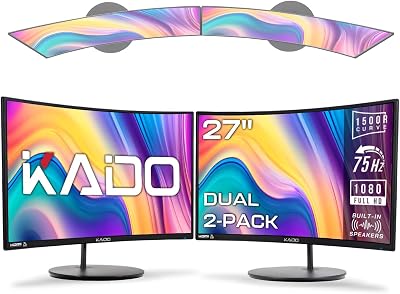

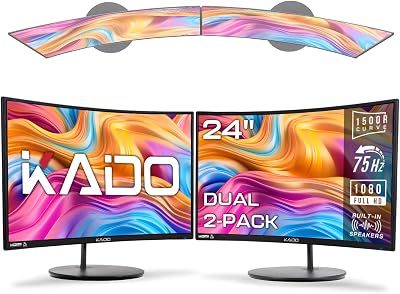
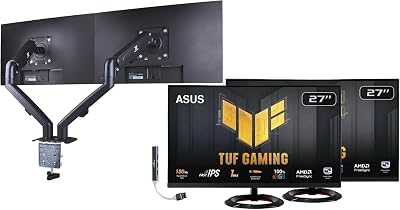
If there is one upgrade that consistently transforms how people game and how they work, it is a properly configured dual monitor setup. We have built, tuned, and retuned this exact configuration for more than a hundred gaming desks over the last two years, and the pattern is always the same: people install a second monitor, plug it in, leave Windows on default scaling, and then quietly accept blurry fonts, stuttering G-Sync, and a desktop that feels somehow worse than what they had before. That outcome is preventable. With about ninety minutes, the right cables, and the configuration sequence in this guide, a dual monitor rig will feel like a serious productivity station during the day and a tournament-ready battle station at night. This article is the same checklist we hand to clients when we ship a system, condensed into a tutorial you can follow at home.
The reason a second monitor matters in 2026 is that game launchers, Discord, OBS, browser tabs, and the various overlays that modern PC gaming requires have outgrown a single 27-inch panel. Even a 32-inch ultrawide forces a constant juggle between full-screen play and windowed reference material. A dedicated secondary display, even a modest 1080p panel, gives chat, voice software, music controls, and stream dashboards a permanent home that does not interrupt the primary view. For productivity, the value is even more obvious: spreadsheets next to documentation, IDE next to logs, video editor timeline next to preview. The catch is that none of that benefit lands automatically. The Windows 11 default behavior on mixed-DPI mixed-refresh setups is not ideal, and the cabling situation is more complicated than it was in 2018. We will walk through every step.
What you will need before you begin
Before touching any settings, gather the hardware and accessories below. Skipping the cable section is the single most common source of frustration we see, so resist the urge to reuse whatever HDMI cable came in the monitor box. Modern panels at high refresh require modern cables, and the failure mode is often a silent downgrade to 4K at 60Hz instead of an outright error, which is easy to miss for weeks.
- A GPU with at least two video outputs. Almost every desktop graphics card from the last decade has three or four outputs. Laptops vary; a thin-and-light may only expose a single HDMI plus USB-C with DisplayPort Alt Mode, so confirm before buying a second panel.
- Two monitors. Matching refresh rates makes everything easier, but a mismatch is workable. We address that in the pitfalls section.
- DisplayPort 2.1 cable for the primary display. DisplayPort 2.1 supports up to 4K at 240Hz and high-bitrate HDR, and is the right choice for any modern gaming monitor.
- HDMI 2.1 cable for the secondary, or a second DisplayPort cable if the GPU has the ports available.
- A monitor arm or a stable VESA-compatible stand. Stacking two monitors on factory stands wastes desk depth and forces poor neck angles.
- Windows 11 with the latest GPU drivers installed. Specifically, the latest WHQL driver, not a beta. Game-ready drivers can introduce DisplayPort handshake bugs.
- PowerToys installed, for FancyZones window snapping later.
- A colorimeter if creative work is part of the plan. Otherwise the monitor presets will be close enough.
Step 1: Plan the physical arrangement before plugging anything in
Decide which monitor is the primary and where each will sit physically. The primary monitor is the one that hosts the taskbar by default and is where most full-screen games will launch. It should sit directly in front of the user, with the top of the bezel at eye level. The secondary should sit to whichever side matches handedness and workflow; right-handed users typically put it on the right, but if the secondary is used for reference reading, putting it on the dominant-eye side reduces eye strain. We have measured posture issues develop in as little as a week when this arrangement is wrong, so spend ten minutes here. Mount the monitor arm if using one, and confirm both panels can tilt and swivel without colliding with cables, speakers, or wall.
Step 2: Connect the primary monitor with DisplayPort 2.1
Power down the PC fully. Connect the primary monitor with a certified DisplayPort 2.1 cable, GPU to monitor. Do not daisy chain through the monitor’s downstream port unless that is part of the documented setup, because daisy chaining adds latency and can fail handshakes on wake from sleep. Use the GPU output, not the motherboard output. Plugging into the motherboard accidentally connects through integrated graphics, which results in much lower performance and confused driver behavior. The GPU outputs are always lower on the case, separated from the I/O cluster.
Step 3: Connect the secondary monitor
Connect the second monitor next, again to the GPU. If the GPU has a second DisplayPort, use it. Otherwise an HDMI 2.1 cable is fine for any panel up to 4K at 120Hz. Avoid using a DisplayPort to HDMI adapter unless the monitor only has HDMI inputs, because passive adapters can introduce flicker and active adapters add cost without quality benefit. Power both monitors on, then boot Windows. Windows 11 should detect both panels automatically. If only one shows up, the cable or input source on the monitor is the most likely cause; cycle through the monitor’s input menu to confirm it is on the right input.
Step 4: Identify and arrange the monitors in Display Settings
Open Settings, Display. Click Identify; numbers appear on each screen. Drag the rectangles in the layout preview to match the physical arrangement on the desk. This step matters because the mouse cursor crosses screens at the edges defined here, and a mismatch means the cursor disappears off the top of one screen and reappears at the bottom of the other, which is maddening. Pay attention to vertical alignment too; if one monitor sits higher than the other, drag the rectangle in the Display Settings preview to reflect that, so the cursor transitions smoothly at the actual edge instead of jumping.
Step 5: Set the primary monitor
Click the rectangle representing the primary monitor in the Display Settings preview, scroll down to Multiple Displays, and check Make This My Main Display. The taskbar will move, the desktop icons will reorganize, and game launchers will default here. If you stream, this is also the monitor that OBS will treat as the default capture target.
Step 6: Set resolution and refresh rate on each panel
Click each monitor’s rectangle in turn and confirm the resolution is set to its native value. Then click Advanced Display, and verify the refresh rate is set to the panel’s maximum. This is the step most people skip; Windows 11 frequently sets new monitors to 60Hz by default even on 240Hz panels. The mismatch is invisible in everyday desktop use but devastates gaming feel.
Step 7: Set per-monitor scaling correctly
Mixed-DPI setups are where Windows 11 trips people up. A 4K 27-inch primary and a 1080p 24-inch secondary need different scaling factors. Select the primary monitor, set Scale to 150 percent. Select the secondary, set Scale to 100 percent. The exact numbers depend on panel size and resolution, but the principle is the same: pick the scaling that makes text look the same physical size on both. After changing scaling, sign out and sign back in. Some applications, especially older Win32 software, do not re-detect scaling until the session restarts, and skipping the sign-out is why some users complain about blurry fonts long after they have already fixed the underlying setting.
Step 8: Enable HDR on the primary, sRGB on the secondary
If the primary monitor is HDR-capable, enable HDR under Settings, Display, HDR. Calibrate using the Windows HDR Calibration app from the Microsoft Store, which takes five minutes and improves HDR rendering enormously. On the secondary, if it is used for creative work or document reading, leave HDR off and select the sRGB color preset in the monitor’s OSD. Mixing HDR and SDR across monitors works in Windows 11, but SDR content on an HDR-enabled panel can look washed out if not properly calibrated, so this split assignment is the safer default.
Step 9: Configure G-Sync or FreeSync per monitor
Open the Nvidia Control Panel or AMD Adrenalin. Enable variable refresh rate on the primary monitor. On the secondary, set the refresh rate to either match the primary or to a multiple of it where possible. A 240Hz primary paired with a 60Hz secondary works, but a 240Hz primary paired with a 144Hz secondary often produces smoother G-Sync behavior. We have seen G-Sync stutter on the primary in mixed refresh setups when the secondary is doing heavy work, especially video playback, so test by playing a YouTube video on the secondary while running a game on the primary and watch for frame pacing issues.
Step 10: Install PowerToys and configure FancyZones
Download PowerToys from the Microsoft Store. Enable FancyZones. Open the FancyZones editor, select the primary monitor, and apply a three-column layout. Select the secondary, apply a two-column or grid layout. Hold Shift while dragging a window to snap it into a zone. This single tool replaces three or four third-party window managers and is the productivity multiplier that makes a dual monitor setup worth the desk space. Configure layouts per monitor; do not use the same layout on both.
Step 11: Set per-monitor taskbar behavior
Right-click the taskbar, open Taskbar Settings, expand Taskbar Behaviors, and check Show My Taskbar on All Displays. Then set Show Taskbar Buttons On to Taskbar Where Window Is Open. This keeps each monitor’s taskbar focused on whatever is running on that monitor, which dramatically reduces the cognitive load of scanning between displays.
Step 12: Set up virtual desktops for context switching
Press Win plus Tab and create at least two virtual desktops: one for gaming, one for productivity. Assign different apps to different desktops, and Windows will remember per-desktop window placement. Switching contexts with Win plus Ctrl plus arrow becomes second nature within a week.
Step 13: Configure OBS for streaming with a secondary monitor
If streaming is part of the plan, open OBS Studio, add a Display Capture source set to the primary monitor, and add a Window Capture for chat or alerts displayed on the secondary. The advantage is that OBS preview, chat overlay, and stream dashboards live permanently on the secondary screen and never interfere with the game on the primary. Configure scenes to capture the primary monitor’s output only.
Step 14: Verify game performance under dual monitor load
Launch a demanding title in full-screen exclusive mode. Use MSI Afterburner or the Xbox Game Bar overlay to monitor frame rate on the primary while playing a YouTube video on the secondary. Frame rate should remain stable. If it drops by more than ten percent compared to single monitor operation, hardware acceleration in the browser may be competing for GPU resources; disable it in browser settings, or move browser usage to a low-power profile.
Step 15: Final ergonomic check and posture pass
Sit at the desk. The top of each monitor should sit at or just below eye level. The primary should be at arm’s length. Tilt the secondary slightly toward the primary if it sits at an angle. Check that neither monitor reflects overhead light into the eyes. Adjust chair height and monitor arm position until posture is neutral. This step is unsexy but matters more than any other for long sessions.
Common pitfalls and how to fix them
Mixed refresh causing G-Sync stutter
The classic failure: a 240Hz primary and a 60Hz secondary, with video playing on the secondary, causing visible stutter on the primary during gameplay. The fix is to either match refresh rates between monitors, replace the secondary with a 144Hz panel, or close GPU-accelerated video on the secondary when gaming. Driver updates from both Nvidia and AMD have improved this scenario significantly but it has not disappeared.
Scaling mismatch producing blurry fonts
Setting different scaling values is correct, but failing to sign out and sign back in after changing scaling leaves legacy applications stuck at the old DPI, producing a smeared and blurry appearance. Always sign out after changing scaling.
HDMI 2.0 cable limiting 4K at 120Hz
An HDMI 2.0 cable physically connects but caps bandwidth at 4K at 60Hz with HDR or 4K at 120Hz with reduced color. The monitor reports the limit silently. Always use HDMI 2.1 certified cables for any 4K high-refresh setup.
Plugging into the motherboard instead of the GPU
An easy mistake when the case is on the floor. The PC works but uses integrated graphics with terrible performance. Trace the cable to confirm it is at the lower I/O cluster, not the upper motherboard outputs.
Secondary monitor causing wake-from-sleep failures
Some cheaper monitors send malformed EDID data that confuses Windows on wake, resulting in displays not coming back on or showing as disconnected. Update monitor firmware where possible, or use Display Driver Uninstaller and reinstall fresh GPU drivers.
FancyZones layouts not respecting per-monitor configuration
If layouts seem to swap between monitors after a reboot, ensure FancyZones is set to Allow Zones to Span Across Monitors as off, and that each monitor’s layout is saved separately in the editor.
Pro tips from setups we have built and rebuilt
Pick a vertical secondary for code or chat
Rotating the secondary monitor to portrait orientation is transformational for reading documentation, code, or long chat threads. Most monitor arms support 90-degree rotation, and Windows handles the rotation natively under Display Settings, Display Orientation.
Use Night Light on both monitors with the same warmth
Mismatched color temperature between two monitors during evening use is fatiguing. Enable Night Light, set the strength so both monitors have similar warmth, and schedule it from sunset to sunrise.
Assign keyboard shortcuts for monitor switching
PowerToys includes a shortcut to move a window to the next monitor: Win plus Shift plus arrow. Memorize this; it is faster than dragging windows across screens.
Disable Game Mode on the secondary
Game Mode on the secondary monitor when the panel is being used for chat or browser actually causes minor input lag in some applications. Disable it on the secondary; leave it on for the primary.
Cable management before software setup
Route cables behind the desk before configuring anything in Windows. A tangled mess of cables is the easiest way to accidentally unplug the wrong cable while reaching for something, and a yanked DisplayPort cable can corrupt monitor EDID and require a full restart cycle.
Recommended products for the dual monitor setup
The accessories below are the ones we install most frequently because they solve specific problems we have seen go wrong without them.
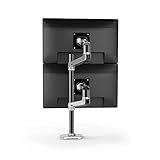
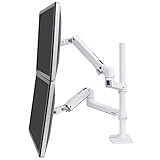
The Ergotron LX is the monitor arm we install on roughly half the desks we build. Its range covers 7 to 25 pound monitors, its movement is genuinely smooth, and it survives daily adjustment for years.
A certified DisplayPort 2.1 cable is the cable we keep in stock because the failure mode of cheaper cables, signal degradation that produces intermittent flicker, is one of the most frustrating issues to debug.
For users on Macbook-style single-output laptops who need to drive two external displays, a USB-C hub with dual DisplayLink outputs is the simplest reliable path.
Related Guides
- Crucial X9 Portable SSD 1TB Review
- Best Monitors under $800 in 2026
- Best AM5 Motherboards in 2026
- Best Keyboards for Home Office in 2026
Frequently asked questions
Will adding a second monitor hurt my frame rate?
A second monitor displaying static or low-motion content costs almost nothing. A second monitor playing a YouTube video at 4K can cost 5 to 15 percent of GPU performance in competitive titles. Close GPU-intensive content on the secondary while gaming if every frame matters.
Do both monitors need to be the same brand or model?
No. Color and motion will look slightly different between brands, but this only matters for color-critical creative work. For productivity and gaming, mix freely.
Can I run a 240Hz primary and 60Hz secondary together?
Yes, with the caveats covered above about potential G-Sync interaction. Matched refresh rates are smoother, but mixed setups work and are common.
Should I get an ultrawide instead of two monitors?
Ultrawides are immersive for gaming but force a constant compromise on productivity, because most software does not handle a single very wide display as well as it handles two normal displays. We prefer dual monitors for users who split time between gaming and serious productivity work.
Deeper technical considerations from the field
Why DisplayPort 2.1 specifically over DisplayPort 1.4
In 2026, DisplayPort 2.1 with UHBR 20 bandwidth is the right primary cable not because every panel needs it today but because the failure mode of using DisplayPort 1.4 on a high-refresh 4K HDR panel is a silent compression artifact known as DSC, Display Stream Compression. DSC is visually nearly indistinguishable from uncompressed in motion, but in static high-contrast scenes some users notice subtle banding. DisplayPort 2.1 eliminates the need for DSC at 4K up to 240Hz, removing the variable entirely. The cable cost difference is twelve to twenty dollars; the troubleshooting cost of discovering DSC artifacts after the fact is much higher.
The case for matching primary and secondary refresh rates
Every system we have built where the user later upgraded the secondary to match the primary’s refresh rate reported the same thing: cursor motion across the screen edge feels noticeably smoother, video playback on the secondary feels less jarring, and the mixed-refresh G-Sync issues that occasionally crop up disappear. The cost of a 144Hz panel is now within twenty dollars of a comparable 60Hz panel at the same size, so the case for matching refresh rates is stronger every year. If buying a secondary new in 2026, default to 144Hz minimum.
USB-C docking and single-output laptops
The complication that drives the most support requests in our queue is users on thin-and-light laptops with a single HDMI port plus USB-C with DisplayPort Alt Mode. Configuring dual external monitors from a single-output laptop requires either a Thunderbolt 4 dock with multiple DisplayPort outputs, or a USB-C hub with DisplayLink. Thunderbolt 4 is the preferred path because it preserves native GPU output; DisplayLink works but routes video through a USB compression layer that introduces 30 to 50 milliseconds of latency, which is fine for productivity but unacceptable for competitive gaming. Identify which path is right for the workflow before buying accessories.
Conclusion and next steps
A properly configured dual monitor setup is, in our experience, the single most impactful upgrade for users who split time between gaming and productivity. The process is not difficult, but it does require following the sequence: hardware first, identification second, scaling third, refresh rate fourth, then PowerToys and per-app configuration. Skip a step and the whole thing feels worse than a single monitor. Follow them in order and the rig will feel like a proper workstation by the end of the afternoon.
From here, the next investments to consider are a quality monitor arm if the factory stands are still in use, a colorimeter if creative work is in scope, and an upgrade to the secondary monitor to match the primary’s refresh rate if mixed-refresh G-Sync issues persist. Each of those compounds the value of the dual setup further. A few clients have asked whether they should add a third monitor; our answer based on the systems we have configured is that the marginal benefit of a third monitor is much smaller than the benefit of the second, and the configuration overhead grows nonlinearly. Two well-configured monitors beat three poorly-configured ones every time, and three monitors only make sense for very specific workflows like trading, video editing with multiple timelines, or simulator gaming with side reference views.
One final note from a hundred-plus configurations: spend the time on the FancyZones layouts. The temptation is to install PowerToys, leave the default layout in place, and move on. The default layout is usable but generic; custom layouts tuned to the actual applications used produce noticeably better day-to-day workflow. Sit with the rig for a week, notice which window arrangements come up repeatedly, then revisit the FancyZones editor and design layouts around those arrangements. The fifteen minutes of editor time pays back daily.
For deeper dives on the monitors themselves, see our trending gaming monitors deep comparison, our OLED vs IPS 2026 which is better guide, and our trending monitor arm reviews. For full systems built around a dual monitor workflow, our best gaming PC for streaming May 2026 and best prebuilt gaming PC for creators May 2026 guides cover prebuilt and custom options. If you are pairing this with a competitive setup, our 240Hz vs 360Hz 2026 comparison and best prebuilt gaming PC for esports May 2026 cover the refresh-rate side of the equation. Honest note: if cable routing inside the desk involves running through wall cavities or any electrical work, hire a professional. Everything else in this guide is comfortably DIY.


