Affiliate disclosure: As an Amazon Associate we earn from qualifying purchases. This post contains affiliate links — if you buy through them we may earn a small commission at no extra cost to you. This never affects our recommendations.
Building your own gaming PC in 2026 is more accessible than ever. Modern components are designed with compatibility in mind—you literally cannot install RAM backward or plug a CPU into the wrong socket. Whether you’re targeting 1440p ultrawide gaming, 4K resolution, or competitive esports at 360 FPS, this comprehensive guide walks you through every step, from selecting components to booting Windows.
In a hurry? See the top-rated How to Build a Gaming PC deals available right now:
🛒 Check How To Build A Gaming Pc Prices on Amazon →Quick answer: Our top pick in 2026 is the CPU — our #1 rated choice. See the full ranked comparison, alternatives and buying advice below.
Why Build Your Own Gaming PC?
Pre-built systems often charge significant markups. By assembling your own, you save 15–25% on the final cost while gaining complete control over every component choice. You’ll understand your system intimately, making upgrades and troubleshooting painless. Plus, the satisfaction of firing up a machine you built yourself is unmatched.
In 2026, gaming has never been more demanding—and more rewarding. Modern titles like Star Citizen, Cyberpunk 2077 with mods, and upcoming AAA releases push GPUs and CPUs to their limits. A custom-built PC ensures you’re not paying for components you don’t need while hitting your exact performance target.
Pre-Build Planning: Budget Tiers & Component Selection
Your first step is deciding your budget and performance target. Gaming PC costs scale dramatically based on GPU choice—graphics cards consume 30–40% of the total budget and deliver the most noticeable performance gains.
Gaming PC Budget Tiers (2026)
| Component | $800 Build | $1,200 Build | $2,000+ Build |
|---|---|---|---|
| CPU | Ryzen 5 9600X ($220) | Ryzen 7 9700X ($350) | Ryzen 7 9800X3D ($550) |
| GPU | RTX 5060 Ti ($350) | RTX 5070 ($550) | RTX 5090 ($1,990) |
| Motherboard | B850 AM5 ($140) | B850 AM5 WiFi ($180) | X870 AM5 ($280) |
| RAM | 32GB DDR5-5600 ($80) | 32GB DDR5-6000 ($100) | 32GB DDR5-6400 ($120) |
| Storage | 1TB Gen4 NVMe ($70) | 2TB Gen4 NVMe ($120) | 2TB Gen4 NVMe ($120) |
| PSU | 650W 80+ Bronze ($60) | 850W 80+ Gold ($120) | 1000W 80+ Platinum ($200) |
| Case | Mid-tower ($60) | Mid-tower w/ fans ($80) | Premium mid-tower ($150) |
| Cooler | Stock cooler ($0) | Tower Air Cooler ($50) | 420mm AIO Liquid ($130) |
| Total | ~$800 | ~$1,200 | ~$2,000+ |
The $800 build targets 1080p gaming at 60–100 FPS. The $1,200 build handles 1440p ultrawide at high settings. The $2,000+ build crushes 4K gaming and future-proofs for 3–5 years.
Critical Component Compatibility Rules
CPU and motherboard socket compatibility is non-negotiable. AMD Ryzen 7000 and 9000 series use AM5 socket. Intel’s latest Core Ultra 200S uses LGA 1851. DDR5 RAM works exclusively on AM5 and LGA boards—not with older DDR4 systems.
Power supply wattage must exceed your system’s peak draw by 20–30%. A Ryzen 7 7800X3D with RTX 5070 peaks at ~520W; a 750W PSU is minimum, 850W recommended. GPU length matters—measure your case’s clearance before buying.
Tools, Safety & Workspace Setup
You need surprisingly few tools:
- Phillips head screwdriver (magnetic-tipped, 6-8″ length) — for case, motherboard, and CPU cooler screws
- Anti-static wrist strap (optional but recommended) — clips to case, prevents static discharge to components
- Zip ties or Velcro cable wraps — organize cables, improve airflow
- Flashlight (or phone light) — illuminate tight spaces inside case
- Small thermal pad applicator (usually included with AIO coolers) — apply thermal paste without mess
Workspace setup matters. Work on a non-carpeted surface (wood table, concrete, tile). If you’re on carpet, wear an anti-static strap clipped to the case. Keep water and drinks away—one spill can destroy $1,500+ in hardware. Lay out all components before starting; organize screws in containers or cups so you don’t lose them.
Example Gaming PC Build (1440p High Settings, $1,200)
Let’s walk through a concrete mid-range build targeting 1440p gaming at 100+ FPS:
AMD Ryzen 7 7800X3D 8-Core, 16-Thread Desktop Processor


As an Amazon Associate we earn from qualifying purchases. Product prices and availability are accurate as of the date/time indicated.

MSI MAG B650 Tomahawk WiFi Gaming Motherboard (AMD Ryzen 9000/8000/7000 Series Processors, AM5, DDR5, PCIe 4.0, M.2, SATA 6Gb/s, USB 3.2 Gen 2, HDMI/DP, Wi-Fi 6E, Bluetooth 5.3, 2.5Gbps LAN, ATX)


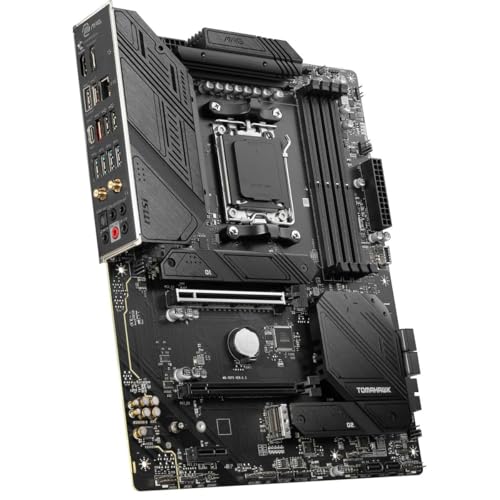
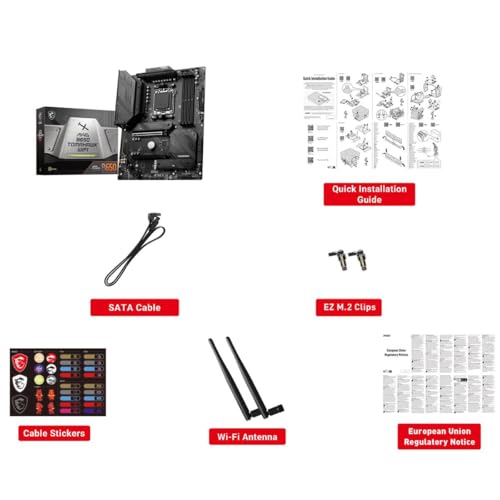
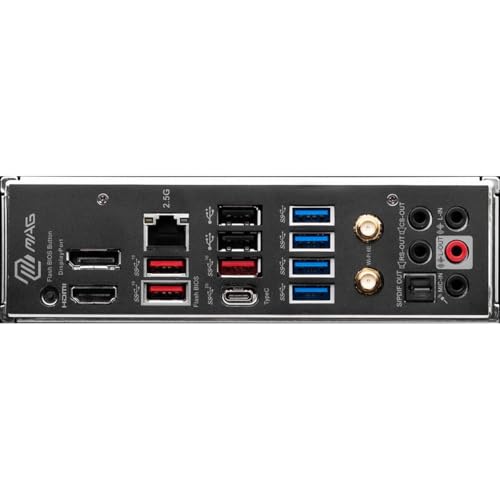
As an Amazon Associate we earn from qualifying purchases. Product prices and availability are accurate as of the date/time indicated.

MSI GeForce RTX 5070 12G Ventus 2X OC


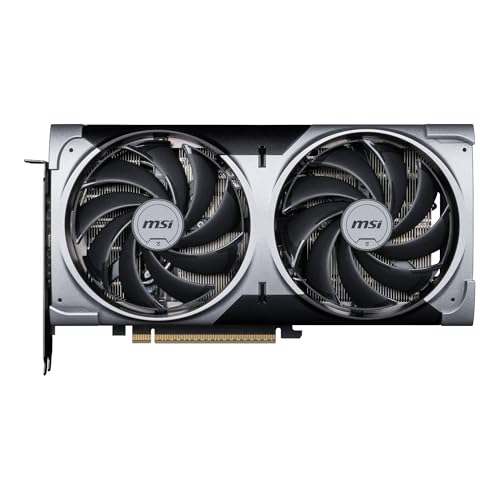
As an Amazon Associate we earn from qualifying purchases. Product prices and availability are accurate as of the date/time indicated.

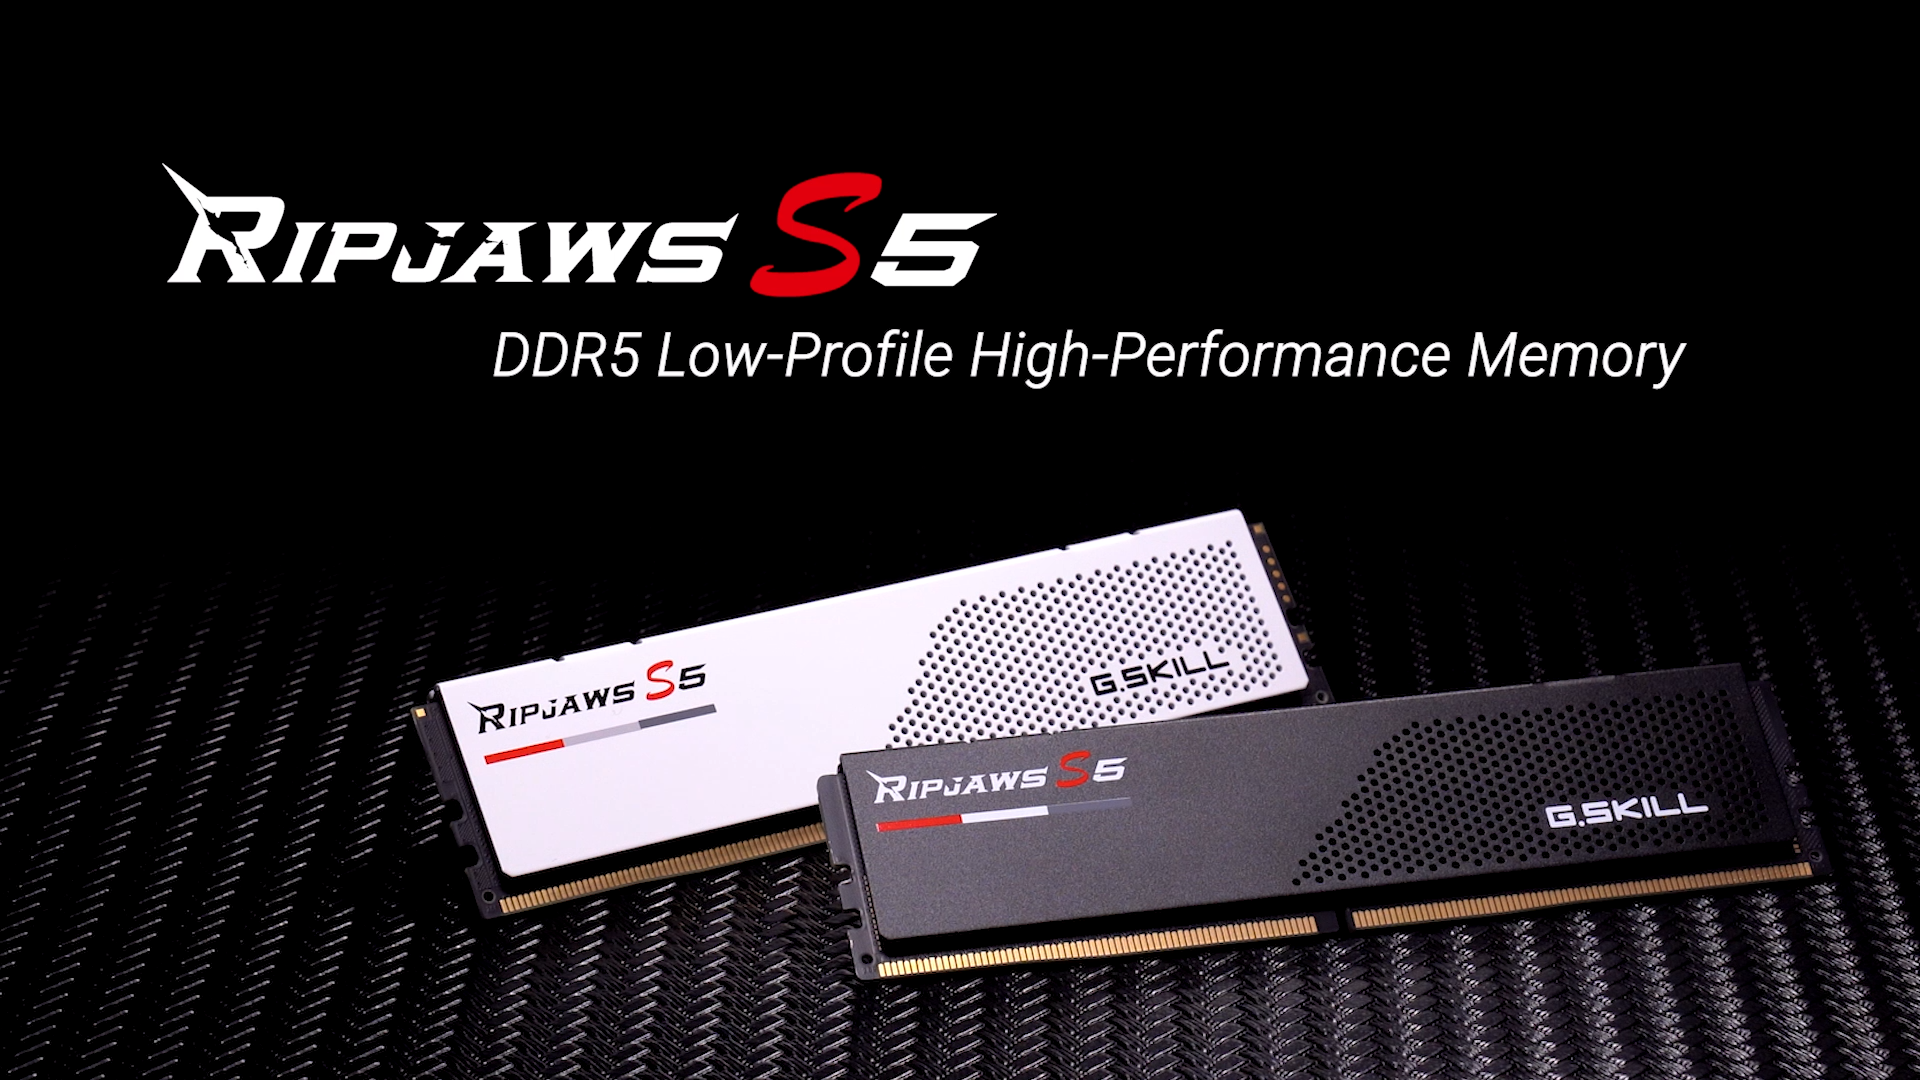
G.SKILL Ripjaws S5 Series DDR5 RAM (Intel XMP 3.0) 32GB (2x16GB) 6000MT/s CL32-38-38-96 1.35V Desktop Computer Memory U-DIMM - Matte Black (F5-6000J3238F16GA2-RS5K)


As an Amazon Associate we earn from qualifying purchases. Product prices and availability are accurate as of the date/time indicated.

Samsung 990 PRO SSD 2TB NVMe M.2 PCIe Gen4, M.2 2280 Internal Solid State Hard Drive, Seq. Read Speeds Up to 7,450 MB/s for High End Computing, Gaming, and Heavy Duty Workstations, MZ-V9P2T0B/AM


As an Amazon Associate we earn from qualifying purchases. Product prices and availability are accurate as of the date/time indicated.

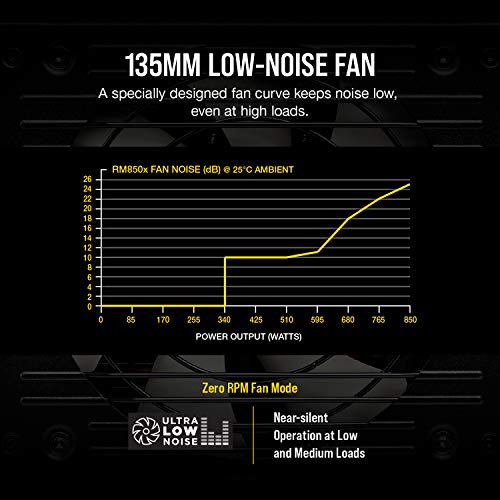
Corsair RMX Series, RM850x, 850 Watt, 80+ Gold Certified, Fully Modular Power Supply (Low Noise, Zero RPM Fan Mode, 105°C Capacitors, Fully Modular Cables, Compact Size) Black


As an Amazon Associate we earn from qualifying purchases. Product prices and availability are accurate as of the date/time indicated.

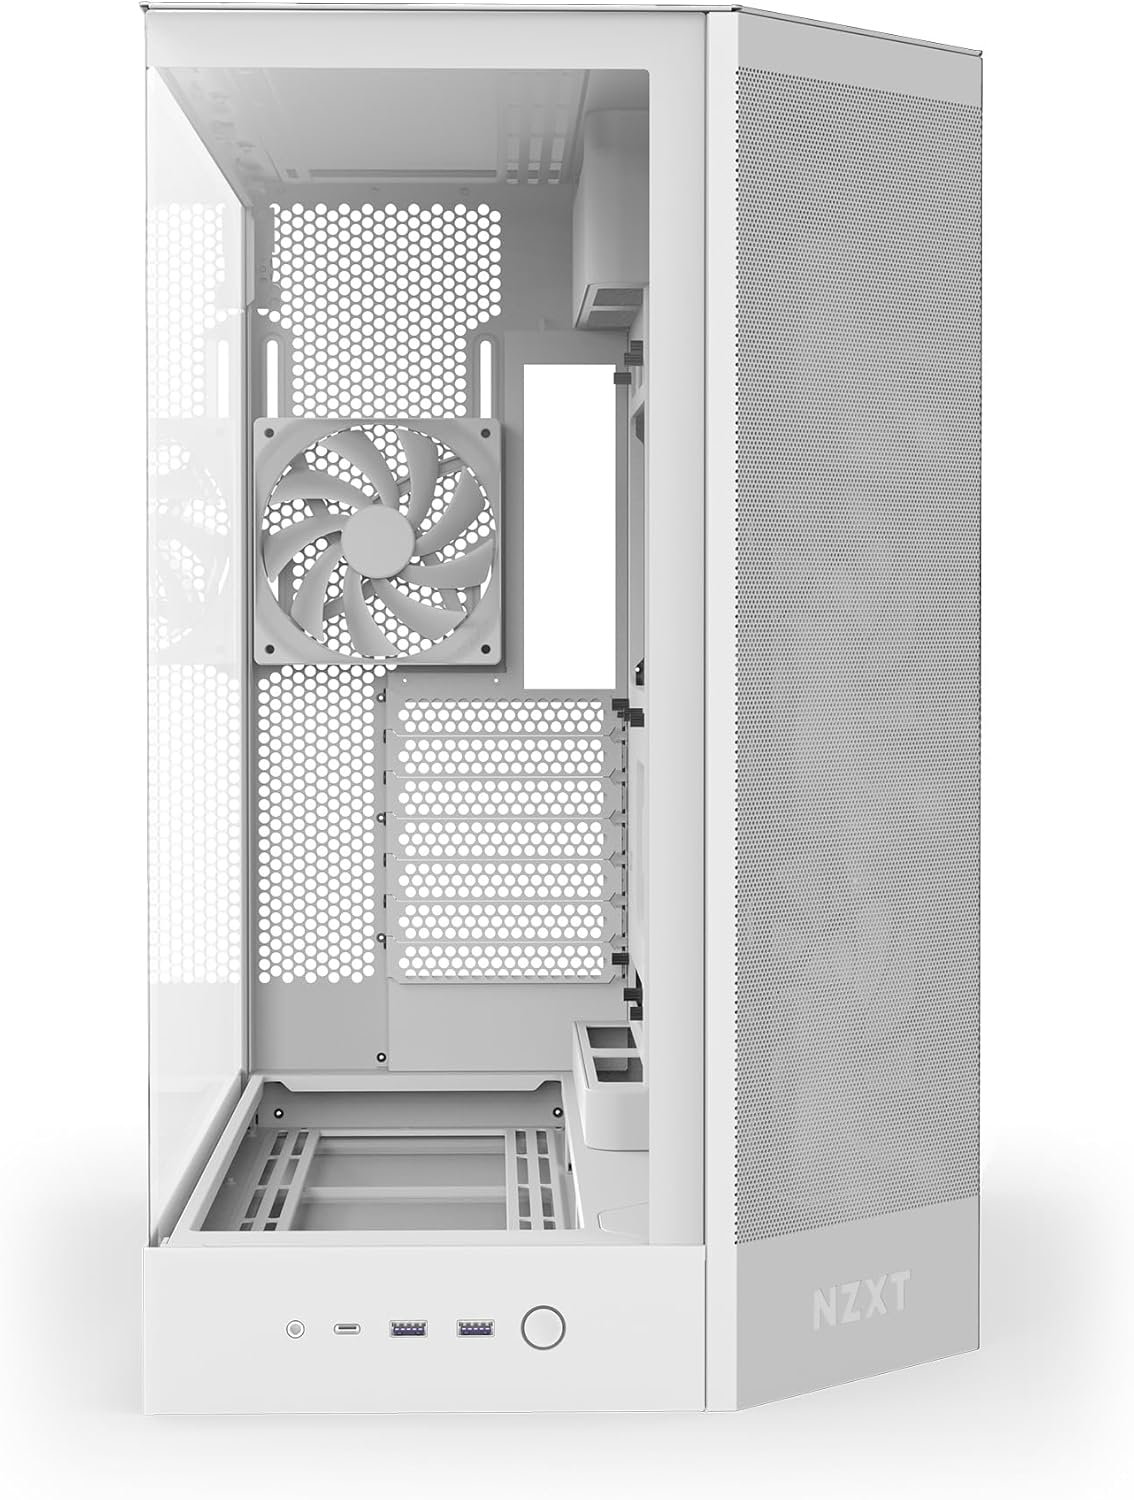
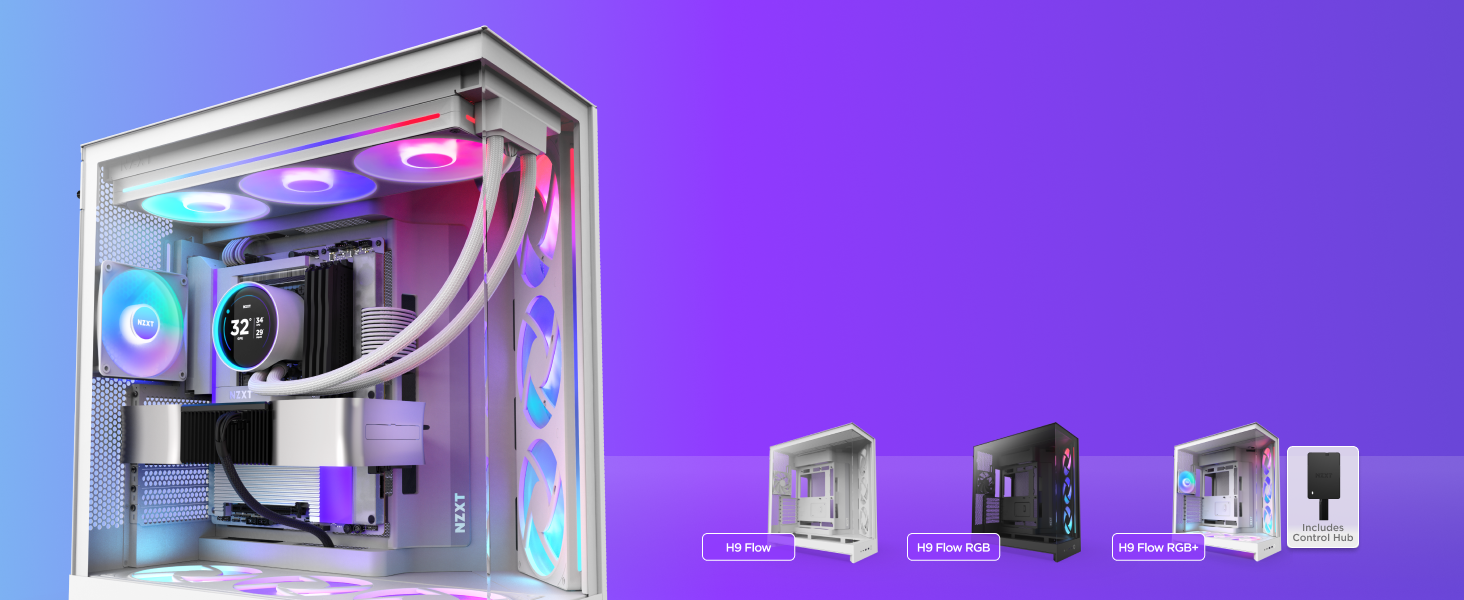
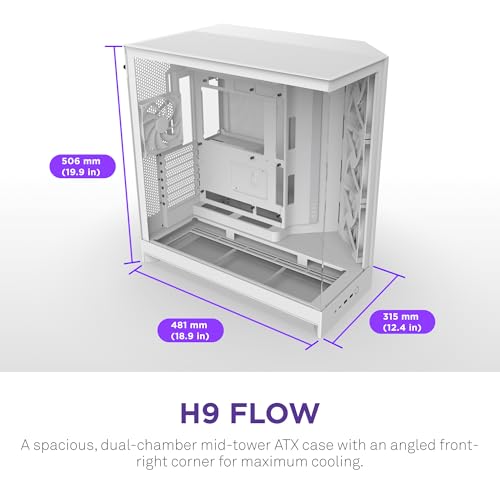
NZXT H9 Flow (2025) – Large Dual-Chamber ATX Mid-Tower Airflow PC Case – Includes 3 x 140mm & 1 x 120mm Fans – 420mm Radiator Support – Tempered Glass – Back-Connect Ready – White


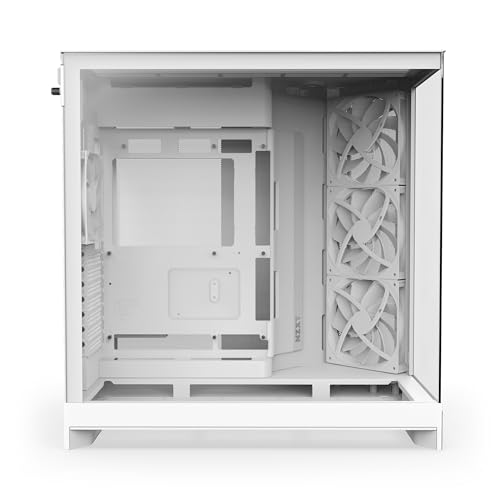

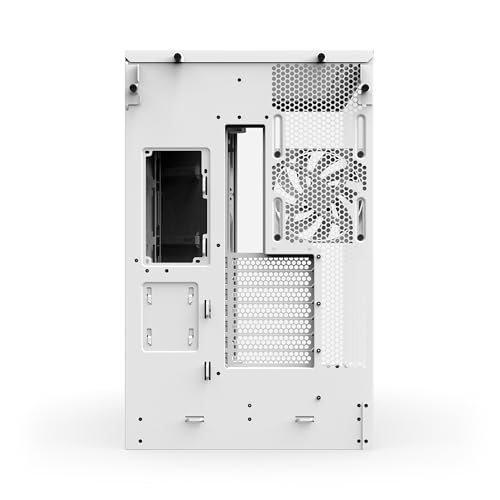
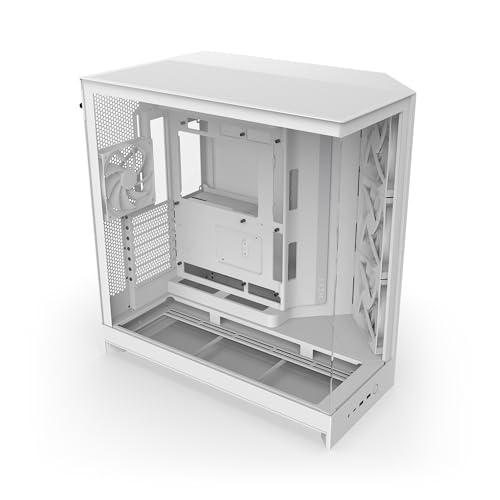
As an Amazon Associate we earn from qualifying purchases. Product prices and availability are accurate as of the date/time indicated.
This configuration delivers 120+ FPS at 1440p on competitive titles (Valorant, CS2) and 70–90 FPS on demanding AAA games (Cyberpunk 2077, Avatar: Frontiers of Pandora).
12-Step PC Assembly Walkthrough
Step 1: Unbox & Inspect All Components
Lay out every component on a clean surface. Check for physical damage—cracked RAM heat spreaders, bent CPU pins (Intel), missing cooler brackets. Verify you received all parts listed in packing slips. This is the moment to catch missing items before you’ve assembled halfway through.
Step 2: Install the Power Supply into the Case
Most modern cases have a PSU bay at the bottom or rear. Orient the PSU with the fan facing downward if your case has ventilation holes (improves cooling). Screw the PSU into the case using four short case screws (usually 6-32 UNC). Do not plug the PSU into power yet—keep it switched off and unplugged during assembly.
Step 3: Install the Motherboard I/O Shield
Remove the I/O shield (metal plate) from your motherboard’s box. Pop it into the rectangular cutout at the case’s rear from inside. It clips into place with a satisfying click. This shields your motherboard’s connectors from dust and electrical interference.
Step 4: Install Motherboard Spacers & Mount the Motherboard
Motherboards need raised spacers to prevent electrical shorts. Your case likely has pre-installed spacers; verify alignment holes match. If needed, install motherboard standoffs (small brass spacers) into the case. Carefully lower the motherboard into the case, aligning the I/O ports with the shield cutout. Screw the motherboard down with screws (usually #6-32 UNC), tightening in an X-pattern to prevent warping. Do not overtighten—hand-tight plus a quarter turn is sufficient.
Step 5: Install the CPU (Ryzen Example)
For AMD Ryzen (Socket AM5): Lift the retention lever on the motherboard’s CPU socket. The socket cover pops off. Align the CPU’s notches with the socket’s keys—there’s only one correct orientation. Gently place the CPU into the socket; it should fall in with no force needed. Lower the retention lever and ensure it locks with a firm click. If the lever requires excessive force, remove the CPU and re-check alignment.
For Intel Core Ultra: Lift the retention bracket on the socket. Remove the retention cover. Place the CPU into the socket; it has no notches—orientation is obvious. Press down the bracket until it locks. Do not touch the bottom of the CPU or socket pins.
Step 6: Apply Thermal Paste & Install the CPU Cooler
Thermal paste transfers heat from the CPU’s integrated heat spreader (IHS) to the cooler’s base plate. Apply a rice-grain-sized dot of paste to the center of the CPU’s IHS. Most modern coolers come with paste pre-applied; check your cooler’s manual. If using a pre-applied pad, simply remove the plastic film.
For air coolers: Mount the backplate behind the motherboard (some cases require partial motherboard removal). Position the cooler over the CPU, align mounting brackets, and screw down evenly in an X-pattern. Listen for the satisfying click when it fully seats. For AIO coolers, mount the pump head over the CPU, then secure the radiator and fans to the case’s top or front.
Do not overtighten—excessive pressure cracks solder joints on the CPU die.
Step 7: Install RAM
DDR5 RAM slots are keyed differently from DDR4—they will not fit into the wrong slot type. Locate the RAM slots next to the CPU (usually two to four long slots). Open the retention clips at both ends of each slot. Align the notch on the RAM stick’s edge with the key in the slot. Press down firmly and evenly on both ends until the clips snap inward with a click. The RAM should be fully seated, with no gold connectors visible.
For dual-channel performance, install RAM in alternating slots (slot 2 and slot 4, or follow your motherboard manual). Verify LEDs or boot lights confirm RAM recognition after first boot.
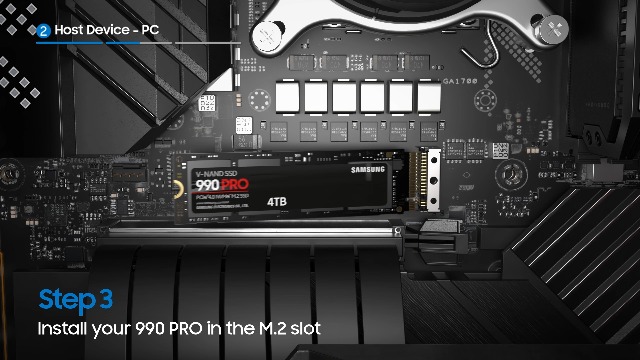
Step 8: Install the NVMe SSD into M.2 Slot
NVMe SSDs (2280 form factor for gaming) slot into M.2 sockets on the motherboard. Locate your M.2 slot (modern boards often have PCIe 4.0 and 5.0 slots; refer to the manual). Remove the small screw and standoff at the end of the slot. Insert the SSD at a 30-degree angle into the slot, pressing down gently. Screw the standoff down. The SSD should sit flat and level. Your motherboard may include a thermal pad for the SSD—apply it to the cooler metal sticker on top of the drive before installation if included.
Step 9: Route Cables & Connect Power
Route the PSU’s 24-pin ATX power connector and 8-pin (or 12-pin) CPU power connector to the motherboard before installing the GPU. This avoids congestion. Use cable ties or clips to route cables behind the motherboard tray or along the case’s interior, keeping them away from fans and the GPU path.
Connect SATA power cables (if using SATA SSDs or drives) from the PSU to the storage devices. For PCIe 5.0 GPUs, some require 12V-2×6 connectors from the PSU—check your GPU’s manual and ensure your PSU supports the correct connectors.
Step 10: Install the GPU (Graphics Card)
GPUs are the largest, heaviest component. The PCIe x16 slot is the long slot closest to the CPU (usually the topmost slot on the motherboard). Remove the retention clip at the end of the slot. Press down the small retention lever or clip at the slot’s base if present (varies by motherboard). Align the GPU’s edge connector with the slot and insert it firmly with both hands, pushing straight down until the retention clip pops back up with a click. The GPU should be fully seated, with its bracket aligned flush with the case’s rear.
Screw the GPU’s bracket to the case using two screws. Connect PCIe power connectors (6-pin, 8-pin, or 12-pin depending on your GPU) from the PSU to the GPU’s power inputs on its side.
Step 11: Connect Front Panel Headers & Connect Case Power Button
Locate the front panel header pins on the motherboard’s bottom-right edge (labeled PWR_SW, RST_SW, LED_POS, LED_NEG). These are tiny connectors—your motherboard manual diagram is essential. The power button connector is typically a 2-pin jumper. Orientation matters for LEDs (+ goes to LED_POS) but not for the power switch (polarity-agnostic).
Connect case fan headers (CPU_FAN, SYS_FAN, etc.) if your case includes fans. Plug USB headers and audio headers from the front panel into the motherboard’s corresponding connectors.
Step 12: Final Power-On & First Boot (Power-On Self-Test / POST)
Before closing the case, perform a test boot. Switch the PSU to ON. Press the power button on the case. Fans should spin, LEDs should light, and the system should attempt to boot. You’ll hear POST beeps (one beep = success). Wait 10–15 seconds. If nothing happens or you hear three beeps (memory error), power off immediately and recheck RAM seating.
If successful, power off, install the case’s side panel, and prepare for Windows installation.
Post-Assembly Troubleshooting: No Display / No Boot
If your system powers on but won’t display video, follow this POST troubleshooting checklist:
- Reseat RAM — Remove and reinstall each stick firmly until the clips click
- Reseat GPU — Remove the GPU, clean the slot connector with a pencil eraser, and reinstall
- Check CPU cooler tightness — If not fully seated, the CPU may thermal-throttle or fail POST
- Verify monitor cable — Plug directly into GPU, not motherboard (GPUs disable integrated graphics)
- Check power connectors — Reseat 24-pin ATX and 8-pin CPU connectors; ensure clicks
- Verify PSU switch — The PSU has a rear switch; ensure it’s ON (not 0)
- One-beep vs. no beeps — One beep = POST success (video issue likely); no beeps = hardware not recognized
If you still have no display after these checks, the GPU or motherboard may be faulty—contact manufacturer support with photos of your build.
BIOS Setup, Updates & Memory Overclocking (EXPO/XMP)
Accessing BIOS
During boot, before Windows loads, press DEL, F2, or F12 (varies by board). You’ll enter the BIOS menu. This is where you enable CPU/GPU overclocking profiles and verify hardware detection.
Enable EXPO (AMD) or XMP (Intel) Memory Profiles
DDR5-6000 memory ships with rated profiles that don’t enable by default—the system boots at 4800MT/s JEDEC standard. To unlock the rated speed, you must enable the memory profile in BIOS.
On ASUS boards: Enter Advanced Mode (F7). Navigate to AI Tweaker → AI Overclocking → Scroll to “AI Memory Tweaking” and change from “Auto” to “Enabled.” Select your EXPO (AMD) or XMP (Intel) profile from the dropdown (Profile 1 or 2). Press F10 to save and exit.
On MSI boards: Navigate to the OC section. Look for “AMD EXPO” or “Intel XMP.” Toggle to “Enabled” and select Profile 1. Save and exit.
On Gigabyte boards: Go to Tweaker → Memory Profile. Select EXPO or XMP Profile 1. Save and exit.
After saving, the system reboots and applies the memory profile. Verify in Windows by opening Task Manager (Ctrl + Shift + Esc) → Performance → Memory. You should see your rated speed (e.g., 6000 MHz) instead of 4800 MHz.
Update BIOS (Optional but Recommended)
Visit your motherboard manufacturer’s support site, download the latest BIOS file, and follow their BIOS update procedure. Updates patch CPU compatibility and improve stability. Don’t update if your system is already stable—BIOS updates carry a small risk if interrupted, though modern boards handle this gracefully.
Installing Windows 11 & GPU Drivers
Before installing Windows, prepare a USB drive (16GB+) with Windows 11 installation media. On another PC, download the Windows 11 ISO from Microsoft’s official site and use Rufus (free tool) to create a bootable USB stick.
Insert the USB into your new PC, boot from it (press DEL during startup to change boot order in BIOS, or select boot device), and follow Windows’ installation prompts. Install to your NVMe SSD. After Windows loads, immediately install GPU drivers from NVIDIA’s or AMD’s official website, then Windows updates.
For a detailed Windows installation walkthrough, see our dedicated Windows 11 installation guide.
Avoiding Common Beginner Mistakes
- Forgetting thermal paste — CPU will overheat and shut down within 10 seconds. Always apply paste.
- Installing RAM with wrong orientation — The notch prevents incorrect insertion; don’t force it.
- Touching gold connectors on RAM or GPU — Oils from skin can cause corrosion; grab by the sides only.
- Overtightening CPU cooler — Excessive force cracks the CPU die; hand-tight plus a quarter turn suffices.
- Forgetting I/O shield — Install it before the motherboard; removing it later is tedious.
- Plugging monitor into motherboard instead of GPU — Integrated graphics are disabled when a GPU is installed. Always use the GPU.
- Not enabling XMP/EXPO — RAM won’t run at rated speed unless you manually enable the profile in BIOS.
- Cheap PSU selection — A $40 PSU saves money until it fails and takes $1,500+ in hardware with it. Invest in 80+ Gold certification minimum.
Gaming PC Build Checklist & Tools Guide
After assembly, ensure you complete these final steps:
- Enable XMP/EXPO in BIOS
- Update BIOS to latest version
- Install latest chipset drivers from motherboard manufacturer
- Install GPU drivers (NVIDIA/AMD)
- Download Windows updates
- Install antivirus software
- Run CPU-Z to verify CPU, RAM speed, and timing
- Run GPU-Z to verify GPU clock and memory bandwidth
- Run benchmark (Cinebench, 3DMark) to verify system stability
- Monitor temperatures during gaming (MSI Afterburner, HWiNFO)
Component Selection Deep Dive: Picking Parts Within Budget
CPU Selection by Budget
For gaming, the best budget gaming CPUs in 2026 are AMD Ryzen 5 9600X ($220) and Ryzen 7 9700X ($350). The Ryzen 7 9800X3D ($550) is the undisputed gaming king due to its massive 3D V-Cache. If you’re on a strict $800 budget, the 9600X is sufficient for 1080p gaming. For 1440p, jump to the 9700X or 5070 GPU instead.
GPU Selection & Performance Targets
The GPU determines gaming performance more than any other component. The RTX 5070 delivers excellent value at $550, hitting 100+ FPS at 1440p on max settings. For budget-conscious gamers, a $700 budget PC build with RTX 5060 Ti targets solid 1080p performance. For future-proofing, the RTX 5080 ($750) handles 4K gaming comfortably.
Motherboard Fit & Features
Visit our guide to the best gaming motherboards to compare B850 vs. X870 chipsets. For 95% of gamers, B850 boards are sufficient; X870 boards add features like dual NVMe cooling and more USB ports, but don’t improve gaming performance.
RAM & Storage Synergy
See our guides on the best DDR5 RAM for gaming and the best NVMe SSDs in 2026. Pair DDR5-6000 with a fast Gen4 NVMe for balanced performance; DDR5-6400 and Gen5 SSDs offer minimal gaming benefit.
Advanced Topics: Cooling, PSU Selection & Case Airflow
Cooling Options
Stock coolers (included with CPUs) handle stock clocks but run warm. Air coolers ($40–$100) are silent and reliable. All-in-One (AIO) liquid coolers ($80–$200) look fantastic and cool marginally better, though require occasional maintenance. For a Ryzen 7 7800X3D, an Arctic Liquid Freezer III 420 AIO keeps temps below 65°C under full load.
PSU Selection Guide
See our comprehensive PSU buying guide for power supply selection. Calculate your system’s TDP (CPU + GPU wattage) and add 20–30% headroom. A Ryzen 7 7800X3D + RTX 5070 system peaks at 520W; an 850W Gold PSU is ideal. Corsair RM850x is a proven choice with 12-year warranty.
AIO Cooler Recommendations
Explore our guide to the best AIO coolers for Ryzen 9 CPUs. The Arctic Liquid Freezer III Pro 420 combines performance, silent operation, and exceptional value. Most gamers won’t benefit from 480mm or 360mm+ radiators unless pushing extreme overclocks.
FAQ: Common Gaming PC Build Questions
Q: Can I upgrade my old pre-built with new components?
A: Yes, but check compatibility first. Pre-built systems often use non-standard PSU connectors and proprietary cases. A case swap ($50–$150) is usually required. For most people, a fresh build is cleaner than retrofitting.
Q: Should I buy RGB fans for better cooling?
A: RGB adds zero cooling performance—it’s purely aesthetic. Standard black fans cost 30–50% less. If RGB matters to you, buy it; if not, skip it and invest in case airflow instead (more intake than exhaust).
Q: How often should I clean my PC?
A: Once every 3–6 months, depending on dust levels. Use compressed air to blow out dust from heatsinks and fans. Avoid vacuums (create static discharge risk). Cleaning every six months keeps thermals optimal.
Q: Is it worth building a $2,500+ gaming PC?
A: Only if you’re targeting 4K gaming at high refresh rates (120+) or plan to use the PC for streaming/content creation. Gaming alone reaches diminishing returns around $1,200–$1,500. Beyond that, you’re paying for luxury components and aesthetic upgrades.
Q: Will my gaming PC handle streaming?
A: Yes, if your CPU is powerful enough (8+ cores/16 threads recommended). The Ryzen 7 9700X handles 1440p gaming + 1080p 60 FPS streaming simultaneously. GPU encoding (NVIDIA NVENC) offloads streaming to the GPU, minimizing CPU load—highly recommended.
Conclusion: Your Gaming PC Awaits
Building a gaming PC is easier than ever in 2026. Modern components are designed for fool-proof compatibility, and assembly takes a focused builder 2–3 hours. You’ll save money, gain deep system knowledge, and experience the unbeatable satisfaction of powering on a machine you built with your own hands.
Start with a realistic budget, research component compatibility using a tool like PCPartPicker, and follow this guide step-by-step. Enable XMP/EXPO in BIOS, install drivers promptly, and monitor thermals during your first gaming session. Within hours, you’ll be gaming at 100+ FPS on a machine tailored exactly to your needs.
Happy building! If you encounter issues, reference your motherboard manual and don’t hesitate to reach out to manufacturer support—they’re remarkably helpful. Your gaming PC is waiting.
Related Articles
Looking for more on this topic? Browse the hand-picked guides below — each one applies the same scoring rubric used in this review.
Ready to decide? Our #1 pick for 2026 is the CPU.
Live price & availability on Amazon.


