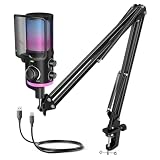
- Top Pick: FIFINE AM6T Gaming USB Condenser Mic for PC
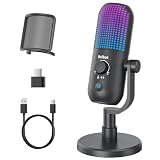
- Best Value: ZealSound Podcast Microphone for PC, Noise Cancellation USB Mic with Gain, Volume Adjustment & Mute Button, Monitoring & Echo, for YouTube, TikTok, Podcasting, Streaming, iPhone, iPad, Android, Mac
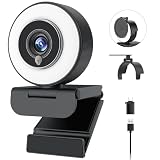
- Premium Choice: Angetube 4K Webcam with Ring Light, Computer Web Camera for Desktop, Laptop
Affiliate disclosure: As an Amazon Associate we earn from qualifying purchases. This post contains affiliate links — if you buy through them we may earn a small commission at no extra cost to you. This never affects our recommendations.
- Hardware Requirements for 2026 Twitch Streaming
- Step 1: Create Your Twitch Account and Enable Two-Factor Authentication
- Step 2: Download and Install OBS Studio
- Step 3: Connect Twitch to OBS via Stream Key or Auto-Configuration
- Step 4: Configure Output Settings — Encoder, Bitrate, Resolution
- Step 5: Add Audio Sources — Microphone, Desktop Audio, Filters
- Step 6: Scene Setup — Game Capture, Webcam, Alerts, Chat Overlay
- Step 7: Install and Configure OBS Plugins for Alerts & Stream Features
- Step 8: Test Your Stream Before Going Live
- Advanced: NVIDIA RTX 50-Series AV1 Encoding & Enhanced Broadcasting
- Multi-Platform Restreaming: Twitch + YouTube Simultaneously
- Recommended Streaming Hardware & Gear
- Troubleshooting Common Streaming Issues
- Recommended Related Guides & Resources
- FAQ: Twitch Streaming on PC
- Conclusion
- Related Articles
- Frequently Asked Questions
- Related Articles
Streaming on Twitch has become easier than ever, but getting the technical setup right remains the difference between crisp, lag-free broadcasts and unwatchable streams. This comprehensive guide walks you through every step needed to launch professional-quality Twitch streams from your PC in 2026, from account creation through advanced multi-platform restreaming.
Whether you’re building your first stream setup or optimizing an existing rig, you’ll learn the exact OBS settings used by successful streamers, hardware recommendations for different budgets, and troubleshooting techniques for common encoding issues. We’ll cover everything: CPU vs. GPU encoding decisions, optimal bitrate configurations for various resolutions, audio source management, and the latest plugin ecosystem that powers modern streaming overlays and alerts.
In a hurry? See the top-rated How to Stream on Twitch from PC deals available right now:
🛒 Check How To Stream On Twitch From Pc Prices on Amazon →🛒 Best Price Today on Amazon
Prime members get fast, free shipping on everything above, plus member-only deals. New members get a 30-day free trial — cancel anytime.
Start 30-Day Prime Free Trial →See Today’s Amazon DealsHardware Requirements for 2026 Twitch Streaming
Your PC hardware directly determines streaming quality and reliability. Here’s what you need to know about CPU, GPU, and internet requirements for stable 1080p60 broadcasts.
CPU Requirements
Your processor handles game logic, physics, AI, and rendering. When streaming, you need CPU headroom left over for encoding if you’re using software encoders like x264. For CPU-based encoding at 1080p60, expect to lose 20-40% of your CPU resources to the streaming pipeline.
Minimum CPU requirement: Intel i7-10700K or AMD Ryzen 5 5600X (8-core, 3.6+ GHz base clock) for stable 1080p60 CPU-only encoding. However, GPU encoding (NVENC) is now the standard approach, which requires minimal CPU overhead.
GPU & Encoder Selection: NVENC vs. x264
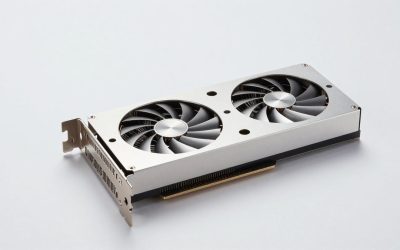
This is the most important decision for 2026 streaming. NVIDIA NVENC (hardware video encoding on GeForce GPUs) is now the industry standard because it offloads encoding to dedicated hardware, leaving your CPU free for gaming.
NVENC Advantages: Uses ~5% GPU encode capacity for 1080p60, supports quality presets with Look-ahead and Psycho Visual Tuning, produces quality equivalent to x264 “medium” preset, enables real-time performance monitoring in OBS.
x264 (CPU Software Encoding): Best quality but requires significant CPU (20-40% per thread). Only recommended if you have a high-end CPU (Ryzen 9 5950X or better) and are willing to sacrifice game performance for stream quality. Minimum bitrate requirement: 5000 kbps for acceptable quality at 1080p60.
GPU Requirements: NVIDIA RTX 20-series or newer for NVENC support. RTX 40-series and 50-series include advanced features like multi-encode capabilities and AV1 codec support.
Internet Requirements
Twitch caps all streamers at 6000 kbps maximum video bitrate (both Affiliates and Partners). To stream 1080p60 reliably, you need:
Minimum upload speed: 10 Mbps (allows 6000 kbps video + 160 kbps audio with headroom). Recommended: 12+ Mbps for stable streaming without frame drops during network fluctuations. Use speedtest.net or your ISP’s tools to measure upload speed—this is critical and often the bottleneck for new streamers.
Step 1: Create Your Twitch Account and Enable Two-Factor Authentication
Before touching OBS, secure your Twitch account with proper authentication to prevent unauthorized access and stream hijacking.
Process:
- Visit
twitch.tvand click “Sign Up” - Enter email, username (can be changed later), and password
- Verify your email address via confirmation link
- Navigate to Settings → Security and Privacy → Two-Factor Authentication
- Enable 2FA using either SMS or an authenticator app (Google Authenticator, Authy recommended)
- Save your backup codes in a secure location (required if you lose access to 2FA device)
- Visit Dashboard → Creator Camp to access your channel dashboard
Once your account is set, you’re ready to configure OBS. Your Twitch account dashboard will show your unique stream key, which you’ll need in the next step.
Step 2: Download and Install OBS Studio
OBS (Open Broadcaster Software) is the free, open-source streaming standard used by the vast majority of Twitch broadcasters. It’s lightweight, highly customizable, and constantly updated with new features.
Installation:
- Go to
obsproject.comand download the latest stable version for your OS (Windows, macOS, or Linux) - Run the installer and follow the setup wizard
- Accept default plugin recommendations (StreamElements and similar tools add optional features)
- Launch OBS and complete the auto-configuration wizard (appears on first run)
OBS will auto-detect your system specifications and suggest initial settings. However, you’ll want to fine-tune these settings using the detailed configuration steps below.
Step 3: Connect Twitch to OBS via Stream Key or Auto-Configuration
OBS needs access to your Twitch channel to broadcast. Two methods work equally well in 2026: automatic OAuth connection or manual stream key entry.
Method A: Automatic OAuth Setup (Recommended)
- Open OBS → Settings → Stream
- Select “Service: Twitch”
- Click “Connect Account”
- Your browser will open Twitch’s OAuth authorization page
- Click “Authorize” to grant OBS permission to stream to your channel
- Return to OBS; your account should now display as connected
- Click “Apply” and “OK”
Method B: Manual Stream Key Entry
- Log into Twitch.tv and navigate to Creator Dashboard → Settings → Stream
- Scroll to “Stream Key” and click “Show” to reveal your unique key
- Copy the entire stream key
- In OBS → Settings → Stream → Service, select “Twitch”
- In the “Stream Key” field, paste your key
- Click “Apply” and “OK”
Step 4: Configure Output Settings — Encoder, Bitrate, Resolution
Output settings determine the quality, file size, and encoding performance of your stream. This is where you balance stream quality against your upload bandwidth and GPU capacity.
1080p60 Configuration (Recommended for Most Streamers)
This setup targets Twitch’s maximum bitrate of 6000 kbps and 1080p60 resolution, which is the current quality sweet spot.
Navigate to Settings → Output → Advanced Output Mode (if using Simple Output, switch to Advanced).
Video Settings:
| Setting | Value | Notes |
|---|---|---|
| Output Resolution | 1920×1080 | Full HD; standard for Twitch |
| Downscale Filter | Lanczos (36 samples) | Best quality downsampling; slight CPU cost |
| Common FPS Values | 60 | Smoother streams; requires 6000 kbps bitrate |
| Base Canvas Resolution | 1920×1080 | Your in-scene resolution; match output if no scaling needed |
Encoder Selection:
In Settings → Output → Streaming tab:
For NVIDIA RTX GPUs (recommended):
- Encoder:
NVIDIA NVENC H.264(RTX 20/30/40 series) - Preset:
Quality (P6)— slower encoding, better quality - Rate Control:
CBR(Constant Bitrate) - Bitrate:
6000 kbps(Twitch limit) - Keyframe Interval:
2 seconds(required by Twitch) - Look-ahead:
Enabled - Psycho Visual Tuning:
Enabled
For Intel Arc or AMD RDNA2+ GPUs:
- Encoder:
HEVC (Intel/AMD) or HEVCif available - Bitrate:
5500 kbps(slightly lower for compatibility) - Keyframe Interval:
2 seconds
For CPU-only (no GPU encoder):
- Encoder:
x264 - Preset:
veryfastorfaster(faster = better quality, higher CPU cost) - Rate Control:
CBR - Bitrate:
6000 kbps - Keyframe Interval:
2 seconds
Audio Configuration
In Settings → Output → Streaming tab:
- Audio Bitrate:
160 kbps(or 128 kbps if bandwidth is tight) - Sample Rate:
48 kHz(Twitch standard)
Alternative Bitrate Configurations
Not everyone has ideal upload speed or GPU capacity. Here’s a matrix of recommended settings for different scenarios:
| Resolution | FPS | Bitrate | Upload Required | Best For |
|---|---|---|---|---|
| 720p | 30 | 3000-4000 kbps | 6 Mbps | Limited bandwidth; acceptable quality for non-fast-motion games |
| 720p | 60 | 4500-5500 kbps | 8 Mbps | Competitive shooters; smoother motion |
| 1080p | 30 | 4500-5500 kbps | 8 Mbps | Story-driven games; slower-paced content |
| 1080p | 60 | 6000 kbps | 10-12 Mbps | Competitive/fast-motion content; maximum quality |
| 1440p | 60 | N/A (exceeds Twitch limit) | Not viable on Twitch | Use YouTube instead for 1440p60+ |
Step 5: Add Audio Sources — Microphone, Desktop Audio, Filters
Audio quality is as important as video. Poor audio will lose viewers faster than poor video. You need two audio sources: your microphone and desktop/game audio.
Adding Microphone (Primary Audio)
- In OBS Mixer panel (bottom of main window), click the “+” button next to “Audio Inputs”
- Select “Audio Input Capture”
- Choose your microphone device from the dropdown (e.g., “Logitech C920” or your USB mic)
- Adjust the volume slider to -6 dB to -3 dB range (peak should not exceed -6 dB)
- Right-click the audio input → Filters
- Add filter:
Noise Suppression (Speex)— reduces background hum/keyboard noise - Set suppression to
-40 dB(aggressive) or-30 dB(moderate) - Click OK
Adding Desktop Audio (Game/System Sounds)
- In OBS Mixer, click the “+” next to “Audio Inputs”
- Select “Audio Output Capture”
- Choose your default audio device (e.g., “Speakers” or “Headphones”)
- Set the volume slider to -6 dB (adjust based on game volume)
- Right-click → Filters → Add “Compressor” filter to prevent audio peaking
Audio Levels & Mixing
Proper audio levels prevent distortion and ensure viewers hear your voice clearly above game audio. Use this guideline:
- Microphone: -6 dB to -3 dB (peak during talking)
- Desktop Audio: -12 dB to -9 dB (game sounds should be quieter than your voice)
- Peak levels should never exceed 0 dB (red zone in mixer)
Test your audio levels with a 1-2 minute test stream to friends or a private stream before going live to a large audience.
Step 6: Scene Setup — Game Capture, Webcam, Alerts, Chat Overlay
Scenes are the visual layouts you switch between during your stream. A typical setup includes your game, webcam (optional), alerts, and chat overlay.
Creating a Basic Scene
- Right-click in the Scenes panel (left of main window) → Create New Scene
- Name it “Main Stream” or “Gameplay”
- Click the “+” button under Sources (below Scenes panel)
- Select “Game Capture”
- Choose “Capture specific window” and select your game executable (e.g., Steam, Battle.net)
- Adjust the source size to fill your 1920×1080 canvas (right-click → Transform → Stretch to Screen)
Adding Webcam Overlay
- Click the “+” under Sources → “Video Capture Device”
- Select your webcam (Logitech C920, Elgato Facecam, etc.)
- Drag the webcam source to the bottom-right corner of your scene
- Right-click → Transform → Scale to Fit Window
- Resize to approximately 20-25% of screen width (e.g., 400×300 pixels)
Adding Alert/Event Overlays
Alerts (follows, subscriptions, donations) are typically added via Browser Source plugin. The most popular tools are StreamElements and Streamlabs.
Using StreamElements (Recommended for 2026):
- Visit
streamelements.comand sign up with your Twitch account - Go to Settings → Overlays → Alerts
- Customize alert designs, sounds, and animations
- Copy the Overlay URL from your StreamElements dashboard
- In OBS, click “+” under Sources → “Browser Source”
- Paste your StreamElements Overlay URL
- Set width to 1920, height to 1080 (full screen)
- Check “Shutdown source when not visible” (saves resources)
- Click OK
Adding Chat Display
Some streamers add an on-screen chat overlay to interact with viewers in real-time. This is optional but helps engagement.
- In OBS Sources, click “+” → “Browser Source”
- Paste this Twitch Chat URL:
https://www.twitch.tv/YOUR_CHANNEL_NAME/chat?popout(replace YOUR_CHANNEL_NAME) - Set width/height and position in bottom-left or bottom-right corner
- Resize to approximately 400×600 pixels
Step 7: Install and Configure OBS Plugins for Alerts & Stream Features
OBS plugins extend functionality without adding bloat. The most useful 2026 plugins for streaming are alert systems and browser source managers.
StreamElements Plugin
StreamElements offers both standalone overlays (Browser Source) and a dedicated OBS plugin that integrates chat, alerts, and media directly into OBS.
Installation:
- Visit
streamelements.com/obs-plugin - Download the latest plugin installer
- Run the installer; it will integrate with OBS automatically
- Restart OBS
- Tools → StreamElements Setup → Authorize with your Twitch account
Once installed, you can add StreamElements-specific sources like Activity Feed, Chat, and Media Share directly to your scenes.
Streamlabs Plugin (Alternative)
Streamlabs is a more beginner-friendly alternative that bundles alerts, chat, and widgets into one OBS plugin.
Installation:
- Visit
streamlabs.com/obs-plugin - Download and install the plugin
- Launch OBS and authorize Streamlabs with your Twitch account
- Go to Tools → Streamlabs → Dashboard to customize your alerts and overlays
Both plugins work well; choose based on preference. StreamElements is lighter weight; Streamlabs is more feature-rich for beginners.
Step 8: Test Your Stream Before Going Live
Never stream to a large audience without a test run. Always do a 5-10 minute test stream to catch encoding errors, audio sync issues, and dropped frames.
- In OBS, click “Start Streaming” (bottom right)
- Set your stream title and category in the Twitch Creator Dashboard (should auto-populate from OBS settings)
- Watch your stream on Twitch.tv in a separate browser window (use an incognito window to avoid caching)
- Check: video quality, audio levels, no pixelation, no dropped frames, alert overlays working
- Keep the test stream running for at least 5 minutes to ensure stability
- Stop the stream via “Stop Streaming” button in OBS
- Check OBS logs (File → View Logs) for any encoder warnings or dropped frame errors
Advanced: NVIDIA RTX 50-Series AV1 Encoding & Enhanced Broadcasting
If you own an RTX 50-series GPU, you have access to cutting-edge AV1 hardware encoding. AV1 is approximately 30% more efficient than H.264 at the same bitrate, meaning your streams will look significantly better with the same 6000 kbps cap.
AV1 on Twitch Status (2026): Twitch is rolling out Enhanced Broadcasting beta support for AV1. If available on your account, you can enable it via your Creator Dashboard → Settings → Stream.
OBS RTX 50-Series AV1 Setup:
- Settings → Output → Streaming
- Encoder:
NVIDIA NVENC AV1(only appears on RTX 40/50-series) - Bitrate:
6000 kbps - Preset:
Quality (P6) - Keyframe Interval:
2 seconds - Apply and test stream (monitor Twitch dashboard to confirm AV1 acceptance)
Multi-Platform Restreaming: Twitch + YouTube Simultaneously
Many streamers now broadcast to Twitch and YouTube simultaneously to reach larger audiences. Two methods exist: Aitum Multistream (free OBS plugin) and Restream (web-based service).
Method 1: Aitum Multistream (Recommended for High Bandwidth)
Aitum Multistream allows unlimited simultaneous platform targets via OBS plugin with independent per-platform settings.
Installation:
- Visit
aitum.tv/multistream - Download the Aitum Multistream plugin for OBS
- Install and restart OBS
- Tools → Aitum Multistream → Create Aitum account
- Authorize Twitch and YouTube in Aitum dashboard
- In OBS Settings → Stream, select “Aitum Multistream” as your service
- Choose which platforms to stream to (Twitch, YouTube, Kick, Facebook, LinkedIn, etc.)
Bandwidth Requirement: Aitum sends one high-quality stream from your PC to Aitum servers, which then relay to all platforms. You’ll need 10+ Mbps upload for simultaneous Twitch + YouTube without drops.
Method 2: Restream (For Limited Bandwidth)
Restream sends a single stream from your PC to their servers, which handle multi-platform distribution. Useful if your upload speed is limited to 6-8 Mbps.
Setup:
- Visit
restream.ioand create a free account - Connect your Twitch and YouTube channels via OAuth
- In OBS Settings → Stream → Service, select “Restream.io”
- Copy your Restream key into OBS Stream Key field
- Start streaming to Restream; they’ll automatically distribute to all connected platforms
Restream Limitations: Free plan supports only 2 simultaneous destinations. Paid plans ($19/month) unlock 10+ platforms. All streams are re-encoded on Restream servers, which introduces slight delay (3-5 seconds) compared to direct Twitch streaming.
Recommended Streaming Hardware & Gear
Your stream quality depends not just on software settings but also on your capture devices, microphone, and control hardware. Here are the industry-standard tools used by 2026 professional streamers:
Capture Cards
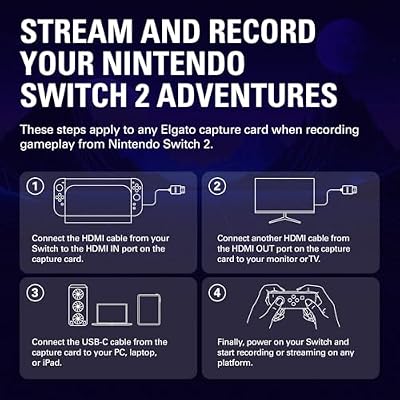
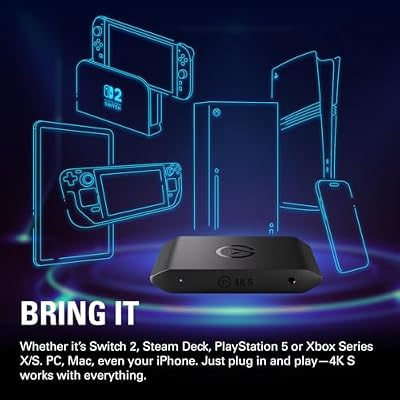
Premium 1080p60 HDR10 and 4K30 capture card for PS5, Xbox Series X, and Nintendo Switch streaming. Ultra-low latency (~66ms) perfect for competitive gaming. Works natively with OBS on Windows and macOS.

Elgato 4K S Capture Card for PS5, Xbox Series X/S, Switch 2 | 4K60 capture, 1440p120 or 1080p240 passthrough, HDR10 support, Near-zero latency, USB-C, Analog audio input






As an Amazon Associate we earn from qualifying purchases. Product prices and availability are accurate as of the date/time indicated.
Webcams
Industry-standard 1080p30 USB webcam with built-in stereo microphone. Auto-focus, wide 78° field of view, and proven reliability. Used by thousands of Twitch streamers.

InnoGear Webcam Stand Arm for Desk Camera Mount Holder for Logitech Webcam | for C922 C930e C920S C920 C615 C960 C920x BRIO 4K NexiGo N60, Heavy Base, Gooseneck, Max Height 20.9", Eye-level Framing


As an Amazon Associate we earn from qualifying purchases. Product prices and availability are accurate as of the date/time indicated.
Microphones
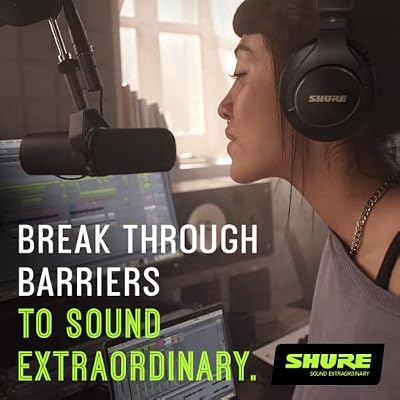
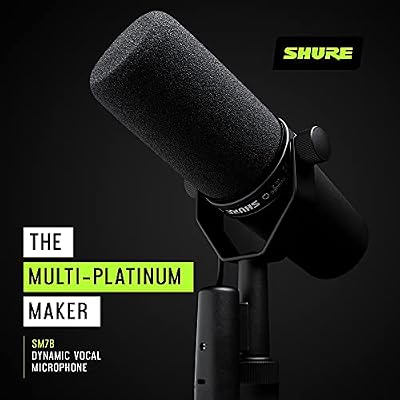
Professional-grade XLR microphone with warm, broadcast-quality audio. Requires XLR interface (Elgato Wave XLR, Focusrite Scarlett) but delivers studio-grade sound. Industry standard for podcasters and streamers.
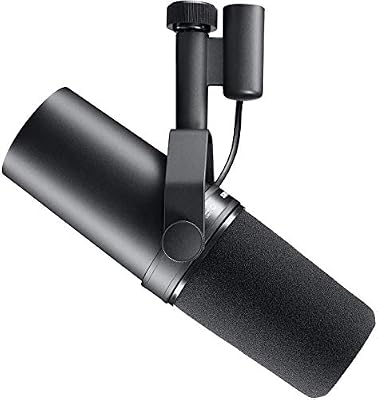
Shure SM7B Dynamic Vocal Microphone for Podcasting & Streaming | XLR studio dynamic mic for broadcast, podcast, recording, gaming and streaming; smooth warm vocals, rugged build




As an Amazon Associate we earn from qualifying purchases. Product prices and availability are accurate as of the date/time indicated.
Compact USB condenser microphone with supercardioid pickup, tap-to-mute, and RGB lighting. Plug-and-play with OBS; no XLR interface required. Best budget USB mic for streaming in 2026.

Stream Control
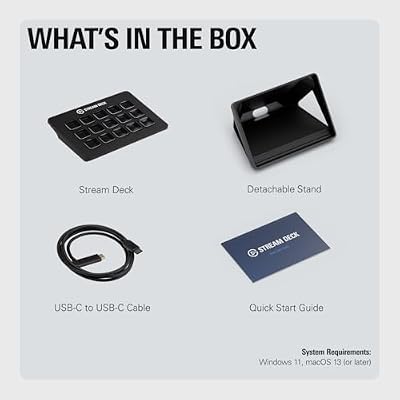
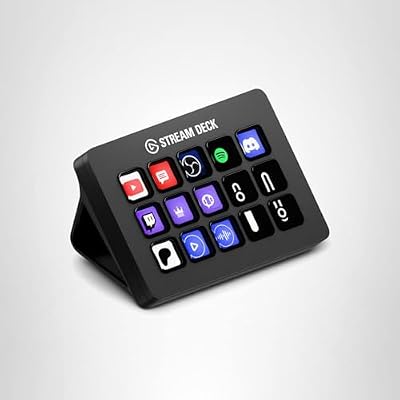
15-key programmable controller for triggering scene changes, alerts, sound effects, and OBS commands with a single button press. Essential for multi-scene streams and complex overlays.

Elgato Stream Deck MK.2 Studio Controller, 15 Macro Keys | Trigger actions in OBS, Twitch, YouTube and more, Visual feedback, Hundreds of plugins, Works with Mac and PC



As an Amazon Associate we earn from qualifying purchases. Product prices and availability are accurate as of the date/time indicated.
Complete Streaming Setup Bundle
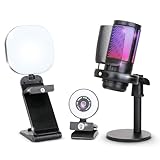
Combine the Elgato HD60 X capture card, Logitech C920 webcam, Razer Seiren V3 Mini microphone, and Elgato Stream Deck MK.2 for a complete, professional streaming station capable of 1080p60 broadcasts with alerts, scene control, and high-quality audio.
As an Amazon Associate we earn from qualifying purchases at no extra cost to you.




Troubleshooting Common Streaming Issues
Dropped Frames & Encoding Overload
Symptom: Stream stutters, pixelates, or shows “Encoder Overloaded” warning in OBS.
Causes & Solutions:
- GPU at capacity: If using NVENC, check GPU usage. If above 80%, reduce bitrate by 500 kbps or lower resolution to 720p60.
- CPU bottleneck (CPU encoding): If using x264, reduce preset from “faster” to “veryfast” or drop to 1080p30.
- Network fluctuation: Twitch’s encoding servers may temporarily reject frames during network lag. Use Twitch’s bitrate test tool to verify upload stability.
- Windows Game Mode conflict: Disable Game Mode (Settings → Gaming → Game Mode toggle off). This can interfere with NVENC.
- OBS plugin overhead: Disable unused plugins (StreamElements, Streamlabs) if not actively using alerts.
Microphone Delay (Out-of-Sync Audio)
Symptom: Your voice audio lags 0.5-2 seconds behind your game video.
Causes & Solutions:
- Microphone buffer lag: In OBS Mixer, right-click your mic audio input → Properties → Change “Audio” device from “Speakers” to “Default” (for USB mics, this usually helps).
- Game audio delay: Desktop audio source delay. In OBS Mixer, right-click Desktop Audio → Audio Properties → Adjust latency by -50 to -100 ms.
- Encoder latency: Lower-preset encoders (Quality/P6) add 1-2 frame delay. Switch to “Fast” or “Medium” preset (slight quality loss) to reduce delay.
Low Bitrate / Stream Killed by Twitch
Symptom: Stream terminates mid-broadcast with message “Broadcast finished. Twitch killed the stream due to low bitrate.”
Causes & Solutions:
- Upload speed drops: Use
speedtest.netto verify your upload speed is stable above 10 Mbps. If it drops below 8 Mbps during peak hours, reduce bitrate to 5000 kbps and resolution to 720p60. - WiFi connection: Always use wired Ethernet for streaming. WiFi is unreliable for sustained 6000 kbps streams.
- ISP throttling: If upload is capped, contact your ISP or upgrade your service tier.
Recommended Related Guides & Resources
To build a complete streaming setup, also read these complementary guides on GamingPCGuru:
- Best Wireless Gaming Headsets 2026 — Audio Quality for Streamers
- Best Gaming Monitors 1440p 240Hz — Low Latency for Competitive Streamers
- Best Mechanical Keyboards Under $150 — Keyboard Switches for Stream Overlay Visibility
- Best Gaming Controllers Under $50 — Full-Featured Pads for Console Streaming
- Best $700 Gaming PC Build 2026 — Streamer Rig with RTX 4060
FAQ: Twitch Streaming on PC
A: 10 Mbps upload speed is the practical minimum for 1080p60 streaming at 6000 kbps. This allows for a 4 Mbps safety margin. Absolute minimum is 8 Mbps, but you’ll experience frequent drops. Wired Ethernet is mandatory for stability; WiFi is not reliable enough for streaming.
A: Use NVENC if you have an NVIDIA GPU (RTX 20-series or newer). NVENC uses minimal GPU resources (~5%) and produces quality equivalent to x264 “medium” preset. Only use x264 if you have a high-end CPU (Ryzen 9 5950X+) and willing to sacrifice game frame rates. NVENC is the 2026 standard for good reason: it’s fast, efficient, and produces excellent quality.
A: As of 2026, Twitch only accepts H.264 for standard streams (with AV1 beta support rolling out for Enhanced Broadcasting). H.265 and AV1 are more efficient but require Twitch’s servers to transcode, adding computational cost. YouTube accepts AV1 natively, so if you have an RTX 40/50-series GPU, use AV1 for YouTube and H.264 for Twitch (via Aitum Multistream).
A: No. Twitch limits all streamers (Affiliates and Partners) to maximum 6000 kbps bitrate, which is only viable for 1080p60. 1440p and 4K require 12,000+ kbps and are not supported. For 1440p+ streaming, use YouTube or Kick instead.
A: Use a capture card like the Elgato HD60 X to input your console’s HDMI output into OBS. Set OBS to 1080p60, 6000 kbps, NVENC H.264. The capture card handles the video encoding from your console; OBS then re-encodes for Twitch, which adds ~1 frame of additional latency but ensures compatibility.
Conclusion
Streaming on Twitch in 2026 is more accessible than ever, but getting the technical setup right separates successful broadcasters from those who struggle with quality issues and viewer dropoff. By following this guide, you’ve learned the exact OBS configuration used by professional streamers, from NVENC encoder selection and bitrate optimization to audio source management and multi-platform restreaming.
The key takeaways: NVENC GPU encoding is the standard for 2026, 6000 kbps at 1080p60 is the quality ceiling on Twitch, stable 10+ Mbps wired internet is non-negotiable, and proper audio setup (microphone + noise suppression + desktop audio mixing) determines viewer retention as much as video quality.
Start with a test stream using these settings. Monitor your OBS logs for dropped frames and encoder warnings. Fine-tune your bitrate based on your network stability. Add quality-of-life tools like StreamElements alerts and Elgato Stream Deck controllers as you grow your audience. Most importantly, focus on content first—technical perfection matters less than entertaining, consistent broadcasts.
Your next step: Download OBS, create your Twitch account with 2FA, configure your encoder settings per this guide, add your audio sources, and run a 5-minute test stream. Congratulations—you’re now ready to broadcast to the Twitch audience.
Related Articles
Looking for more on this topic? Browse the hand-picked guides below — each one applies the same scoring rubric used in this review.
Frequently Asked Questions
What bitrate and resolution should I stream at?
For most affiliate-level streamers, 1080p at 60fps with a bitrate around 6000kbps is the practical ceiling on Twitch without partner enhanced broadcasting. If your upload connection is unstable, 936p or 720p at a lower bitrate produces a cleaner picture than a higher setting that constantly drops frames.
Should I use hardware or software encoding?
Use hardware encoding on a modern GPU. Current NVIDIA, AMD, and Intel encoders produce quality close to the software encoder while leaving your processor free for the game. Software encoding only makes sense on a dedicated second streaming machine with a strong multicore processor.
Do I need two PCs to stream well?
No. A single modern system with hardware encoding handles gaming and streaming simultaneously without meaningful frame loss in most titles. A dual PC setup is a refinement for people streaming extremely demanding games at high frame rates, not a requirement for getting started.
Why do my viewers see dropped frames?
Dropped frames almost always indicate a network problem rather than a hardware one, usually insufficient or unstable upload bandwidth. Use a wired ethernet connection, choose the closest ingest server, and lower your bitrate. Encoding overload, which is different, appears as skipped frames due to CPU or GPU limits.
What audio setup makes the biggest difference?
Audio quality affects retention more than video quality does. A decent USB or XLR microphone positioned close to your mouth, plus a noise suppression and compressor filter chain in OBS, will improve your stream more than any resolution increase. Always monitor your own audio while live.