Good PC cable management comes down to three habits: route every cable behind the motherboard tray where possible, keep the power connectors fully seated and gently bent, and make sure no cable crosses the path of your case intake fans. Done well, it makes the build look cleaner, simplifies upgrades and removes obstacles for airflow, though the airflow gain is usually modest compared with fan placement.
This guide covers planning before you start, a routing order that avoids rework, the connectors that deserve special care in 2026, and the tools worth having. It treats tidiness as a practical goal first and a visual one second, so you can use it whether your case has a glass panel or a solid one.
Plan Before You Plug Anything In
Cable management is easiest when you decide the cable paths before the parts go in. A short planning pass saves a lot of unplugging later.
Choose the right power supply
A fully modular power supply lets you connect only the cables you need, which removes the bundle of unused wires. Semi-modular units attach the main cables permanently, and non-modular units make you hide every extra cable. Check cable length too, since a long case needs longer leads.
Check your case’s cable space
Look at the space behind the motherboard tray, the number of tie-down points and the pass-through grommets. A case with roughly 20 to 30 millimeters of space behind the tray is easier to work with than a very thin one. Check the manual or product page for the exact dimension.
Consider the motherboard layout
Some motherboards and cases place connectors on the rear or bottom to hide cables. If you are buying parts together, a case and board designed for hidden connectors can help the build look tidy with little effort.
Routing Order That Saves Rework
Install in an order that lets you reach each connector, and test the system before you tighten every tie.
Start with the big connectors
Run the 24-pin motherboard cable first, then the 8-pin CPU power cable. Route them behind the tray and through the grommet nearest each socket, and keep the bends gentle. Do not force a tight turn, since stress on the connector can loosen the pins.
Add graphics card power
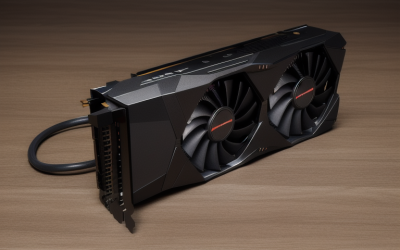
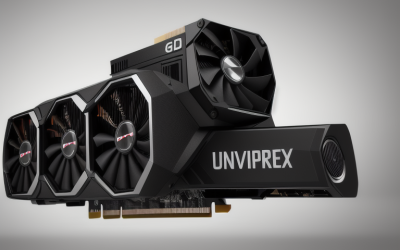
Connect the graphics card power cable after the card is installed. Use the cables that came with the power supply, and seat them firmly. For the newer 12-volt high-power connector found on some cards, push until it clicks and avoid sharp bends near the plug. Follow the card and power supply makers’ guidance on how much straight length to leave, which is often several centimeters.
Finish with fans, front panel and storage
Connect fan, USB, audio and front-panel headers last. Keep the thin front-panel wires together in one bundle, and use the motherboard manual to confirm each pin. Run drive cables along the existing paths.
Airflow Matters More Than Looks
Cables should not block air from reaching your parts. Keep the path from the intake fans to the graphics card and CPU clear. Behind the tray, bundles should be flat so the side panel closes without pushing on the cables.
| Area | Good practice | Common problem |
|---|---|---|
| Front intake | Keep cables clear of fans and filters | Loose power cables hanging in front of the fans |
| Graphics card area | Run the power lead straight back, not across the heatsink | Cables pressing against the fans |
| CPU cooler | Keep fan and pump cables clear of the blades | Cables that touch spinning blades |
| Rear exhaust | Leave the area free | Dangling cables blocking the airflow |
| Behind the tray | Bundle flat with straps | Thick bundles pushing the side panel |
Cable management has a limited effect on temperatures in a case with good airflow, and it is not a substitute for good fan placement. Treat it as removing barriers rather than creating cooling.
Tools and Materials
Hook-and-loop straps versus zip ties
Reusable hook-and-loop straps are easier to adjust than plastic ties, which must be cut when you change anything. Use ties if you want a very permanent bundle, but trim them flush to avoid sharp ends.
Extensions and sleeved cables
Custom extension cables add color and tidy up exposed areas, but they add resistance and connectors if poorly made. Pick cables designed for your power supply, as pin layouts differ between brands and models. Never mix cables from different power supplies.
Lighting connectors
Addressable RGB headers use 5 volts with three pins, and standard RGB headers use 12 volts with four pins. Plugging one into the other can damage lights, so read the labels and the motherboard manual.
Spec Targets by Build Type
| Build type | Power supply | Case features |
|---|---|---|
| Budget | Semi-modular or non-modular with enough cable length | Grommets and a few tie-down points |
| Mid-range | Fully modular | Decent space behind the tray, hook-and-loop straps included |
| Show build | Fully modular with custom or extension cables | Back-connect support, ample rear space, cable covers |
Cleaning Up an Existing Build
You do not need to rebuild a PC to improve it. A tidy-up on an existing system takes an hour or two and starts with power-down, unplugging and a photo of how things look now, so you can restore connections if something goes wrong.
Remove what you do not use
On a modular power supply, unplug cables that lead nowhere, such as spare drive connectors. On a non-modular unit, bundle unused leads and park them in a spare bay or behind a drive cage where they cannot touch fans or boards.
Re-route one cable at a time
Take out and re-route each cable individually, starting with the thickest. Work from the back panel to the front so you can see how each bundle runs. Check that the cable still reaches its connector without tension, and leave a little slack at each end.
Check the cooling afterward
Once everything is tidy, run a demanding game or stress test and watch temperatures. If something runs hotter than before, you may have placed a cable too close to a fan intake. Reopen the case and adjust the path. A tidy case that cools worse than before has missed the point.
Take the opportunity to dust filters and fans while the case is open. Dust is a bigger airflow problem than most cables, and a clean intake filter helps every part in the system.
Small Cases and Tight Builds
Compact cases make every cable decision harder, because there is almost no hidden space. In a small-form-factor build, shorter or custom-length cables help a great deal, and flat ribbon-style cables bend more easily than thick round ones. Plan the order of installation carefully, since you may need to connect the power cables before the graphics card or the cooler goes in.
In these builds, airflow is limited already, so keep every cable out of the path between intake and the hottest parts. If the manufacturer publishes an assembly order for the case, follow it. When you are unsure whether a cable fits, do a dry run with no tie-downs, close the panel, and look for any pressure points before you finalize the routing.
Common Mistakes
- Bending the graphics card power cable sharply right at the connector
- Letting cables touch fan blades or hang in front of intake fans
- Using cables from another power supply because the connectors look the same
- Plugging a 5-volt addressable RGB device into a 12-volt RGB header, or the reverse
- Tightening every tie before powering on and testing the system
Before You Close the Case Checklist
- Check that all power connectors are fully seated
- Confirm no cable touches a fan, pump or heatsink
- Check that the side panel closes without pressure
- Verify front-panel and header connections match the manual
- Power on and test before you finalize the bundles
Related guides
- Aio Liquid Coolers For High Performance Gaming
- Wireless Gaming Headsets Under 100 For Pc
- Ssds For Large Video And Raw Photo Files
Frequently Asked Questions
Does cable management improve temperatures?
Only slightly in most modern cases, since fan placement matters more. It helps most in tight cases where loose cables block airflow to the parts.
Do I need a modular power supply?
No, but it makes tidy builds much easier. Non-modular units can work well if the case has enough room to hide the extra cables.
How should I route the graphics card cable?
Run it neatly along the card’s edge and gently into the connector, avoiding sharp bends near the plug. Check the card and power supply manuals for any specific guidance.
Are zip ties or straps better?
Straps are easier to adjust and reuse, while zip ties give a firm hold. Use whichever you prefer, and avoid over-tightening either one.