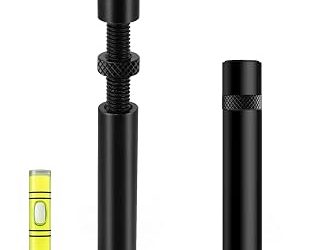
- Top Pick: acer GPU Support Bracket, GPU Stand with Magnet Non-Slip Base,(L, 70-120mm) | Adjustable Graphics Card Holder, Video Card Sag Holder Bracket Fits Most Cases, Tool-Free GPU Brace
- Best Value: California JOS GPU Support Bracket Graphics Card Brace Anti-Sag Holder Height Adjustable Video Card Stand Large(1 PCAK, Black)
- Premium Choice: ASUS NVIDIA GeForce RTX™ 5060 LP BRK 8GB GDDR7 OC Edition Graphics Card (PCIe® 5.0, 8GB GDDR7, HDMI®/DP 2.1, Low-Profile Design, IP5X Dust Resistance), 3 Year Warranty
Undervolting is one of the few genuinely free upgrades left in PC gaming. By reducing the voltage your GPU pulls at a given clock speed, you can shave 10-20°C off your core temperature, cut fan noise dramatically, and in many cases match or beat stock performance because the card no longer throttles under thermal pressure. It costs nothing, voids no warranty, and takes about 30 minutes to dial in properly.
In 2026, with flagship and mid-range cards alike pushing 200-350W out of the box, undervolting has gone from a niche enthusiast trick to a practical necessity for anyone running a compact case or a quiet build. This guide walks through the process step by step, plus the accessories worth having on hand while you’re inside your case.
As an Amazon Associate we earn from qualifying purchases at no extra cost to you.


⚡ Save on Your Next PC — Amazon Prime
Prime members get fast free shipping on the systems above, plus early access to Prime Day & Black Friday PC deals. New members get a 30-day free trial.
Watch: How to Undervolt Your GPU — Video Review
Why Undervolt Your GPU
Stock voltage curves from AMD, NVIDIA, and Intel are built with worst-case silicon and worst-case cooling in mind. Most chips can run the same clocks at meaningfully lower voltage, which cuts power draw and heat without sacrificing frame rates.
- Lower core temperatures, typically 8-15°C at the same clocks
- Reduced fan speed and acoustic noise, often by 5-10 dB
- Lower total system power draw, which helps thermally constrained or small-form-factor cases
- Less thermal throttling, which can actually raise average clocks under load
Tools You’ll Need
You don’t need anything exotic. A voltage/frequency curve editor and a way to stress-test stability are the only requirements.
- MSI Afterburner (works on any GPU brand) or your vendor’s software, like AMD Adrenalin or Intel Arc Control
- GPU-Z for monitoring clocks, voltage, and power draw in real time
- A demanding benchmark loop such as 3DMark Time Spy Stress Test or a 20-minute Cyberpunk 2077/Alan Wake 2 session
- FurMark or OCCT for a worst-case power virus test, used sparingly to check for artifacts
Step-by-Step: Finding Your Stable Curve
The core method is the same across brands: reduce voltage at your target clock speed, then verify stability, and repeat until you find the lowest voltage that holds without crashing or dropping frames.
- Open the voltage/frequency curve editor and note your card’s boost clock and default voltage under load
- Drag the curve point at your typical boost clock down by 30-50mV and flatten the curve to the right of it
- Apply, then run a 10-minute benchmark loop while watching GPU-Z for crashes, black screens, or artifacting
- If stable, drop another 20mV and retest. If it crashes or artifacts, roll back 10-20mV and lock that in
- Most modern cards land in the 850-950mV range for their peak boost clock, down from 1.0-1.1V stock
Testing for Stability
A curve that survives a benchmark isn’t necessarily safe for a 6-hour gaming session. Stability testing should mimic real use, not just synthetic load.
- Run at least two different games for 30+ minutes each, ideally one CPU-light and one GPU-bound title
- Watch for driver timeout errors (event ID 4101 on Windows) which signal an unstable curve
- Check that your undervolted clocks aren’t lower than stock at the same power limit; if they are, ease off 10-15mV
- Re-test after driver updates, since voltage tables occasionally shift with new releases
Complementary Hardware: Supporting Your Card
Undervolting reduces heat and stress on your card, but it doesn’t address a separate, very physical problem: sag. Heavy triple-fan coolers can bend the PCIe slot over time, which stresses solder joints and can cause intermittent connection issues. If you’re already inside your case tuning voltage curves, it’s a good time to check for sag and correct it. A magnetic anti-sag bracket like the GPU Support Bracket, GPU Stand with Magnet Non-Slip Base or the California JOS GPU Support Bracket takes a few minutes to install and adjusts to fit most case heights. For builds where every millimeter of clearance matters, an ASUS GeForce RTX 5060 LP BRK is a genuinely low-profile, low-power card that runs cool by design and rarely needs aggressive undervolting to stay quiet. If you’re planning a case refresh alongside your tuning session, a vertical mount kit like the Lian Li VG4v4 GPU Kit with its Gen 5 riser cable eliminates sag entirely by turning the card on its side, and it looks sharp behind tempered glass.
Tips
- Undervolt before you overclock. A stable low-voltage baseline makes it easier to see how much headroom you actually have for extra clocks
- Save your curve as a profile in your GPU software and set it to load on Windows startup, since some drivers reset curves after a reboot
- Don’t chase the absolute lowest voltage. Leave a 10-15mV safety margin below your crash point for temperature swings and aging silicon
- If your card sags visibly, install a support bracket now rather than after you notice display artifacts, since a stressed PCIe connection can mimic driver instability
Frequently Asked Questions
Will undervolting reduce my frame rate?
Usually not. Since you’re keeping clock speeds the same while lowering voltage, performance stays flat or improves slightly as thermal throttling decreases. You’ll only lose performance if you push the undervolt too aggressively and the card downclocks to stay stable.
Is undervolting safe for my warranty?
Yes. Undervolting reduces stress on the card, unlike overclocking, and every major vendor’s software includes voltage curve editing as a supported feature. It’s a software-level adjustment, not a hardware modification.
Do I need a support bracket if I undervolt?
Undervolting lowers temperature and power draw, but it does nothing for the physical weight of the cooler. Cards over 1.2kg, common on triple-fan RTX 40 and 50 series cards, still benefit from an anti-sag bracket regardless of your voltage settings.
How often should I recheck my undervolt settings?
Recheck after any driver update and after roughly six months of use. Silicon can shift slightly with age, and driver updates occasionally alter default voltage tables in ways that interact with custom curves.
Conclusion
Undervolting is a low-risk, high-reward tune-up that every GPU owner should do at least once. Pair it with a proper anti-sag bracket or a vertical mount, and you’ll end up with a cooler, quieter, and more physically stable card that’s built to last well past its next upgrade cycle.