- Top Pick: Thermal Grizzly Kryonaut – 1 Gram – Extremely High Performance Thermal Paste + 12 Cleaning Wipes 6 Wet & 6 Dry – for Demanding Applications and Overclocking CPU/GPU/PS4/PS5/Xbox
- Best Value: Noctua NT-H1 3.5g SW Edition, Thermal Paste, Spatula and 3 Cleaning Wipes
- Premium Choice: Thermal Grizzly Kryonaut – 1 Gram – Extremely High Performance
A CPU running 15°C hotter than it should almost always comes down to one thing: bad thermal paste application. Whether you’re doing a fresh build, a delayed cooler upgrade, or just re-pasting a chip that’s been running hot for two years, the paste itself matters less than how you put it on. Get the technique right and even a budget compound will perform within a couple degrees of the expensive stuff.
This guide walks through picking the right paste for your setup, prepping the surface properly, and applying it so you get full coverage without a mess. We’ll also cover the tools that make the job easier, since a bad spatula or dried-out wipe can undo an otherwise good application.
As an Amazon Associate we earn from qualifying purchases at no extra cost to you.


⚡ Save on Your Next PC — Amazon Prime
Prime members get fast free shipping on the systems above, plus early access to Prime Day & Black Friday PC deals. New members get a 30-day free trial.
Watch: How to Apply Thermal Paste Correctly — Video Review
Choosing the Right Thermal Paste
Not all paste is built for the same job. Conductivity, viscosity, and longevity vary enough that the “best” option depends on what you’re cooling and how often you plan to reapply.
- High-end overclocking: Thermal Grizzly Kryonaut is rated around 12.5 W/mK and handles sustained high temps well, making it a favorite for overclocked CPUs and GPUs.
- Everyday builds: Noctua NT-H1 has been a benchmark-tested favorite for over a decade, offering excellent value with reliable performance across CPU and GPU applications.
- Long-term set-and-forget: Noctua NT-H2 is a non-conductive, non-capacitive formula designed for durability, ideal if you don’t want to repaste every year.
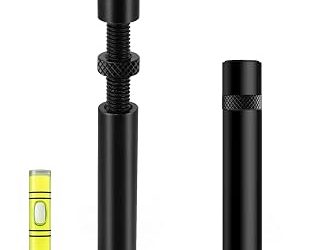
- Thick or sticky compounds: If you’re working with a paste that resists spreading, a roller-style applicator kit makes even coverage far easier than a spatula alone.
Prepping the Surface
Old paste, dust, and skin oils all reduce contact between the cooler and the die. Skipping cleanup is the single most common mistake in re-pasting jobs.
- Power down and unplug the system, then remove the cooler carefully by twisting rather than yanking.
- Use isopropyl alcohol (90%+ concentration) with a lint-free cleaning wipe to remove all old paste from the CPU/GPU die and the cooler’s contact plate.
- Let the surface fully dry, usually 30-60 seconds, before applying new paste. Any residual alcohol will thin the paste and affect spread.
- Inspect the cooler’s base for warping or leftover residue in the corners — a quick second wipe catches what the first pass misses.
Applying the Paste: Pattern and Amount
Coverage matters more than the specific pattern, but some methods make even coverage more predictable. Most modern CPUs and GPUs need less paste than people assume.
- Dot method: A single pea-sized dot (about 3-4mm diameter) in the center works well for most consumer CPUs under a standard IHS.
- Line method: A thin line across the die suits larger rectangular dies, like Threadripper or many GPU cores, ensuring paste reaches all edges under mounting pressure.
- Spread method: Using a spatula to spread a thin, even layer works best for large or uneven surfaces, and is the intended technique with kits like the Noctua NT-H1 that include a spatula.
- As a rule of thumb, less is more — a layer thicker than 0.5mm typically hurts thermal transfer rather than helping it.
Mounting the Cooler
Even perfect paste application fails if the cooler isn’t seated evenly. Mounting pressure spreads the paste, so how you tighten it matters.
- Tighten mounting screws in a diagonal or star pattern, not one side at a time, to apply even pressure across the die.
- Go slow — tighten each screw partially in rotation rather than fully seating one before moving to the next.
- Avoid rocking or twisting the cooler once it makes contact with the paste, as this can push compound off-center or create air pockets.
- Check for even squeeze-out on your first repaste attempt by removing the cooler once to confirm coverage, then reapplying fresh paste before final mount.
Tips
- Reapply thermal paste every 2-3 years for daily-use systems, or sooner if you notice rising idle or load temperatures.
- Keep a few dry and wet cleaning wipes on hand — many paste kits, like the Kryonaut bundle, include both for exactly this reason.
- Store opened paste tubes upright and sealed tightly; dried-out paste applies unevenly and loses thermal performance.
- Run a stress test (15-20 minutes) after reapplication and compare temps to your previous baseline to confirm the job worked.
Frequently Asked Questions
How much thermal paste should I actually use?
For most CPUs, a dot around the size of a grain of rice to a pea is enough. Mounting pressure spreads it across the die, so more paste doesn’t mean better contact — it usually means more squeeze-out and mess.
Can I mix different thermal paste brands?
It’s fine to fully clean off one brand and apply another, but never layer different pastes on top of each other. Mixed compounds can have inconsistent viscosity and reduce thermal performance.
Is more expensive paste always better?
Not necessarily. High-end pastes like Kryonaut shine under sustained overclocking loads, but for stock or lightly boosted systems, a well-applied budget paste like NT-H1 often performs within 2-3°C of premium options.
What’s the difference between NT-H1 and NT-H2?
NT-H2 is Noctua’s newer, more durable formula built for longevity and consistent long-term performance, while NT-H1 remains a proven, slightly more affordable option with a longer track record in independent benchmarks.
Conclusion
Good thermal performance comes from combining the right paste with careful technique — clean surfaces, appropriate application amount, and even mounting pressure. Whether you choose a premium option for overclocking headroom or a reliable standard for daily use, the fundamentals of application matter more than brand loyalty. Take your time on the prep work and you’ll get results that last years, not months.