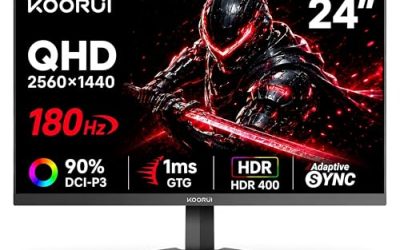
- Top Pick: Samsung 27" Odyssey OLED G6 (G61SH) QD-OLED, QHD (1440P) Gaming Monitor
- Best Value: ASUS TUF Gaming Series 5 24.5” 1080P Monitor (VG259QM5A) – Full HD, Fast-IPS, 240Hz, 0.3ms, G-SYNC Compatible, FreeSync Premium, 99% sRGB, DisplayWidget, Gaming AI, 3 yr Warranty
- Premium Choice: INNOCN 24.5" 1440P 240Hz Gaming Monitor Fast IPS HDMI 2.1, DP, Black, 25G2S
Screen tearing and stuttering are the two things that make an otherwise great gaming monitor feel cheap. G-Sync and FreeSync fix both by syncing your display’s refresh rate to your GPU’s frame output in real time, but only if you enable them correctly. A lot of gamers buy a 240Hz panel, plug it in, and never turn the feature on because it’s buried in a driver menu or disabled by a single wrong cable.
This guide walks through enabling adaptive sync on both NVIDIA and AMD systems, what hardware you need, and which monitors and cables actually support it without weird caveats. Whether you’re running a Samsung QD-OLED or a budget 1080p panel, the setup steps are nearly identical once you know where to look.
As an Amazon Associate we earn from qualifying purchases at no extra cost to you.


Check Price on Amazon →


⚡ Save on Your Next PC — Amazon Prime
Prime members get fast free shipping on the systems above, plus early access to Prime Day & Black Friday PC deals. New members get a 30-day free trial.
Watch: How to Enable G-Sync or FreeSync — Video Review
What G-Sync and FreeSync Actually Do
Both technologies are variable refresh rate (VRR) systems. Instead of your monitor redrawing at a fixed 144Hz or 240Hz regardless of what the GPU is doing, the display waits for each new frame before refreshing. That eliminates tearing (when two frames render on screen at once) and reduces stutter caused by mismatched frame timing.
- G-Sync: NVIDIA’s standard, split into G-Sync Compatible (VRR over standard HDMI/DisplayPort, works on most modern monitors) and G-Sync Ultimate (requires a dedicated hardware module)
- FreeSync: AMD’s royalty-free standard, built on the VESA Adaptive-Sync spec, found on nearly every gaming monitor sold in 2026
- Most current monitors, including the ASUS TUF VG259QM5A and INNOCN 25G2S, support both labels simultaneously since they share the same underlying VESA protocol
Checking Your Hardware First
Before touching any settings, confirm your GPU and cable can actually carry the signal.
- NVIDIA GPUs need driver 417.71 or newer for G-Sync Compatible mode; anything from the RTX 30-series onward works out of the box
- AMD GPUs from the RX 400-series onward support FreeSync natively through Adrenalin software
- DisplayPort 1.2 or higher is required for VRR; HDMI needs 2.1 for full-bandwidth adaptive sync at high refresh rates
- A cable rated below spec is the most common reason VRR silently fails, so a certified DisplayPort 1.4 cable like the Capshi 6.6ft or 10ft option is worth having on hand for desk setups of any distance
Enabling G-Sync on NVIDIA
Once your monitor is connected via DisplayPort or HDMI 2.1, enabling G-Sync takes about a minute in NVIDIA Control Panel.
- Right-click the desktop, open NVIDIA Control Panel, and select “Set up G-SYNC”
- Check “Enable G-SYNC, G-SYNC Compatible” and choose whether to apply it to full screen mode only or windowed/borderless mode too
- Confirm your display is listed as G-Sync Compatible; if it isn’t detected, update your GPU driver and reboot
- In your monitor’s OSD menu, make sure the sync feature (often labeled FreeSync, since G-Sync Compatible rides on the same hardware) is switched on, not just detected by Windows
Enabling FreeSync on AMD
AMD’s setup mirrors NVIDIA’s but lives in Radeon Software instead.
- Open AMD Radeon Software, go to Settings > Display, and toggle “AMD FreeSync” to on
- Enable FreeSync in the monitor’s own OSD, usually under a Game or Display submenu, since some panels ship with it off by default
- For monitors like the CUNPU 200Hz panel that list both FreeSync and G-Sync compatibility, only one toggle is needed since the panel handles both protocols through the same VRR range
Confirming It’s Actually Working
Enabling the setting doesn’t guarantee it’s active during gameplay.
- Use the built-in NVIDIA or AMD overlay to show refresh rate in real time while gaming
- Run a VRR test pattern (UFO Test’s screen tearing test or a similar tool) to visually confirm smooth panning with no tear lines
- Check that your monitor’s refresh rate in Windows Display Settings matches its rated max, since a wrong setting can cap VRR range unexpectedly
Tips
- Cap your frame rate a few FPS below your monitor’s max refresh (for example 237 on a 240Hz panel) to stay inside the VRR window and avoid tearing at the ceiling
- Enable V-Sync alongside G-Sync/FreeSync in the driver, not in-game, for a cleaner fallback when frame rates spike above the panel’s range
- If you’re daisy-chaining a long DisplayPort run, use a VESA-certified DP 1.4 cable rated for the full distance since generic cables often drop VRR signaling past 6 feet
- Update both GPU drivers and monitor firmware before troubleshooting flicker, since most VRR flicker complaints trace back to outdated firmware rather than the panel itself
Frequently Asked Questions
Can I use FreeSync with an NVIDIA GPU?
Yes, as long as the monitor is on NVIDIA’s G-Sync Compatible list or you manually enable it in NVIDIA Control Panel. Most FreeSync monitors sold since 2020, including budget 1080p panels, work fine this way even without official certification.
Does adaptive sync add input lag?
No, VRR itself doesn’t add latency since it’s just adjusting refresh timing. Any lag typically comes from V-Sync or triple buffering used alongside it, which is why capping frame rate is the better fix for tearing above the VRR range.
Why does my screen flicker with FreeSync enabled?
Flicker usually happens near the bottom of a monitor’s VRR range, often below 48Hz, when frame rates drop too low. Enabling low framerate compensation (LFC), standard on panels like the Samsung Odyssey G5, doubles the refresh internally to stay inside the supported range.
Do I need a special cable for G-Sync or FreeSync?
You need a cable that meets DisplayPort 1.2+ or HDMI 2.1 bandwidth, not a cable specifically labeled for VRR. A certified DisplayPort 1.4 cable, like Capshi’s 6.6ft or 10ft versions, guarantees the bandwidth headroom for high refresh rates over longer runs.
Conclusion
Adaptive sync is one of the few gaming features that costs nothing in performance and fixes a visible problem outright. The setup takes minutes once you know the two places to check, your GPU’s driver software and the monitor’s own OSD, and a quick VRR test confirms it’s live. Pair a certified panel with a proper DisplayPort cable and tearing becomes a non-issue for the life of the setup.