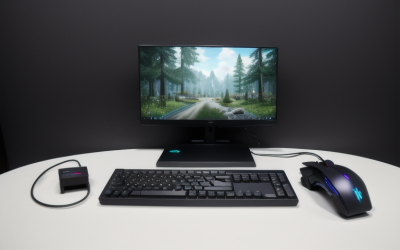
A beginner game streaming setup needs four things: a PC that can play the game and encode video at the same time, free broadcasting software such as OBS Studio, a wired internet connection with enough upload speed, and a clear microphone. Everything else, including a camera, capture card, lighting and a second monitor, can wait until you know you enjoy streaming.
- The Gear a Beginner Setup Actually Needs
- Choosing Streaming Software
- Starting Settings: Resolution, Frame Rate and Bitrate
- One PC, Two PCs or a Console
- Audio, Lighting and Overlays
- Picking a Platform and Building a Routine
- Before You Go Live Checklist
- Fixing Problems After Your First Streams
- Common Mistakes
- Related guides
- Frequently Asked Questions
The common beginner trap is spending on accessories while leaving the basics unconfigured. A modest PC with the right encoder, a sensible bitrate and clean audio produces a better stream than an expensive rig with default settings. This guide walks through the gear, the software and the starting settings in the order they matter, as of 2026.
The Gear a Beginner Setup Actually Needs
Streaming adds work on top of gaming, so each component has a specific job. Start by checking what you already own against the list below.
PC and Video Encoder
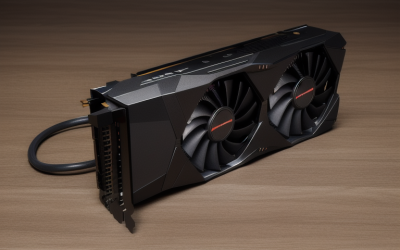
Modern graphics cards from Nvidia, AMD and Intel include a dedicated hardware video encoder (NVENC, AMD’s encoder block and Intel Quick Sync or its Arc equivalent). Using it moves most of the encoding load off the CPU and off the game’s rendering path, which is why a hardware encoder is the default choice for beginners. Software encoding with x264 on the CPU can look good at slow presets, but it needs plenty of spare cores and often costs frame rate in the game.
As a rough guide, 16 GB of RAM is a practical minimum when the game, OBS and a browser are all open, and 32 GB gives breathing room for heavier titles. Check your graphics card’s encoder generation on the manufacturer’s spec page, because newer generations handle H.264 and AV1 more efficiently than older ones.
Microphone and Audio
Viewers forgive average video far sooner than bad audio. A USB dynamic or condenser microphone is the simplest starting point because it needs no interface. Dynamic microphones tend to reject room noise and keyboard clatter better in untreated rooms, while condensers capture more detail but also more of the room. Place the capsule a hand-width from your mouth and use a pop filter.
Webcam or Camera (Optional)
A facecam is optional. If you want one, a 1080p webcam with decent low-light behavior is enough, and good front lighting matters more than the sensor. Skip the DSLR or mirrorless camera route until you also own a capture device and know you will keep streaming.
Internet Connection
Upload speed, not download speed, decides what you can stream. Use a wired Ethernet connection rather than Wi-Fi, since wireless adds jitter that shows up as dropped frames. Run a speed test at the time of day you plan to stream, and look at both upload speed and consistency.
Choosing Streaming Software
OBS Studio is free, open source and available for Windows, macOS and Linux, which makes it the safest beginner pick. Streamlabs Desktop is built on the same foundation and adds a more guided interface, themes and alerts, at the cost of being heavier and pushing some extras behind a subscription. Check the current feature list before choosing either one, because platform integrations change.
Scenes and Sources
OBS organizes your stream into scenes, and each scene holds sources such as game capture, webcam, microphone and overlays. A beginner needs only three scenes: a starting-soon screen, the main gameplay scene and a brief-break screen.
Game Capture vs Display Capture
Use Game Capture for most titles because it grabs the game directly and keeps notifications and private windows off the stream. Display Capture records your whole monitor, which is useful for desktop content but risks showing private information. Some games and anti-cheat systems need Window Capture or running OBS with matching privileges, so read the game’s support notes if the source shows a black screen.
Starting Settings: Resolution, Frame Rate and Bitrate
The settings below are conservative starting points, not fixed rules. Platforms update their recommended ingest limits from time to time, so check the current Twitch, YouTube or Kick guidance before you go live. A sound rule is to keep your video plus audio bitrate to roughly 70 to 75 percent of your measured upload speed so there is headroom for spikes.
| Tier | Output Resolution | Frame Rate | Typical Video Bitrate | Encoder |
|---|---|---|---|---|
| Entry (weak upload or older GPU) | 720p | 30 fps | About 2,500 to 4,000 kbps | Hardware H.264 |
| Middle (most beginners) | 720p to 900p | 60 fps | About 4,500 to 6,000 kbps | Hardware H.264 |
| Higher (strong upload, modern GPU) | 1080p | 60 fps | About 6,000 to 8,000 kbps, within platform limits | Hardware H.264 or AV1 where supported |
Set the keyframe interval to 2 seconds, use constant bitrate (CBR) and select the audio bitrate at 128 to 160 kbps. Scale the output down from your monitor resolution in OBS rather than changing your game resolution just for streaming.
One PC, Two PCs or a Console
Most beginners should stay with a single PC. Two-PC streaming, where one machine plays and a second encodes through a capture card, solves performance problems you may never have. Console streaming usually works by sending the console’s HDMI signal through a capture card or by using the console’s built-in broadcast feature, which is limited but easy.
When a Capture Card Makes Sense
A capture card is useful for consoles, a second PC or a handheld device. Check the maximum passthrough and capture resolution on the spec sheet, and note whether it supports the frame rate you actually plan to stream.
Reducing Load on a Single PC
If frame rate drops while streaming, lower the game’s settings first, then reduce stream resolution, and only then think about hardware. Closing browsers and overlay apps often recovers more headroom than expected.
Audio, Lighting and Overlays
Add a noise gate and a compressor in OBS filters for your microphone, then keep game audio quieter than your voice. Put the main light in front of you, not behind. Keep overlays simple; a clean frame with a small webcam window is easier to watch than a crowded layout.
Picking a Platform and Building a Routine
Twitch, YouTube and Kick all accept OBS, and each has its own rules on bitrate limits, monetization thresholds and music licensing. Read the current terms before you commit, especially the music and copyright sections, because background tracks from a streaming service can lead to muted recordings or takedowns. Many beginners stream to one platform and save local recordings with a separate OBS recording profile, which gives them material for short clips later.
Consistency matters more than gear. A fixed schedule, a clear title and a category that matches the game help viewers find you. Review your stats after each session, such as dropped frames and CPU or GPU load, and change one setting at a time so you can see what helped.
Before You Go Live Checklist
- Record a local two-minute clip and check audio levels and frame drops.
- Confirm your stream key is entered and kept private.
- Check that the bitrate fits within your upload speed with headroom.
- Mute notifications and close apps that show private information.
- Set a stream title and category so viewers can find you.
- Look at OBS’s stats panel for dropped frames during the first few minutes.
Fixing Problems After Your First Streams
Three symptoms account for most early trouble. If viewers report buffering, your bitrate is probably too high for your real upload speed, so lower it by a notch or two. If the game stutters while OBS is open, check whether the stats panel shows encoding overload and drop the output resolution before touching game settings. If the picture looks blocky in fast scenes, a slightly higher bitrate at a lower frame rate often looks cleaner than a low bitrate at 60 fps.
Make changes one at a time and record a short local clip after each change. That habit shows what actually helped and stops you from stacking guesses on top of each other.
Common Mistakes
- Streaming over Wi-Fi when a wired connection is available, which causes dropped frames and buffering for viewers.
- Setting the bitrate near the full upload speed, leaving no room for network fluctuations.
- Buying a camera or capture card before fixing audio quality.
- Showing the whole display and accidentally exposing private tabs, chats or notifications.
- Copying a streamer’s settings without matching their hardware and upload speed.
Related guides
- Aio Liquid Coolers For High Performance Gaming
- Wireless Gaming Headsets Under 100 For Pc
- Ssds For Large Video And Raw Photo Files
Frequently Asked Questions
Can I stream on a laptop?
Yes, if it has a modern discrete or integrated GPU with a hardware encoder and adequate cooling. Plug it in, use Ethernet through a dock or adapter, and expect to lower game settings because laptops throttle under sustained load.
Do I need a capture card to stream PC games?
No. OBS captures PC games directly through Game Capture, so a capture card matters only for consoles or a dedicated second streaming PC.
What upload speed do I need?
Plan on at least double your intended bitrate, so a 6,000 kbps stream calls for roughly 12 Mbps of stable upload. Check your plan’s real upload performance, since advertised and actual speeds can differ.
Is free software good enough?
Yes. OBS Studio is widely used by streamers at every level, and paid tools mostly add convenience features such as alerts and themes rather than better video.