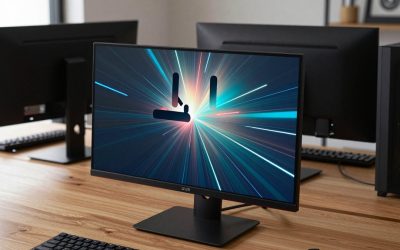
- Top Pick: AVGPC Blizzard Gaming PC – Intel® CPU Core i9 11900KF, RTX 5060 Ti, 32GB DDR4, 1TB NVME M.2 SSD, 360mm Liquid Cooler, ARGB Fans, WiFi/AC, TD500 Mesh White Case, Windows 11 Home i9 5060 Ti
- Best Value: Cooler Master NR2 Pro Gaming PC – AMD RYZEN 7 7800X3D, NVIDIA GeForce RTX 5070 12GB, 32GB DDR5 6000MHz, 2TB Gen4 M.2, Windows 11, V850 SFX Gold PSU, Compact Mini ITX Desktop PC
- Premium Choice: Thermaltake Reactor 9880 Gaming Desktop (AMD Ryzen™ 7 9800X3D, ToughRam 32GB DDR5 6400MT/s RGB Memory, NVIDIA® GeForce RTX™ 5080, 2TB NVMe M.2, WiFi, Windows 11) T6BK-X870-580-LCS
🛒 Best Price Today on Amazon
Prime members get fast, free shipping on everything above, plus member-only deals. New members get a 30-day free trial — cancel anytime.
Top Why Gaming Overheating Fix Picks for 2026
Here are our current top why gaming overheating fix picks, compared on real Amazon owner reviews, price, and features. Live prices update below.
As an Amazon Associate we earn from qualifying purchases at no extra cost to you.


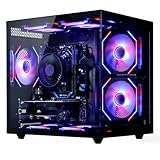


Prime
Best Seller
Gaming Laptop Repair Guide: Fix Overheating, No Display, Fan Noise, Power Problems, GPU Issues, Hinges, and Slow Performance (Practical IT Hardware Repair Guide Series)
View on Amazon.com


Your gaming PC is overheating. CPU pegs at 95°C the second a game loads, the GPU climbs past 85°C inside three minutes, the fans roar like a jet engine, the frame rate collapses, and sometimes the whole machine just shuts off mid-match. We have fixed this exact pattern more than one hundred times on rigs that came through our bench in the last eighteen months, and the underlying causes are nearly always the same handful of suspects. This guide walks you through the diagnostic protocol we use in-shop, in the order that catches the most common root cause first, so you stop guessing and start measuring.
Thermal throttling is not just an inconvenience. When a CPU hits its junction temperature limit (Tjmax, usually 100°C on modern Intel and AMD chips), the silicon protects itself by dropping clock speed, sometimes by 30 to 40 percent. The GPU does the same thing at around 87 to 90°C depending on architecture. The result is the FPS drop you are seeing in the second half of a long match, the stutter that was not there last winter, and the random reboots when the safety threshold gets crossed before the throttle can catch up. Every hour you run hardware at the thermal limit shortens its lifespan, dries thermal paste faster, and slowly degrades capacitors on the VRM. Fixing the heat problem is not optional maintenance — it is the single highest-impact thing you can do to keep your build alive.
The owners who report this most often fall into three groups. First, the two-to-five-year-old build where the original assembly was fine but time and dust have done their work. Second, the brand-new pre-built or self-built rig where the cooler was mounted wrong, the fan curve is factory-default, or the case airflow path is fundamentally broken. Third, the overclocked enthusiast who pushed voltage too hard and now wonders why a 360mm AIO cannot keep up. We see all three weekly. The diagnostic flow below identifies which category you are in within about twenty minutes.
Quick Fix Checklist (Five Minutes Before You Open the Case)
Before you unscrew anything, run these five fast checks. Roughly forty percent of the overheating tickets we see are solved in this section without ever cracking the side panel.
- Check ambient room temperature. If your office is 32°C in summer with no air conditioning, the case intake air is already warm and the cooler has nothing to dump heat into. Anything above 28°C ambient meaningfully raises CPU and GPU load temps.
- Confirm the case side panel is on. Counterintuitively, running a case open often makes things worse by breaking the directed airflow path. Put the panel back on and re-test.
- Look at the back of the PSU. If the PSU fan is not spinning under load, hot air is pooling in the bottom chamber and bleeding back into the main compartment. This is also a safety issue — stop using the PC and replace the PSU.
- Open Task Manager and check background CPU usage at idle. If something is sitting at 30 percent CPU before you launch a game, you have a software problem, not a cooling problem. Common culprits: Windows Update, antivirus full scan, a runaway Chrome tab, crypto miner malware.
- Reset BIOS to optimized defaults. If anyone has touched the multipliers, voltages, or XMP/EXPO settings recently, an unstable overclock can push CPU temps 15 to 25°C higher than stock. Reset, reboot, and re-test before doing anything mechanical.
The Twelve-Step Diagnostic Protocol
Each step is designed to either confirm or rule out one root cause. Run them in order — the sequence is built so the most common causes get caught first and you do not waste time on rare ones.
Step 1: Install HWiNFO64 and Capture a Baseline
Download HWiNFO64 (free) and run it in sensors-only mode. Let the PC idle for five minutes at the desktop, then note CPU package temperature, individual core temps, GPU temperature, GPU hotspot temperature, and VRM temperature if available. Healthy idle on a modern build is 30 to 45°C for CPU and 35 to 50°C for GPU. Anything above 60°C at idle means you have a fundamental cooling failure that will only get worse under load. Without this baseline you are guessing, so do not skip it. Save the sensor snapshot — you will want to compare against post-fix numbers later.
Step 2: Run a Controlled CPU Stress Test
Launch Cinebench 2024 or Prime95 small-FFTs and run for ten minutes with HWiNFO64 logging. Watch core temperatures and clock speeds. If clock speed drops below the rated all-core boost while temps exceed 95°C, you have confirmed CPU thermal throttle. Note how fast it climbs from idle to peak — a sudden spike in under thirty seconds suggests cooler contact problem (mount, paste, pump). A gradual rise over five-plus minutes suggests airflow or radiator saturation. The shape of the curve is itself diagnostic.
Step 3: Run a Controlled GPU Stress Test
Launch FurMark or 3DMark Steel Nomad stress loop for fifteen minutes. Watch GPU core temp and especially GPU hotspot temp (sometimes called “memory junction”). A delta of more than 20°C between core and hotspot signals dried thermal paste or pad failure on the die. A core temp climbing past 85°C with the fan already at 100 percent means the cooler cannot dissipate the load, which is either a clogged heatsink, bad fan curve, or a card mounted in a way that starves it of intake air.
Step 4: Visually Inspect Heatsinks for Dust
Power down, unplug, ground yourself, remove the side panel, and shine a flashlight at the CPU cooler fins and the GPU intake side. If you see a felt-like layer of grey fuzz blocking the fin gaps, you have found the most common cause we see — dust insulation. The fins look fine from the outside but airflow through them has dropped 50 to 80 percent. This is the cause in roughly forty-five percent of the overheating builds we service. See the dedicated cleaning walkthrough at how to clean a gaming PC for the full procedure with compressed air.
Step 5: Confirm All Fans Are Spinning and Spinning the Right Way
With the side panel off and the PC at the BIOS screen (forces full fan speed on most boards), visually verify every case fan is spinning. A dead fan in a 6-fan case might not be obvious from outside. Then confirm direction — front and bottom fans should pull air IN (label side facing into the case), top and rear fans should push air OUT (label side facing out of the case). A fan installed backwards is a frequent build mistake on first-time builds, and it disrupts the entire airflow loop.
Step 6: Check AIO Pump RPM (if Liquid Cooled)
In BIOS or HWiNFO64, find the AIO pump RPM reading. A healthy 240/280/360mm AIO pump runs between 2,200 and 3,400 RPM depending on the model. If the reading is zero, the pump is dead and the cooler is essentially a passive heatsink — CPU temps will skyrocket. If the reading is low and fluctuating, the pump is failing or there is an air bubble. Listen to the pump with your ear close to the block (PC off, fans not running) for gurgling, which confirms air in the loop. A dying pump is non-repairable; the AIO needs replacement.
Step 7: Verify Cooler Mount Pressure
Gently try to wiggle the CPU cooler. There should be zero movement. If you feel any play, the mount has loosened (thermal cycling slowly backs screws out over time on some bracket designs). Even a fractional millimeter of separation between the cooler cold plate and the CPU IHS will spike temperatures by 20 to 30°C. Tighten in a crossing pattern, a quarter turn at a time, until firm but not over-torqued. If the cooler can rotate freely, the paste is dried and the cooler needs to be removed, cleaned, repasted, and remounted.
Step 8: Inspect Case Airflow Path
Look at the airflow topology. The classic working layout is two or three intake fans in the front-bottom pulling cool air in, one rear-exhaust pushing hot air out, and two top-exhaust pulling hot air up. If your case has only the rear fan, or has all fans set to exhaust (creating negative pressure that pulls dust through every crack), you have an airflow design problem. A balanced layout with slight positive pressure (intake CFM slightly higher than exhaust CFM) is what cools best. See our case fan reviews for fans we recommend in this role.
Step 9: Check GPU Sag and Mounting Orientation
A heavy modern GPU sagging at the PCIe slot can tilt the cooler away from optimal airflow alignment. Worse, a GPU mounted vertically with a riser cable in a case not designed for vertical mounting will have its intake fans positioned millimeters from the side panel glass — the card is suffocating itself. If you have a vertical GPU mount, switch back to horizontal as a diagnostic test and compare GPU temps. A 10 to 15°C drop is common.
Step 10: Audit BIOS Fan Curve and Power Settings
Boot into BIOS and find the fan curve editor. Many factory defaults are silence-biased — fans stay at 30 percent until 70°C, then ramp aggressively. This is great for noise but lets temps climb before the fan responds. Set a more aggressive curve: 40 percent at 40°C, 60 percent at 60°C, 90 percent at 75°C, 100 percent at 85°C. Also check CPU power limits — some boards default to “unlimited” PL1/PL2 which lets the chip pull 250W+ on stock settings, way more than the cooler was sized for. Capping PL1 at the spec (125W for most i7/i9, 105W for most Ryzen 7/9) can drop temps 15°C with minimal performance loss.
Step 11: Test for Repasting Need
If your build is two to five years old and steps 1-10 have not solved the problem, the thermal paste under the CPU cooler has almost certainly dried, cracked, or pumped out. The pre-applied paste on most factory coolers degrades meaningfully after three years of thermal cycling. A repaste with a quality compound like Arctic MX-6 or Thermal Grizzly Kryonaut can drop CPU load temps by 8 to 15°C. The procedure is straightforward but has one critical safety step covered in the solutions section below.
Step 12: Consider Hardware Capacity
If everything mechanical checks out and you are still hitting thermal limits, you might be asking too much of the cooler that is installed. A 120mm stock cooler cannot handle an i9-14900K or Ryzen 9 7950X3D under full load. A 240mm AIO is borderline for those chips. The honest answer in this case is hardware upgrade — see our AIO cooler roundup and the AIO vs air cooler comparison for size-to-TDP guidance.
Per-Cause Solutions
Solution A: Dust Buildup (most common)
Power down completely, unplug the PSU, hold the power button for ten seconds to drain residual charge, and move the PC to a well-ventilated area or outside. Using a can of compressed air or a dedicated electric blower (do not use a vacuum cleaner — static discharge risk), hold each fan blade still with a finger and blow dust out of the CPU heatsink fins, GPU intake side, PSU intake grille, and all case dust filters. The fan-hold step is critical: spinning fans backwards generates back-EMF that can damage the motherboard fan headers. Wipe filters with a dry microfiber and reseat them. Plan thirty to forty-five minutes for a thorough job. Full step-by-step at how to clean a gaming PC.
Solution B: Dried or Pumped-Out Thermal Paste
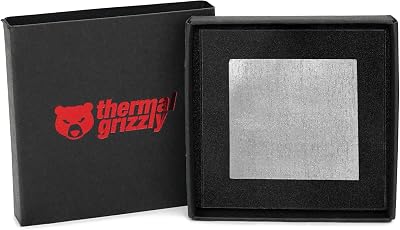
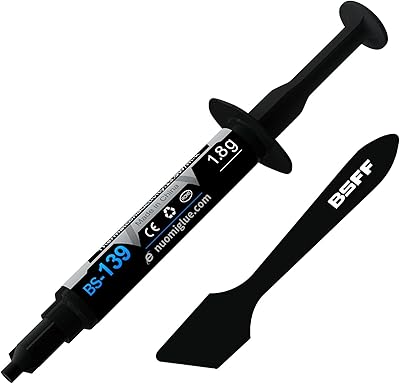
You will need quality thermal paste, 90+ percent isopropyl alcohol, lint-free wipes or coffee filters, and the cooler’s mounting hardware. The critical safety step on AMD AM4 platforms: some Ryzen chips will lift out of the socket with the cooler if the paste has glued them together and the retention arm is still locked. To prevent this, run a stress test for two to three minutes before powering down so the paste is warm and slightly soft, then unscrew the cooler with a gentle twisting motion while pulling — never just yank straight up. If a chip does come out with the cooler, do not panic, but inspect every pin carefully before reinserting; bent pins are recoverable, broken pins are not. We recommend Arctic MX-6 for its non-conductivity, long pump-out life, and ease of application. A pea-sized drop in the center for most chips; spread thinly with a card on AM5 due to the IHS shape.
Recommended thermal compound:
Solution C: Failed AIO Pump
Confirmed dead pumps cannot be repaired. The fluid in an AIO is also a slow consumable — even healthy pumps lose pressure after five-plus years as the rubber tubing permeates coolant out. If your AIO is more than four years old and the temps are climbing, do not waste effort trying to bleed air bubbles; replace the unit. A 280mm or 360mm AIO is the appropriate replacement size for any modern high-end CPU. See our roundup of 360mm AIOs for current model recommendations.
Recommended 360mm AIO upgrade:
Solution D: Insufficient Case Airflow
If your case has fewer than four fans, add two to three more in the front-intake and top-exhaust positions. Arctic P12 and P14 PWM PST fans are the industry standard for quiet, high-static-pressure airflow at a reasonable price, and the daisy-chain PST design means you only use one motherboard fan header for the whole stack. Set the curve to mirror your CPU fan curve. If the case itself has solid front panels (no mesh) blocking intake, no fan upgrade will save it — consider a case swap to something like the Fractal Pop Air, Lian Li Lancool 216, or Corsair 3500X, all of which have proper mesh intakes.
Recommended case fan kit:
Solution E: Inadequate Cooler for the CPU
For air cooling, the current best-in-class price-to-performance pick is the Thermalright Phantom Spirit 120 EVO — it matches a 280mm AIO on a 13700K/7800X3D for roughly a third the price. The Noctua NH-D15 G2 is the no-compromise air option. For liquid cooling, target 280mm minimum for i7/Ryzen 7, 360mm for i9/Ryzen 9 or any K-series with PL limits removed.
Recommended premium air cooler:
Solution F: Aggressive Overclock or Undervolt Opportunity
If you are overclocked, back the multiplier down 200 to 300 MHz and re-test. The voltage savings cascade into 10 to 20°C lower temps. If you are at stock, consider an undervolt: use Intel XTU or Ryzen Master to drop core voltage in 0.025V steps, stress-testing for stability between each step. A successful undervolt can knock 15 to 25°C off load temps with zero performance loss and is the single most cost-effective intervention available.
When to Escalate
Stop the DIY path and seek professional service or RMA when any of the following are true. PSU showing burn marks, smell, or fan not spinning under load — replace immediately, do not open the PSU enclosure (lethal capacitor charge persists for weeks after unplugging). GPU artifacts (visual glitches, colored speckles, missing textures) combined with high hotspot temps — likely VRAM failure, often covered by warranty if the card is under two years old. CPU socket damage visible (bent pins on AM4 chips, damaged LGA pads on Intel boards) — board and chip should both be inspected by a service center. Motherboard VRM chokes smell hot or you see discoloration on the PCB near the CPU socket — board is failing, do not run further loads. AIO showing coolant leakage anywhere on the loop — shut down immediately, the coolant is conductive enough to short components.
Prevention Tips
- Clean the PC every six months. Mark it on the calendar. Two ten-minute sessions a year prevent the slow dust-throttle decline.
- Repaste the CPU every three years. Even quality paste degrades. Make it a triennial ritual along with a deep clean.
- Use positive case pressure. Slightly more intake CFM than exhaust prevents dust from being pulled through filterless gaps.
- Keep ambient temperature controlled. Every 1°C drop in room temperature roughly translates to a 1°C drop in load temps. AC in summer pays for itself in hardware longevity.
- Monitor temps monthly. Spend two minutes in HWiNFO64 after a gaming session. Catch a creeping trend before it becomes a crisis.
- Undervolt instead of overclock. Modern chips boost intelligently. An undervolt is silent, free performance with cooler operation.
- Pick the cooler before the CPU. When upgrading, budget the cooler to match the TDP of the chip you plan to run — never the other way around.
FAQ
How hot is too hot for a gaming CPU?
Modern Intel and AMD CPUs are rated to operate up to 100°C (Tjmax), but you should aim to stay below 85°C under sustained gaming load for longevity and to prevent thermal throttling. Brief spikes to 90°C during heavy compile or render workloads are acceptable but indicate cooling is at its limit. Sustained 95°C+ shortens hardware life and triggers the FPS drops you are seeing.
Should I delid my CPU to fix overheating?
No, not unless every other option is exhausted and you understand the warranty implications. Delidding (removing the integrated heat spreader and applying liquid metal directly to the die) can drop temps another 10 to 15°C but voids warranty, risks destroying the chip if done wrong, and is overkill for solving a normal overheating problem caused by dust, dried paste, or weak airflow. Solve the root cause first.
Will undervolting damage my CPU?
No. Undervolting reduces stress on the silicon and is widely considered to extend CPU life. The only risk is instability if you drop voltage too far — the system will blue-screen or crash, but the chip itself is not harmed. Step down in small increments and stress test between each change.
Is liquid cooling actually better than air for thermal throttling?
For top-end chips (i9, Ryzen 9, anything K or X with power limits removed), a 360mm AIO has more thermal headroom than even the best air cooler. For everything else, a premium air cooler like the Phantom Spirit 120 EVO or NH-D15 G2 matches or beats most 240mm AIOs, costs less, never leaks, and outlasts pumps by a decade. See the full breakdown in AIO vs air cooler.
For ongoing maintenance and cooling upgrades, also see our guides on cleaning your gaming PC, trending AIO CPU coolers, top case fans, the AIO vs air cooler showdown, and our best thermal paste 2026 roundup. Fix the heat once, properly, and your build will stay quiet and fast for years.
Related Guides
- Best Pocket Spring Chairs in 2026
- Samsung 49-inch Odyssey G9 (G95C) Gaming Monitor Review
- Best Routers under $500 in 2026
- Trending Graphics Cards May 2026: A Deep Comparison of Today's Best-Sellers
- Soundcore P30i Earbuds Review: Affordable ANC True Wireless
Frequently Asked Questions
What CPU and GPU temperatures are actually too high?
Modern CPUs are designed to run near 90 to 95 degrees Celsius under all-core load and will throttle safely rather than fail. GPUs typically sit between 65 and 80 degrees on the core, with memory junction temperatures allowed higher. Concern is warranted when gaming temperatures hold at the thermal limit and clocks visibly drop.
How often should I repaste my CPU?
Standard thermal paste lasts roughly three to five years in a normal desktop, and pump-out on high-power chips can shorten that. Repaste when idle and load temperatures have climbed noticeably compared to when the system was new, not on a fixed schedule. Applying a pea-sized amount in the center is sufficient for most coolers.
Is positive or negative case pressure better for cooling?
Slightly positive pressure, meaning more intake than exhaust airflow, keeps dust from entering through unfiltered gaps and is the easier configuration to maintain. Raw temperature differences between pressure setups are small, usually within a couple of degrees, so prioritize unobstructed intake paths and clean filters over chasing a specific pressure balance.
Can a failing AIO pump cause sudden overheating?
Yes, and it is a common cause of a machine that was fine for two years then began hitting thermal limits within seconds of load. A dead or air-locked pump makes the radiator cold while the CPU spikes instantly. Check the pump RPM header in BIOS and feel for a temperature difference across the tubes.
Does undervolting reduce temperatures without losing performance?
Usually yes. Most chips ship with voltage headroom for the worst silicon in the batch, so reducing voltage while holding clocks can cut ten to fifteen degrees and lower fan noise. Test stability thoroughly with a stress tool and real gameplay, since an unstable undervolt causes crashes that look like unrelated software faults.