A corrupted microSD card usually announces itself in one of three ways: the handheld boots to an empty library, the frontend freezes while scanning, or a card that worked yesterday suddenly asks to be formatted. The instinct is to poke at it — reboot, reinsert, let the device try to fix it. Resist that instinct. Almost every recovery failure starts with good intentions and a card that kept being written to after the damage was done.
Recovery is a sequence, and the order matters more than any single tool. This guide follows the order professionals use: freeze the situation, copy everything off the card in one read-only pass, do all repair work on that copy, and only rebuild onto a fresh card at the end. Your save files are small and tough. The filesystem around them is what breaks, and filesystems can be worked around.
As an Amazon Associate, we earn from qualifying purchases.
Quick Answer
Stop using the card immediately, because every new write can overwrite recoverable data. Connect it to a computer through a reliable reader and make a full read-only image of the card. Run filesystem repair or file carving on the image, never the original, rescue the save folders first, then copy everything back onto a fresh, correctly formatted card.
Step Zero: Stop Writing to the Card
Corruption rarely erases data outright. More often, the card’s map of where files live — the file allocation table on FAT32 and exFAT cards — gets damaged, while the files themselves still sit intact in their clusters. Deleted and orphaned data also survives until something new is written over it. That is why the first rule of recovery is simply to stop: power the handheld down, remove the card, and do not let any device mount it read-write again until an image exists.
Two common moves make things worse. Accepting a handheld or phone’s offer to “fix” or format the card destroys the map permanently. And copying files off one by one with a file manager is risky too, because a struggling card can hang, overheat, or degrade further during dozens of small reads. One sequential image pass is gentler and captures everything, including data the filesystem no longer knows about.
Phase One: Image the Card Before You Touch It
An image is a bit-for-bit copy of the whole card stored as a single file on your computer. Imaging tools read the card start to finish in one pass, retry weak sectors, and skip nothing. Once the image exists, the original card goes back in its case and every risky operation happens on the copy. If a repair attempt mangles the image, you make another copy of the image and start again. The original stays untouched as the fallback.
Use a reader you trust for this step. A failing card in a bargain reader that drops the connection mid-pass can waste an hour and stress the card for nothing. Connect the reader directly to the computer rather than through a hub, start the imaging tool, and let it finish even if progress stalls for a while at a damaged section — stalls are the tool working around bad areas, not a crash. The image file will be as large as the card’s full capacity, so clear space on an internal drive or a fast portable SSD first.
Phase Two: Read the Symptoms Before Choosing a Tool
What the computer says about the card tells you which recovery route to take, and the three common cases need different handling.
If the card is not detected at all — no drive letter, no device in disk management — the problem is likely physical or electronic rather than filesystem damage. Try a second reader and a second computer before concluding anything; if it stays invisible everywhere, software recovery is off the table and only a specialist lab could help, which is rarely sensible for a game library.
If the card is detected but shows as empty, unformatted, or RAW, the data area is usually intact and the filesystem map is broken. This is the best case: a carving tool can scan the image and rebuild files from their internal signatures.
If files appear but folders are scrambled, names are garbled, or games fail to load their saves, the filesystem is half-alive. Repair tools have their best chance here, and carving remains the fallback.
Phase Three: Repair the Copy, or Carve the Files Out
Work on the image, and try the least destructive option first. Mount the image and run a filesystem check in read-only or copy-on-repair mode where the tool allows it. Classic checkers such as chkdsk on Windows or fsck on Linux can rebuild a damaged allocation table, but they can also truncate files they cannot reconcile — which is exactly why they only ever run against the image.
When repair fails or the filesystem reads as RAW, switch to carving. A carving tool ignores the filesystem entirely and scans the raw image for file signatures, pulling out anything recognizable. For a retro handheld, your priority targets are small: RetroArch keeps battery saves in its saves folder and save states in its states folder, and standalone emulators use their own save directories near the ROM folders. Battery saves use extensions such as .srm and .sav, and states use .state plus numbered variants. Carve those first, then ROMs, which are large and usually easy to re-source anyway. Rename carved saves to match your ROM file names exactly, because emulators pair saves to games by name.
Phase Four: Rebuild on a Fresh Card
A card that has corrupted once has told you something about its health. Even a successful recovery should end on new media. Format the fresh card the way your handheld’s firmware expects — FAT32 for most Linux-based handheld firmware, exFAT for most Android handhelds and larger cards — then copy the rescued save folders over first and confirm a game loads its save before copying the full library back.
Keep the card image on your computer until the rebuilt card has survived a few full play sessions. The image is your undo button if a carved save turns out to be damaged in a way that only shows up hours into a game.
The Recovery Toolkit
None of this needs exotic hardware. It needs a reader that holds a connection, enough fast storage to hold a full card image, and fresh cards worth trusting. These five items cover the whole workflow.
UGREEN Card Reader

The imaging reader. A stable connection matters more than headline speed during a long sequential pass over a struggling card, and this dual-slot reader handles SD and microSD without an adapter.
Specs:
– Interface: USB 3.0 Type-A
– Slots: SD and microSD, one at a time or both
– Card support: UHS-I SD, SDHC, SDXC and microSD equivalents
– Use case: long read-only imaging passes
SanDisk MobileMate

A compact second reader worth keeping as a cross-check tool. When a card is not detected, swapping readers is the fastest way to learn whether the card or the reader is at fault.
Specs:
– Interface: USB 3.0 Type-A
– Slots: microSD only
– Card support: UHS-I microSDHC and microSDXC
– Use case: detection checks and quick save copies
Samsung T7 Portable SSD 1TB

Staging space for the image. A full 256 GB or 512 GB card image needs a home, and a fast portable SSD keeps imaging and carving passes from crawling on a nearly full internal drive.
Specs:
– Capacity: 1 TB
– Interface: USB 3.2 Gen 2, USB-C
– Read speed: up to 1,050 MB/s
– Use case: holding card images during recovery
Samsung PRO Plus 256GB

The rebuild target for most handheld libraries. Strong sustained write speeds make the full library copy-back painless, and the A2 rating keeps frontend scanning snappy afterward.
Specs:
– Capacity: 256 GB
– Class: UHS-I U3, V30, A2
– Read speed: up to 180 MB/s
– Write speed: up to 130 MB/s
SanDisk Extreme 256GB
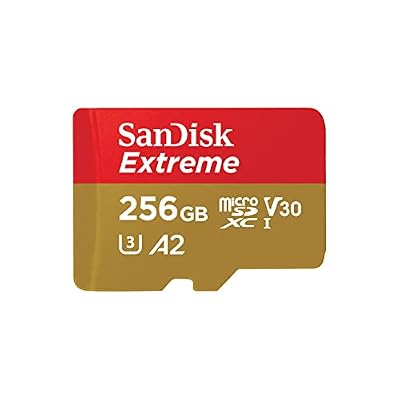
An equally sound rebuild card with fast writes and proven endurance in always-on devices, which is the same write-heavy life a handheld card lives.
Specs:
– Capacity: 256 GB
– Class: UHS-I U3, V30, A2
– Read speed: up to 190 MB/s
– Write speed: up to 130 MB/s
How to Choose
Choose the reader for stability, not speed. Imaging a damaged card is a marathon read, and a reader that runs cool and never drops the connection beats a faster one that disconnects at the worst moment. Owning two readers from different brands turns the scariest symptom — a card that is not detected — into a two-minute test.
Choose the staging drive by capacity: it must hold one full image of your largest card with room to spare, because you may keep the image for weeks while you validate rescued saves.
Choose the fresh card by sustained write speed and rating rather than peak read numbers. Rebuilding means writing the entire library back in one go, and the A2 application rating predicts how the card behaves under the many small reads a frontend performs. Buy cards from reputable sellers; counterfeit capacity is itself a leading cause of the corruption this guide exists to fix.
Who Should Skip This Recovery Route
Skip it if the card is not detected in two different readers on two different computers. That points to dead electronics rather than a broken filesystem, and no software in this guide can reach data on a card that will not enumerate.
Skip it, too, if the card holds nothing you cannot rebuild in an afternoon. A fresh install of a curated library is sometimes faster than carving, and recovery time is only worth spending on saves and configurations that cannot be replaced.
And skip the repair phase entirely if the card came from an unknown seller and reports a suspiciously large capacity. A counterfeit card never held your data in the first place, so there is nothing to recover.
Frequently Asked Questions
Can I recover saves if my handheld asks to format the card?
Usually, yes. The format prompt means the device cannot read the filesystem map, not that the data is gone. Remove the card without accepting the prompt, image it on a computer, and carve the saves folder contents from the image.
Is it safe to run a repair tool directly on the card?
It is risky. Repair tools write as they fix, and a fix that goes wrong can overwrite the very data you are trying to save. Always image first and run repair tools on the image or on a copy of it.
Which files should I rescue first from a corrupted card?
Your saves. Battery saves and save states are tiny, irreplaceable, and quick to carve. ROMs and media can almost always be sourced again, so they come last in any recovery pass.
How do I stop this from happening again?
Shut the handheld down fully before removing the card, eject the card in software before pulling it from a computer, keep a periodic image or save backup, and retire cards that have corrupted once from primary duty.
Final Verdict
A corrupted card feels like a lost library, but in most cases only the map is broken, not the territory. Freeze the card, image it in one careful pass, repair or carve the image rather than the original, and rebuild onto fresh media. Follow that order and the saves you cared about almost always come home.
Product and ASIN Reference
| Product | ASIN |
|---|---|
| UGREEN Card Reader | B0779V61XB |
| SanDisk MobileMate | B07G5JV2B5 |
| Samsung T7 Portable SSD 1TB | B0874XN4D8 |
| Samsung PRO Plus 256GB microSD | B0C1PPWTWT |
| SanDisk Extreme 256GB microSD | B09X7CRKRZ |