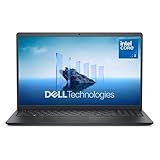
- Top Pick: Dell 15.6 Laptop, FHD, Intel Core 3 100U, 8 GB RAM, Windows 11 Home
- Best Value: Dell Latitude 5420 14" FHD Business Laptop Computer, Intel Quad-Core i5-1145G7, 16GB DDR4 RAM, 256GB SSD, Camera, HDMI, Windows 11 Pro (Renewed)
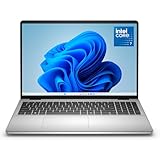
- Premium Choice: Dell Pro 15.6" Laptop 2026, Intel Core 3 100U, 16GB DDR5, 256GB SSD
To run a Dell computer hardware diagnostic, restart the PC, tap F12 the moment the Dell logo appears, and select Diagnostics from the boot menu — the built-in ePSA test then runs automatically and flags failures with a 2000-series error code in about ten minutes. If the machine still reaches Windows, the free SupportAssist app runs equivalent scans from the desktop. Below is the full procedure for both tools, how to interpret the error codes, and how to tell whether a failure points at RAM, storage, or the motherboard.
As an Amazon Associate we earn from qualifying purchases at no extra cost to you.


Which Dell Diagnostic Tool to Use
Dell ships three overlapping diagnostic tools — the pre-boot ePSA environment, the Windows-based SupportAssist app, and SupportAssist OS Recovery for machines that won’t load Windows. Picking the right one for the symptom avoids wasted boot cycles:
| Symptom | Best tool | Why |
|---|---|---|
| PC won’t POST or reach Windows | ePSA (F12 or Fn+Power) | Runs from BIOS ROM — no OS or working drive required |
| Windows loads but freezes or crashes | SupportAssist hardware scan | Tests hardware while logging drivers and software state |
| Suspected bad RAM (random BSODs) | ePSA thorough memory test | Hammers every memory address outside the OS |
| Suspected drive failure (slow boot, file errors) | ePSA quick test | Reads SMART data and runs a short drive self-test |
| No video at all — only a blinking LED | Amber/white blink code chart | Works even when the display never initializes |
| POSTs fine but Windows won’t start | SupportAssist OS Recovery | Hardware scan plus repair, backup, and restore tools |
| Preparing a warranty claim | ePSA with validation code | Dell support can verify the failure online without re-testing |
Running ePSA Pre-Boot Diagnostics
ePSA (Enhanced Pre-boot System Assessment) lives inside the BIOS, so it works even with a dead SSD or corrupted Windows install. On recent Dell systems the pre-boot screen may carry SupportAssist branding, but the flow and error codes are identical.
- Step 1: Connect the AC adapter and unplug USB drives, docks, and external monitors. ePSA probes everything it can enumerate — a flaky USB stick or dock can produce misleading storage errors, and a low battery can abort the run mid-test.
- Step 2: Shut the PC down completely. Press the power button and immediately tap F12 once per second until the One Time Boot Menu appears. On most models you can skip the menu entirely by holding Fn and pressing the power button.
- Step 3: Select Diagnostics. The quick test launches automatically and takes roughly 5–10 minutes, checking the CPU, memory, motherboard, storage, fans, and battery.
- Step 4: Watch for the interactive LCD test. When asked whether the color bars displayed correctly, press Y if you can see them. Ignoring the prompt or pressing N logs a false video error (a 2000-03xx code) even on a perfectly good screen — this is the single most common cause of bogus ePSA failures.
- Step 5: If the quick test passes but problems persist, rerun in Thorough mode (the checkbox on the results screen). Expect 30–60+ minutes depending on how much RAM is installed and drive capacity — the deep memory patterns and full surface read are what catch intermittent faults.
- Step 6: Write down the Error Code, the Validation Code, and the Service Tag. The validation code lets Dell confirm the failure remotely, so a warranty claim doesn’t require re-running the test on a phone call.
Running SupportAssist Scans in Windows
- Step 1: Launch SupportAssist (preinstalled on most Dell consumer PCs and laptops; otherwise grab it from dell.com/support using your Service Tag).
- Step 2: Run the hardware scan from the home screen for a quick check of CPU, memory, storage, fans, and network hardware — usually under five minutes.
- Step 3: For a targeted check, use the troubleshooting section to run a custom scan against a single component, including a CPU stress test and an extended memory test. Choose this over the quick scan when one subsystem is the suspect; there’s no reason to stress a healthy drive while hunting a RAM fault.
- Step 4: Read the results. A green check means pass; a failed component links to a suggested fix and can trigger an automatic service request if the machine is under warranty.
- Step 5: If Windows won’t start at all, press F12 at boot and choose SupportAssist OS Recovery. This boots a recovery environment (standard on Dell systems shipped since roughly 2018) with a hardware scan tile plus driver repair, file backup, and system restore options. Alternatively, enter the Service Tag at Dell’s support site and run the online diagnostic — useful because it lands the result in Dell’s service history for warranty purposes.
Reading ePSA Error Codes: RAM, Drive, or Motherboard?
ePSA failures report as a 2000-XXXX code plus a validation code and a short message. The second digit pair tells you which subsystem failed:
| Error code | Component flagged | What it usually means | First action |
|---|---|---|---|
| 2000-0111 | CPU | Machine check exception — processor or board-level fault | Check cooling/reseat; usually a service repair |
| 2000-0123 | Memory | Integrity test failed — a DIMM is returning bad data | Isolate sticks one at a time (procedure below) |
| 2000-0131 / 0132 | Battery | Battery missing or past its usable life | Replace the battery |
| 2000-0141 | Storage | No drive detected | Reseat the drive; check whether the BIOS main page lists it |
| 2000-0142 | Storage | Short drive self-test failed | Back up immediately — the drive is dying |
| 2000-0146 | Storage | Self-test log contains previous errors | Treat the same as 0142 |
| 2000-03xx series | Display/graphics | LCD or video test failure — often just an unanswered color-bar prompt | Rerun and press Y at the prompt before assuming a bad panel |
Two interpretation rules save real money. First, 2000-0142/0146 nearly always means the drive itself — a replacement 1TB NVMe SSD usually runs $45–$90. Second, 2000-0141 is ambiguous: if the BIOS still lists the drive but the test fails, blame the drive; if the BIOS doesn’t see it even after reseating, try another M.2 slot or a known-good drive before blaming the motherboard. Repeated 2000-0111 codes, or multiple unrelated component failures in one run, point back at the board.
Isolating a Bad RAM Stick
A 2000-0123 code says memory failed but not which stick or which slot. The standard servicing procedure:
- Power off, unplug, and ground yourself before opening the chassis.
- Remove all DIMMs but one, then rerun the ePSA memory test.
- If it fails, move the same stick to a different slot and test again. Errors that follow the stick mean a dead DIMM (a replacement DDR5 module usually costs $30–$90); errors that stay with the slot mean a motherboard problem.
- Before condemning anything, load BIOS defaults — an unstable XMP/EXPO memory profile mimics hardware failure and clears the moment you drop back to JEDEC speeds.
Blink Codes When the Screen Never Turns On
When a Dell won’t even reach the F12 menu, the power or battery LED flashes a diagnostic pattern: amber flashes, a pause, then white flashes. Count them and compare:
| Amber, white | Meaning |
|---|---|
| 2,1 | CPU failure |
| 2,2 | System board / BIOS ROM failure |
| 2,3 | No memory detected |
| 2,4 | Memory/RAM failure |
| 2,5 | Invalid memory installed |
| 2,6 | System board or chipset error |
| 2,7 | LCD/display failure |
| 3,1 | RTC power failure (CMOS battery) |
| 3,2 | PCI/video card or chip failure |
| 3,3 / 3,4 | BIOS recovery image missing or invalid |
A 2,3 pattern often resolves with a simple RAM reseat — no tools required beyond a screwdriver.
Diagnostic Tools Beyond Dell’s Own
ePSA and SupportAssist are the core diagnostic tools in computer hardware for Dell machines, but computer hardware servicing often calls for third-party utilities to confirm results or stress components the pre-boot test can’t fully exercise. MemTest86 runs deeper RAM patterns from a bootable USB (four passes is the standard burn-in); CrystalDiskInfo exposes raw SMART attributes so you can watch reallocated-sector counts grow before ePSA trips a 0142; HWiNFO logs voltages and temperatures under load, catching thermal and PSU sag issues that isolated component tests miss; and OCCT applies a sustained power load that reveals a marginal PSU — the failure class pre-boot diagnostics almost never catch because they draw so little current.
FAQ
Does ePSA need Windows or a working hard drive?
No. It runs from BIOS ROM with no operating system at all — with no drive installed, the storage section simply reports nothing to test.
How long does a full diagnostic take?
The quick test runs 5–10 minutes. Thorough mode scales with installed RAM and drive capacity — plan for 30–60 minutes or more on a 32GB system.
ePSA passed but the PC still crashes — what now?
Diagnostics test components in isolation at light load. Driver bugs, thermal throttling under gaming loads, and a weak PSU all pass ePSA while still crashing Windows — that’s where in-OS logging with HWiNFO and an OCCT load test come in.
Do I need the validation code?
Only for warranty claims — Dell uses it to confirm the failure in their system, which usually skips a second diagnostic run during the support call. Screenshot or photograph the results screen either way.