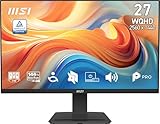
- Top Pick: msi PRO MP273Q E14 27-inch IPS 2560 x 1440 (QHD) Computer Monitor, 144Hz,Adaptive-Synch, HDMI, DP Port, VESA Mountable, Tilt, Speaker, 1ms, Black
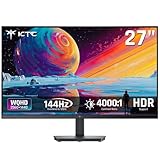
- Best Value: ASUS TUF Gaming VG27AQ3A 27 Inch 1440p 180Hz G-SYNC Gaming Monitor
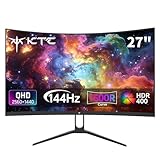
- Premium Choice: KTC H27S5C 27 Inch Curved Gaming Monitor, 1440P QHD 144Hz Monitor, HDR 400
1440p at 144Hz used to be the “sweet spot” tier that cost $400+. That’s no longer true. Panel manufacturing has gotten cheap enough that you can get a genuinely good 1440p/144Hz monitor for $180-230, and the main thing separating budget panels from premium ones now is coating quality, stand build, and how well the factory tunes the overdrive settings rather than raw specs on the box.
The catch is that “budget” in this category covers a wide range of panel quality, and the spec sheet alone won’t tell you which panels have ghosting problems, backlight bleed, or a VRR flicker issue at low frame rates. Here’s what actually matters and where it’s safe to cut corners.
As an Amazon Associate we earn from qualifying purchases at no extra cost to you.


Panel type: IPS vs VA vs TN
Almost every budget 1440p 144Hz monitor released in the last two years uses IPS, and that’s good news. A few years back budget 1440p meant TN or VA panels with real compromises. Now IPS panels have come down enough in price that TN is basically extinct at this resolution, and VA only shows up in curved ultrawide-style budget options.
IPS gives you the color accuracy and viewing angles you want for a desk monitor you’ll sit in front of for hours. The trade-off is contrast: budget IPS panels typically do 1000:1 static contrast, so blacks look more like dark gray in a dim room. VA panels do 3000:1+ contrast and look better in dark scenes, but they’re more prone to black smearing in fast motion, which is a worse problem for competitive gaming than mediocre contrast. If you mostly play shooters or anything twitchy, stick with IPS. If you’re buying one monitor for gaming and movies in a dark room, a VA panel is a legitimate alternative and often cheaper.
What you can safely cut corners on
Budget monitors save money in predictable places, and most of those places don’t actually hurt the gaming experience:
- Stand adjustability — budget stands often skip swivel or height range. Fine if you’re not sharing the desk or constantly repositioning. A $15 VESA arm fixes this later if it bothers you.
- Speakers — built-in speakers on budget monitors are universally bad. Nobody buying this tier should plan to use them.
- USB hub/ports — fewer or no USB passthrough ports. Doesn’t affect image quality at all.
- HDR label — budget monitors slap “HDR400” on the box, but with no local dimming and 300-ish nits of real brightness, it does nothing useful. Ignore HDR entirely at this price point and judge SDR picture quality instead.
What actually matters
Where budget panels differ meaningfully is response time tuning, VRR range, and factory calibration. A panel with a bad overdrive implementation will show visible overshoot (bright trailing edges around moving objects, sometimes called “inverse ghosting”) that’s worse than just leaving some blur. This is a real failure mode on cheaper models, especially ones pushed to 144Hz+ beyond what the panel comfortably handles. Reviews with pursuit camera photos (RTINGS, TFTCentral) are the only reliable way to check this before buying, since spec sheets never mention it.
VRR range matters more than people expect. Many budget monitors only support FreeSync/G-Sync Compatible from around 48Hz up, meaning if your frame rate dips below that in a demanding game, you get stutter or have to deal with the backup frame-doubling behavior, which isn’t always smooth. A wider VRR window (down to 40Hz or lower) is worth checking for if you don’t have a GPU that will consistently push 100+ fps.
| Factor | Budget tier reality | Worth paying more for? |
|---|---|---|
| Panel type | IPS standard, VA on some curved models | No, IPS at this price is already good |
| Response time tuning | Inconsistent, overshoot common | Yes, check reviews with motion photos |
| VRR range | Often 48-144Hz only | Sometimes, if your fps dips often |
| HDR | Label only, no real impact | No, ignore it under $400 |
| Stand/build | Basic tilt-only stands common | No, VESA mount is a cheap fix |
| Factory color calibration | Noticeably varies between models | Yes, affects out-of-box accuracy |
How to actually pick one
Start by browsing 1440p 144Hz monitors and sort by review count rather than price first, since a model with 3,000+ reviews has had its defect rate and panel lottery issues surfaced publicly, which newer budget releases haven’t. Check for mentions of dead pixels, backlight bleed, or stand wobble in the one and two-star reviews specifically, since that’s where real defect patterns show up rather than in the average rating.
If you’re running an older GPU (anything below an RTX 3060 or RX 6600-class card), it’s worth checking whether you’ll actually hit 144fps at 1440p in the games you play. If you’re consistently capped around 90-100fps, a cheaper 1440p 165Hz panel saves you nothing, but a 1080p 144Hz monitor from the same budget tier will look sharper in practice because the GPU isn’t the bottleneck. Don’t buy refresh rate your hardware can’t use.
For connecting a current-gen console alongside a PC, double check the HDMI version on budget models. Some cheaper panels still ship with HDMI 2.0 ports that cap at 144Hz only through DisplayPort, which matters if you’re planning to run a PS5 or Series X at higher refresh through HDMI. Looking specifically at 1440p 144Hz monitors with HDMI 2.1 avoids that problem entirely and isn’t usually a price premium anymore.