What PCPartPicker compatibility checks catch, and what they don’t
PCPartPicker is the first stop for almost anyone building a PC, and for good reason. It flags socket mismatches, RAM that won’t fit your motherboard’s supported speeds, and PSUs that are undersized for your GPU. That’s genuinely useful and saves beginners from the classic mistake of buying an AM5 CPU for an AM4 board. But the compatibility checker isn’t a guarantee of a working build, and treating it as one causes real problems.
- What PCPartPicker compatibility checks catch, and what they don’t
- The wattage calculator runs conservative, and that’s fine
- Comparing three build approaches at the same rough budget
- Mistakes the parts list won’t stop you from making
- Air vs liquid cooling: the honest version
- Using the tool as a draft, not a final answer
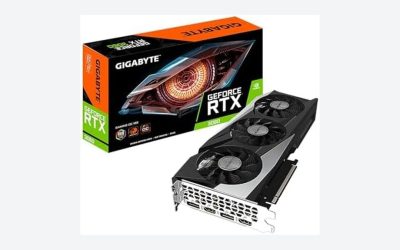
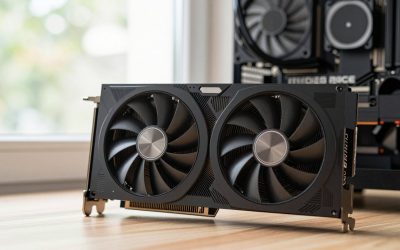
It doesn’t catch case clearance issues reliably. A 340mm GPU “fits” according to the parts list even if your case’s drive cage puts the actual limit at 310mm. It doesn’t catch CPU cooler height versus side panel clearance in smaller cases. It doesn’t know if your specific motherboard’s BIOS ships with support for your CPU’s launch microcode, which matters a lot right now with newer AMD and Intel chips landing on boards with older firmware. And it won’t tell you that your “compatible” RAM kit only hits its rated speed with manual XMP or EXPO enabling, not out of the box.
The wattage calculator runs conservative, and that’s fine
PCPartPicker’s power estimate tends to land close to real sustained draw for a typical build, but it doesn’t model transient spikes well. Modern GPUs, especially high-end ones, can spike 1.5-2x their rated TDP for milliseconds at a time. A card rated for 320W can hit 550W transient spikes. Good PSUs with proper capacitor design absorb this fine; cheap ones brown out or trip.
Practical rule: take PCPartPicker’s wattage estimate and don’t just match it, give yourself 150-200W of headroom on top, especially if you’re running a single high-end GPU. This isn’t about efficiency curve nitpicking, it’s about having margin for transients and future upgrades. If you’re shopping for a unit, browse 80 Plus Gold power supplies in the 750-850W range for most single-GPU gaming builds — that covers current mid-to-high-end cards with room to spare, and you’re not paying for capacity you’ll never touch with a 1200W unit.
Comparing three build approaches at the same rough budget
Here’s how three common strategies shake out at a similar total spend, based on current component pricing patterns. This isn’t “best build,” it’s a trade-off comparison.
| Approach | CPU/GPU balance | Typical weak point | Best for |
|---|---|---|---|
| GPU-heavy | Mid CPU, high-end GPU | Bottlenecks in CPU-bound games/esports titles | 1440p/4K single-player gaming |
| Balanced | Mid CPU, mid GPU | No standout performance tier, feels average everywhere | Mixed gaming + productivity, undecided priorities |
| CPU-heavy | High-end CPU, mid GPU | GPU-limited at higher resolutions, wasted CPU headroom | Streaming, video editing, competitive FPS at 1080p |
Most people building a gaming-first PC should lean GPU-heavy. The GPU is the component that actually determines your framerate and resolution ceiling in the games where it matters, and CPUs have had enough headroom for the last several generations that a mid-tier chip rarely bottlenecks a high-end card except in a handful of CPU-bound titles. The exception is competitive shooters at 1080p with high refresh monitors, where CPU and RAM speed matter more than people expect.
Mistakes the parts list won’t stop you from making
A few failure modes show up constantly in build logs and forum posts, and none of them trigger a PCPartPicker warning:
- Buying RAM that’s “compatible” but not on the motherboard’s QVL list. It’ll probably boot, but you may not hit rated speeds without manual tuning, and troubleshooting instability later is a pain.
- Ignoring CPU cooler socket compatibility across generations. AM4 coolers often work on AM5 with a different mounting bracket, but not always, and the parts list treats “cooler” as a generic compatible item.
- Underestimating case airflow for the cooler you picked. A 240mm AIO in a case with one intake fan will run hotter than the same AIO in a case with proper front-to-back airflow, even though both “fit.”
- Pairing a budget PSU with a power-hungry GPU because the wattage number technically clears. Clearing the number and having stable rails under load are different things.
Air vs liquid cooling: the honest version
For most CPUs below the extreme high end, a quality air cooler is genuinely fine and often the better choice. A good tower cooler handles 95% of consumer CPUs at stock or mild overclocks without issue, costs less, has nothing to leak, and has no pump to fail after three years. Liquid cooling earns its place when you’re running a high-TDP chip in a case with poor front clearance for a tall air tower, or when you want the radiator mounted somewhere a heatsink physically can’t go.
Where AIOs lose value is on mid-range CPUs in well-ventilated mid-tower cases — you’re paying $30-50 more for a couple of degrees that don’t change your clock speeds. If you’re deciding, look at CPU air coolers first for anything short of a flagship chip, and only step up to liquid if your specific case or thermal target calls for it.
Using the tool as a draft, not a final answer
Build your list in PCPartPicker, but then go read two or three recent reviews of your specific motherboard and GPU combo before buying. Check actual case dimensions against your GPU’s listed length, not just the “fits” flag. And when you’re choosing between GPUs in a similar price bracket, cross-check current pricing against a graphics card find alternatives listing, since street prices shift faster than any build tool updates. The parts list gets you 90% of the way to a safe build; the last 10% is still on you.