- Top Pick: LEVEL UP : The Complete Owner's Manual for the Acer Nitro V Gaming Laptop: Setup, Performance Optimization, and Full Mastery for First-Time Owners and Student Gamers
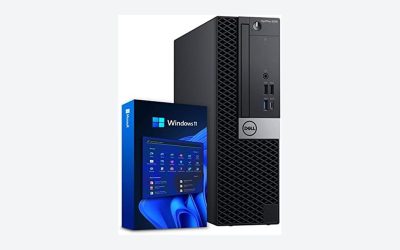
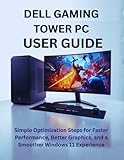
- Best Value: DELL GAMING TOWER PC USER GUIDE: Simple Optimization Steps for Faster Performance, Better Graphics, and a Smoother Windows 11 Experience
- Premium Choice: msi Raider GE68HX 16” 120Hz MiniLED UHD+ Gaming Laptop: Intel Core i9-14900HX, NVIDIA Geforce RTX 4080, 64GB DDR5, 2TB NVMe SSD, Thunderbolt 4, Cooler Boost 5, Win 11 Home: Black 14VHG-286US
Affiliate disclosure: As an Amazon Associate we earn from qualifying purchases. This post contains affiliate links — if you buy through them we may earn a small commission at no extra cost to you. This never affects our recommendations.
As an Amazon Associate we earn from qualifying purchases at no extra cost to you.



Windows 11 ships with settings optimized for general use that leave gaming performance on the table. Optimizing Windows 11 for gaming involves disabling background processes that consume CPU and RAM during gameplay, enabling performance-focused power settings, updating drivers to current versions, and adjusting visual effects that tax system resources without improving the gaming experience. These optimizations are free, reversible, and provide measurable FPS and latency improvements — especially on mid-range and budget hardware.
In a hurry? See the top-rated How to Optimize Windows 11 for Gaming deals available right now:
🛒 Check How To Optimize Windows 11 For Gaming Prices on Amazon →🛒 Best Price Today on Amazon
Prime members get fast, free shipping on everything above, plus member-only deals. New members get a 30-day free trial — cancel anytime.
Start 30-Day Prime Free Trial →See Today’s Amazon DealsStep 1: Enable High Performance Power Plan
Windows 11’s default Balanced power plan reduces CPU and GPU performance during perceived idle periods — which can include milliseconds between game frames. Switch to High Performance: Control Panel → Power Options → High Performance (show additional plans). For NVIDIA GPUs, open NVIDIA Control Panel → Manage 3D Settings → Power Management Mode → “Prefer Maximum Performance.” For AMD, AMD Radeon Software → Gaming → Global Graphics → Performance. This single change provides 5–15% FPS improvement on systems where power plan throttling was actively reducing performance.
Step 2: Disable Xbox Game Bar and Background Apps
Xbox Game Bar captures screenshots, records gameplay, and monitors system performance — useful features that consume CPU and memory during gaming. If you don’t use Game Bar features: Settings → Gaming → Xbox Game Bar → toggle Off. Also disable: Settings → Privacy & Security → Background Apps → disable apps that don’t need to run continuously (OneDrive sync, Teams, Spotify auto-start). Task Manager (Ctrl+Shift+Esc) → Startup apps tab → disable non-essential startup programs. Freeing RAM from background apps reduces game stuttering on 8–16GB systems.
Step 3: Update GPU Drivers
Outdated GPU drivers miss per-game optimizations that can provide significant FPS improvements in recently released titles. NVIDIA: GeForce Experience app → Drivers tab → Check for Updates, or manually download from nvidia.com/drivers. AMD: AMD Software: Adrenalin Edition → Software Update. Update GPU drivers monthly or before playing major new releases. Driver Game Ready releases (NVIDIA) and Adrenalin Optimized releases (AMD) often include 10–20% performance improvements for specific titles on launch week.
Step 4: Configure Windows 11 Gaming Mode
Windows Game Mode prioritizes system resources toward the active game process: Settings → Gaming → Game Mode → On. Game Mode reduces background process CPU allocation, disables Windows Update from running during gameplay, and optimizes GPU resource scheduling. Hardware-Accelerated GPU Scheduling (HAGS): Settings → System → Display → Graphics → Change default graphics settings → Hardware-accelerated GPU Scheduling → On. HAGS reduces input lag by allowing the GPU to manage its own memory rather than delegating to the CPU — most effective on NVIDIA RTX 3000+ and AMD RX 6000+.
Step 5: Optimize Visual Effects for Performance
Windows 11’s animations and transparency effects consume GPU resources that games need. Disable them: Search “Adjust the appearance and performance of Windows” → Visual Effects tab → “Adjust for best performance” (or manually uncheck all animation options). Also: Settings → Personalization → Colors → toggle off Transparency effects. Settings → Accessibility → Visual effects → toggle off Animation effects. These changes make Windows itself feel slightly less polished but return GPU and CPU cycles to game rendering.
Advanced Optimizations
Network Optimization for Online Gaming
Disable Windows Auto-Tuning for improved network latency: open Command Prompt as administrator and run: netsh int tcp set global autotuninglevel=disabled. Enable Network Throttling Index adjustment: open Registry Editor → HKEY_LOCAL_MACHINESOFTWAREMicrosoftWindows NTCurrentVersionMultimediaSystemProfile → change NetworkThrottlingIndex value to ffffffff (hex). These changes prioritize gaming network packets over background data transfers.
Storage Optimization
Enable SSD TRIM (ensures SSD maintains peak performance): Command Prompt as administrator → fsutil behavior set DisableDeleteNotify 0. Disable drive indexing on gaming drives: File Explorer → right-click game drive → Properties → uncheck “Allow files on this drive to have contents indexed.” Indexing reads from the drive continuously — disabling it on dedicated game drives removes an unnecessary I/O overhead.
Frequently Asked Questions
How much FPS improvement can Windows 11 optimization provide?
Realistic expectations: 5–20% FPS improvement from a full optimization pass on a previously unoptimized system. The power plan change alone provides 10–15% on throttling systems. Background process reduction provides 3–8% on RAM-constrained systems. GPU driver updates provide 5–15% on recently released games. Total optimization impact varies by hardware and previous system state — older systems with more background bloat see larger gains.
Is Windows 11 better or worse for gaming than Windows 10?
Windows 11 performs similarly to Windows 10 in most gaming benchmarks after optimization. Windows 11 added DirectStorage 1.2 support for faster NVMe game asset loading (beneficial on PCIe 4.0/5.0 NVMe drives) and Auto HDR for enhanced game visuals on HDR monitors. Some early Windows 11 releases showed performance regressions on AMD CPUs (the L3 cache latency issue) — this was patched. A fully updated, optimized Windows 11 system provides equal or marginally better gaming performance than Windows 10 in current testing.
Should I reinstall Windows to improve gaming performance?
A clean Windows reinstall removes years of accumulated software installations, registry entries, and background services that slow down the system. If your PC has been in use for 2+ years without reinstallation and shows gradual performance decline, a clean install is worth considering. Modern Windows 11 provides a “Reset this PC” option (Settings → System → Recovery) that reinstalls Windows cleanly while keeping your personal files. Full optimization after a clean install provides the maximum performance baseline.
Related Articles
Looking for more on this topic? Browse the hand-picked guides below — each one applies the same scoring rubric used in this review.