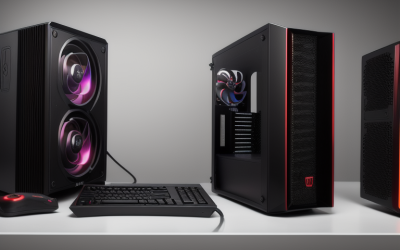
To install case fans correctly, point the front and bottom fans so they pull cool air into the case, point the rear and top fans so they push warm air out, and make sure the airflow arrow printed on each fan frame matches that direction. Then plug each fan into a motherboard header or a fan hub and set a fan curve so the speed rises with temperature instead of running at a fixed level.
A good airflow layout lowers CPU and graphics card temperatures, reduces noise, and keeps dust under control. The details change with each case design, so this guide covers general rules, step-by-step installation, and fan curve basics rather than a single universal layout. Always follow the instructions that came with your case, fans, and motherboard, since header limits and mounting hardware differ between products.
Understand Airflow Direction First
Every fan has a direction of airflow and a direction of rotation. Many fan frames have two small arrows molded into the side: one showing which way the blades turn and the other showing which way air moves. If your fans lack markings, check the fan documentation, since the two sides are not always obvious.
Intake and exhaust
An intake fan draws outside air into the case, and an exhaust fan pushes air out. A balanced build moves cool air across the CPU, graphics card, memory, and drives before it leaves. Without exhaust, hot air collects; without intake, the case has nothing to replace what leaves.
Positive and negative pressure
Slightly more intake than exhaust creates positive pressure, which tends to push air out through gaps and can help reduce dust entering through unfiltered openings. More exhaust than intake creates negative pressure, which can pull dust through every opening. Many builders prefer neutral to slightly positive pressure with filters on the intake side.
Which side is which
On many fans, air enters on the side with the exposed rotor supports and leaves on the side where the frame is open. This is a common rule of thumb rather than a guarantee, so confirm with the arrows or the manual before mounting.
Where to Place Fans
Typical gaming cases use a standard layout. Your case manual may show recommended positions for its specific design, so treat these as general guidance.
Front: intake
Front fans pull air from the front panel and send it across the components. This is the standard position for the main intake, and mesh front panels allow more airflow than solid panels.
Rear: exhaust
A rear fan near the CPU socket pushes heated air out of the case and works with the front intake to create a clear path.
Top: exhaust, or radiator position
Warm air rises, so top fans help remove heat from the upper part of the case. If you use a liquid cooler radiator at the top, follow the cooler manual for direction.
Bottom and side: situational
Bottom intake fans can feed the graphics card in some cases. Side panel fans can bring air directly to the graphics card in compatible designs, though they can disturb the main airflow path if overdone.
Step by Step Installation
Take your time, and treat the fans and headers with care. The numbered list below covers a typical install.
- Shut down the PC, switch off the power supply, and unplug the power cord. Press the power button once to discharge residual power.
- Touch bare metal on the case to discharge static before handling components.
- Remove the case panel and any dust filters or fan brackets needed to reach the mounting points.
- Check the arrows on each fan frame and decide whether it will act as intake or exhaust.
- Hold the fan against the mounting location with the airflow arrow pointing the correct way, then insert screws or rubber mounting pins. Tighten gently so the frame does not crack.
- Route the fan cable behind the motherboard tray where possible, keeping it clear of blades and other fans.
- Connect the cable to a chassis fan header or a fan hub. Use the labels in your motherboard manual.
- Replace the panels, reconnect power, and watch each fan spin during first boot.
Safety notes: never put fingers or cables near spinning blades, and avoid forcing connectors, which are keyed to fit one way.
Connectors, Headers, and Power Limits
3-pin versus 4-pin fans
A 3-pin fan is typically controlled by voltage, while a 4-pin fan uses a PWM signal for finer speed control. Many motherboard headers support both modes, but check your BIOS and manual to confirm the control setting for each header.
Splitters and hubs
A single header has a current limit, often listed in your motherboard manual. Plugging in many fans through a basic splitter can exceed it. A powered fan hub takes power from the power supply and uses one header for the speed signal, which is the safer way to run many fans.
RGB and software control
Lighting uses separate connectors from fan power. Mixing brands can lead to incompatible RGB headers, so check the connector type and voltage before connecting.
Set Up Fan Curves
A fan curve tells the fan how fast to spin at each temperature. You can usually set it in the motherboard BIOS or utility software, or in vendor software for fan hubs.
Choose the right temperature source
Case fans respond best to the CPU temperature or a motherboard sensor. Graphics card heat matters too, so some builders tie front intake fans to a combined or higher-load source. Avoid tying fans to a sensor that jumps rapidly, which makes speed swing up and down.
Build a smooth curve
Start with a low, quiet idle speed, ramp gently through normal use, and reach high speed only at high temperatures. A step or delay setting can prevent constant speed changes caused by short load spikes.
Check minimum speed and stop settings
Some fans stall at very low speeds, and some setups allow fans to stop at idle. Check your fan documentation for the minimum supported speed, and test that fans restart reliably.
| Load | Typical goal | Fan behavior |
|---|---|---|
| Idle and browsing | Quiet | Low and steady speed |
| Gaming | Cool components, moderate noise | Medium speed that rises with temperature |
| Heavy sustained load | Prevent throttling | High speed |
Match the Fan Type to the Position
Fans are usually described as airflow focused or static pressure focused, and the difference matters for where each one goes. Manufacturers describe their designs on the spec sheet, so read it before you buy.
Airflow fans for open spaces
Fans with an airflow emphasis move a lot of air when nothing blocks them, which suits mesh front panels and rear exhaust positions with little resistance.
Static pressure fans for restricted paths
Fans designed for static pressure push air through resistance, such as dense dust filters, tight front panels, heatsink fins, and radiators. If your case has a mostly solid front with narrow side vents, this type often works better on the intake side.
Size and count
Larger fans can move the same air at lower speed, which usually means less noise. Check which fan sizes your case supports at each position, and whether the mounting holes accept both common sizes. Matching fans in the same group makes the sound more uniform and the curve easier to tune.
Cable Management and Dust Control
Good airflow depends on more than fan direction. Loose cables and clogged filters can quietly undo a well planned layout.
Keep the airflow path clear
Bundle excess cable behind the motherboard tray and use the tie points in your case. Thick graphics card power cables and a bundle of drive cables right in front of an intake fan can block a surprising amount of air.
Clean filters on a schedule
Dust filters protect components, but they also restrict airflow when full. Remove and rinse or wipe them regularly, and let them dry completely before reinstalling. When you clean the fans themselves, hold the blades still so they do not spin from compressed air, which can damage bearings.
Watch for noise problems
Rattling can come from loose screws, a cable touching a blade, or a fan with worn bearings. Humming at specific speeds often means resonance with the case panel, which a small curve adjustment can avoid. Rubber mounts or anti-vibration pads can reduce vibration if your fans support them.
Before You Close the Case
- Every fan arrow matches the intended direction.
- Cables are clear of blades and secured.
- Filters are installed on intake openings.
- Fan curves are saved and applied.
- Temperatures are checked under load with a monitoring tool.
Common Mistakes
- Installing fans without checking the airflow arrows, leaving two fans fighting each other.
- Using only exhaust fans and starving the case of fresh air.
- Powering too many fans from a single motherboard header through a basic splitter.
- Setting a curve tied to a jumpy sensor, which produces constant fan noise changes.
- Skipping dust filters, then wondering why temperatures rise over time.
Related guides
- Aio Liquid Coolers For High Performance Gaming
- How To Lower Input Delay In Competitive Shooters
- Wireless Gaming Headsets Under 100 For Pc
Frequently Asked Questions
Should the rear fan be intake or exhaust?
Exhaust is the standard choice, working with front intake fans to move air across the components. Follow your case manual if it recommends a different layout. Check airflow direction with the frame arrows.
How many case fans do I need?
Many gaming cases do well with two or three intake fans and one or two exhaust fans. The right number depends on case size, mesh panels, and the heat of your components. Add fans only when temperatures or noise show a need.
Is positive pressure better?
It often helps keep dust down when intake openings are filtered. Balanced airflow matters more than exact numbers. Check your case design and adjust if you see hot spots.
Do I need software to control fans?
Not always, since many motherboards include fan control in the BIOS. Software can be helpful for more complex setups or fan hubs. Follow the instructions from your motherboard or fan manufacturer.