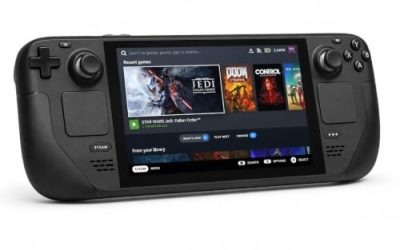
A new handheld usually arrives with better sticks, a brighter screen and a faster chip, but it also arrives empty. The library you spent months curating, the BIOS folder you finally got right, the per-game overrides and the frontend layout you tuned until it felt like yours all live on the old device. The good news is that almost none of that work is locked to the hardware. An emulator setup is mostly a tree of ordinary files, and ordinary files copy.
This guide covers the full move: not just save files, and not a bit-for-bit card image, but the whole working setup, including ROM folders, BIOS files, configuration files, core overrides, shaders, bezels and frontend data. It also covers the parts that genuinely do not transfer, so you can plan for them instead of discovering them mid-game.
As an Amazon Associate, we earn from qualifying purchases.
Quick Answer
Most of a retro handheld setup moves with the card: ROM folders, BIOS files, saves, save states, RetroArch configs, core overrides, shaders and frontend data are plain files. Copy the whole folder tree to the new device, reinstall the same frontend or RetroArch build, then fix paths, scaling and per-game overrides that were tuned for the old screen.
Know What You Are Actually Moving
Before copying anything, it helps to see your setup as layers, because each layer moves differently.
The library layer is your ROM folders, disc images and the BIOS folder. This is the bulk of the data and the easiest part: these files are identical on every device, and a BIOS file that works on the old handheld works on the new one.
The progress layer is battery saves, save states and memory card files. These live inside or beside your ROM folders and inside each emulator’s save directory. They are portable, but their locations differ between standalone emulators and RetroArch cores, so they are the layer most often left behind by accident.
The tuning layer is configuration: RetroArch’s main config file, per-core and per-game override files, controller mappings, shader presets, bezel overlays and video settings. Most of it is text or small data files that copy cleanly. The catch is that some of it describes the old hardware, such as the screen’s aspect ratio or a shader chain chosen for a weaker chip.
The presentation layer is your frontend: the theme, scraped box art, gamelists and collections in a Linux frontend, or the launcher database and artwork cache on Android. Artwork and gamelist files travel well. The frontend application itself does not; you install a fresh copy on the new device and feed it the data.
The Four-Phase Move
Phase 1: Inventory the Old Device
Plug the old card into a computer and look at the folder structure before touching it. Note where the ROMs, BIOS files, saves and config folders sit, and which frontend or emulator builds you run. Write down the RetroArch version and any standalone emulator versions, because matching versions on the new device avoids config format surprises. If your old device stores saves inside an Android app’s private storage rather than on the card, open each standalone emulator and use its export or backup option now, while the old device still works.
Phase 2: Copy the Whole Tree, Not Just the Games
Copy the entire folder structure to a staging drive or straight to the new card, keeping the same folder names. Copying the whole tree, including folders you do not recognize, is safer than cherry-picking, because override files, shader presets and frontend metadata often live in places that do not look important. Keep the old card untouched until the new setup is verified; it is your rollback plan.
Phase 3: Rebuild the Shell on the New Device
Install the frontend and emulators fresh on the new handheld, then point them at the copied folders. On Linux firmware this usually means flashing the firmware image to the new card first and then copying your folders into the matching locations. On Android it means installing the same launcher and emulator apps, granting storage permissions, and setting the ROM and BIOS directories to the copied ones. Launch RetroArch once before copying its config over, so it creates its default directory structure; then close it and replace the config, overrides and shaders with yours.
Phase 4: Verify System by System
Open one game per system and check three things: that the game launches, that your save or save state loads, and that the picture looks right. Fix problems while they are still one system deep. Only wipe or repurpose the old card after every system you care about has passed this check.
Crossing Between Android and Linux
Moving within the same family is mostly a copy job. Linux to Linux keeps the same frontend conventions, and Android to Android keeps the same app data layout, though you still reinstall the apps themselves.
Crossing over takes one extra pass. RetroArch is the bridge: its ROM, BIOS, save, config and shader folders are structured the same way on both platforms, so a RetroArch-centered setup crosses almost intact. Standalone emulators are the friction. An Android standalone app stores settings inside the app, not in your folder tree, so moving to Linux means recreating those settings inside RetroArch cores or the Linux equivalent, even though the games and saves themselves still copy. Going the other way, expect to set BIOS and save directories by hand inside each Android app the first time you open it.
What Does Not Survive the Move
Some things should be rebuilt rather than copied, and knowing them in advance saves troubleshooting later.
Absolute paths inside configs and gamelists point at the old card’s mount location or drive letter. If a frontend shows an empty library after the move, a stale path is the first suspect.
Per-device scaling and integer-scale settings were calculated for the old screen. A handheld with a different resolution or aspect ratio needs these revisited, or games will sit in the wrong part of the panel.
Shader chains tuned for a weak chip may run badly on a different GPU, and the reverse also happens: a heavier, better-looking chain that the old device could not handle is now worth trying.
Android app data protected by scoped storage cannot be lifted off the card as files. Anything a standalone app never exported stays behind, which is why Phase 1 insists on exporting from inside those apps.
Gear That Makes the Move Painless
A card reader and a staging drive turn a fiddly evening into a simple copy. These are the pieces worth having on the desk.
UGREEN Card Reader — A USB 3.0 reader that takes SD and microSD cards in separate slots, so an old card and a new card can sit side by side during the copy. UHS-I speeds keep a full library transfer from dragging.
SanDisk MobileMate — A compact USB 3.0 microSD reader that reads and writes at UHS-I speeds. Small enough to live in the handheld’s carry case, and ideal when the whole job is one card to another.
Samsung PRO Plus 256GB — A microSDXC card with UHS-I, U3 and V30 ratings and an A2 app rating. A strong destination card for the new device, with fast random access that frontends feel when loading artwork.
SanDisk Extreme 256GB — A microSDXC card rated U3 and V30 with A2 app performance. Big enough for a large curated library with room for save states and scraped media, and fast enough that verification passes stay quick.
Samsung T7 1TB — A portable SSD on USB 3.2 Gen 2 with read speeds up to 1,050 MB/s. Use it as the staging drive: copy the old setup onto it, and the new device can be rebuilt from it even if the first attempt goes wrong.
How to Choose Your Copy Method
Choose based on how different the two devices are. If the new handheld runs the same firmware family as the old one, a direct card-to-card folder copy through a reader is fastest and keeps everything. If you are crossing between Android and Linux, stage everything on a drive first, because you will copy in stages: library and BIOS first, then saves, then configs, checking as you go. If your old card is small and the new one is much larger, copy files rather than cloning an image, so the new card’s extra space is usable straight away instead of sitting in an unexpanded partition.
Who Should Skip the Full Migration
Skip it if your old setup is a mess you tolerate rather than a setup you like; a new device is the best excuse for a clean library. Skip it if you only play a handful of games, because moving five ROMs and their saves takes minutes by hand. And skip the config layer entirely if the new screen is a very different shape from the old one, since rebuilding video settings from scratch is faster than untangling inherited ones.
Frequently Asked Questions
Can I just swap the old card into the new handheld?
Sometimes, on closely related Linux devices from the same family, but it is the exception. Firmware expects specific partition layouts and device-specific files, and Android devices keep apps and permissions on internal storage. A folder copy into a fresh install is slower but far more predictable.
Will my save states work on the new device?
Usually, provided the same core and a similar core version loads them. Save states are more fragile than battery saves, because they snapshot the emulator’s internal state. Keep the battery save as your safety net, and expect a few states from very old core versions to refuse to load.
Do I need to re-scrape all my box art?
No. Scraped artwork and gamelist files are part of the presentation layer and copy with the folder tree. As long as the new frontend finds the same folder names and file paths, it reuses the existing art instead of scraping again.
What should I do with the old handheld afterward?
Keep it as a backup until the new setup has survived a few weeks of real play. After that, it makes a good dedicated machine for one system, a loaner for family, or a test bed for firmware updates you do not want to risk on your main device.
Final Verdict
Moving a full emulator setup is a copy job with a short rebuilding list, not a fresh start. The library, BIOS files, saves, configs and frontend data all travel as ordinary files; only the apps, the absolute paths and the settings that described the old screen need attention. Work in phases, keep the old card untouched until the new device passes a per-system check, and the upgrade keeps everything you built.
Product and ASIN Reference
| Product | ASIN |
|---|---|
| UGREEN Card Reader | B0779V61XB |
| SanDisk MobileMate | B07G5JV2B5 |
| Samsung PRO Plus 256GB | B0C1PPWTWT |
| SanDisk Extreme 256GB | B09X7CRKRZ |
| Samsung T7 1TB | B0874XN4D8 |