- Top Pick: NVIDIA Shield TV Pro
- Runner-up: Samsung T7 Portable SSD 1TB
- Also consider: Sabrent 4-Port USB 3.0 Hub (HB-UM43)
Most streaming boxes treat emulation as an afterthought, but the NVIDIA Shield TV was built with a game processor, real USB ports and a wired network jack — which still makes it the easiest Android TV device to turn into a retro console. Build around the Pro model.
As an Amazon Associate, we earn from qualifying purchases.
This guide is Shield-specific throughout: installing RetroArch, downloading cores, setting up USB storage, adding your own game files, pairing controllers, and an honest account of which generations the Tegra X1+ handles well. Everything assumes games and BIOS files you dumped from your own media.
This article contains affiliate links, and we may earn a commission when you buy through them at no extra cost to you.
Quick Answer
Install RetroArch from the Play Store on your Shield TV Pro, download the cores you need inside the app, point it at game files you dumped yourself on a USB drive, and pair a Bluetooth controller. The Tegra X1+ covers everything up to PlayStation and Nintendo 64 comfortably, PSP well, and some GameCube.
Why the Shield Still Earns Its Place
Two Shield models share the Tegra X1+ name, and they are not equal here. The Pro carries 3 GB of RAM, 16 GB of storage and two full-size USB 3.0 ports. The smaller tube-shaped Shield TV drops to 2 GB of RAM and 8 GB of storage, loses the USB ports and expands only via microSD. Emulators notice the missing RAM on heavier systems, and storage on the tube is a workaround from the start. Buying for emulation, buy the Pro.
The rest of the Pro’s spec sheet suits the job: Gigabit Ethernet, HDMI 2.0b output, Bluetooth 5.0 for controllers, and an Android TV platform NVIDIA has kept updated far longer than rival boxes — which matters, because emulator apps target current Android.
Step 1: Install RetroArch and Download Its Cores
RetroArch is free on the Google Play Store and installs like any other TV app. Open it once and let its first-run setup finish. Inside, the Main Menu leads to the Online Updater, and the key item is the Core Downloader: cores are the actual emulators, and RetroArch is a shell until you fetch them.
A sensible starter set covers most libraries: Nestopia UE or Mesen for NES, Snes9x for Super Nintendo, Genesis Plus GX for Sega’s machines, mGBA for Game Boy Advance, PCSX ReARMed for PlayStation and Mupen64Plus-Next for Nintendo 64. Download a core, load one of your own game files with it, then move on. Refresh the controller profiles in the same updater, and set a hotkey combination for opening the RetroArch menu in game — the Shield remote will not do it for you.
Step 2: Storage, Set Up Before the Library Grows
Sixteen gigabytes sounds adequate until disc-based games arrive, and part is already the system’s. The Pro’s USB ports are the answer, in two forms. As removable storage, a drive stays readable by a PC — the easy place to copy game files across — and RetroArch reads games from it directly. As adopted storage, the Shield formats and encrypts the drive as extra internal storage: apps and data can live on it, but it becomes tied to that Shield and unreadable elsewhere.
The practical landing spot: adopt a fast USB SSD so apps, cores and saves never squeeze the built-in storage, and keep game files on the same drive or a network share. An SSD is the comfortable choice for it, and NVIDIA recommends fast drives for this role.
Step 3: Add Your Own Games and BIOS Files
Copy your game files into a clearly named folder per system. In RetroArch, use Import Content and Scan Directory on each folder: recognised games land in tidy playlists named by system, and the couch experience becomes browsing titles, not file paths. A file that fails a scan can still be launched via Load Content — usually the file is fine and only the database entry is missing.
Some cores need BIOS files dumped from your own consoles — PlayStation cores are the common case. Those files belong in the RetroArch system folder, and each core’s information screen lists which files it expects. Check it before assuming a game is broken; a missing BIOS file is the most common cause of a black screen.
Step 4: Pair a Controller You Actually Want to Play On
The bundled Shield remote is a streaming remote, not a gamepad, so a controller is not an accessory here — it is the input device. Pairing happens in the Shield’s settings under Remotes and Accessories: put the pad in pairing mode, add it as a Bluetooth accessory, and every emulator sees it. Xbox Wireless and 8BitDo pads are the well-trodden paths, and the Pro’s USB ports also accept wired controllers and dongles.
Most modern pads are recognised by the autoconfig profiles from Step 1. Confirm your hotkey combination opens the menu, and save a core override only when a system needs a different layout — Nintendo 64’s C-buttons are the usual candidate. Finally, enable game mode on the TV’s HDMI input; picture processing delay otherwise undoes RetroArch’s low-latency settings.
What the Tegra X1+ Can Honestly Play
The comfort zone. Everything from the NES and Master System through the Super Nintendo, Genesis, Game Boy Advance and original PlayStation runs at full speed, with headroom for shaders and modest run-ahead. Arcade cores match that for the classic eras — most of the retro library most people mean.
The working tier. Nintendo 64 is broadly good through Mupen64Plus-Next or the standalone app below, with a minority of titles wanting per-game settings. PSP in PPSSPP is a genuine strength: most of the library plays well, and demanding titles respond to a lower rendering resolution. Dreamcast through Redream or Flycast covers much of its library convincingly. Saturn is the patchiest here and stays title-dependent.
The bonus tier, stated plainly. GameCube and Wii in Dolphin are real but partial: a share of the library plays at native resolution, and heavier games will not hold full speed however settings are arranged. PlayStation 2 is where honest advice stops — no well-supported route exists on this hardware. If those systems are the point, the streaming route below, or a PC, is the answer.
Standalone Apps Worth Adding Beside RetroArch
A few standalone apps officially published for Android TV earn their place. PPSSPP’s standalone app gives PSP a simpler settings surface than the core. Dolphin has an official Android build and is the only sensible GameCube and Wii route here. Mupen64Plus FZ remains a Nintendo 64 favourite, with per-game profiles the core handles less gracefully. Redream is a polished Dreamcast option, and DuckStation an excellent PlayStation alternative.
One honest warning: the Android TV app catalogue changes. Apps are updated, moved to developers’ own sites or withdrawn, so treat any store listing as current only when you see it, and take sideloaded APKs only from official project pages.
A Frontend for the Couch
Once several emulator apps coexist, a frontend turns the collection into one library. Daijisho is the popular choice: free, organised by platform, designed for D-pad navigation, and able to launch games into RetroArch or standalone apps alike. LaunchBox for Android is the polished alternative. Point it at the Step 3 folders, assign each platform its emulator, and the Shield feels like a console.
The Shield’s Second Job: Streaming From Your PC
The Shield is also one of the best Moonlight clients available, which quietly solves its hardware ceiling. With Sunshine on a gaming PC, it streams that PC’s emulators to the TV, so heavy systems play in the living room while the PC does the work; our separate guide to streaming emulators to a TV covers that pairing in full.
Gear That Completes a Shield Setup
NVIDIA Shield TV Pro

The box this guide is built on, and the only streamer whose processor and ports suit this job.
Specs:
– Processor: NVIDIA Tegra X1+ with 256-core GPU
– Memory: 3 GB RAM, 16 GB storage
– Ports: 2x USB 3.0 Type-A, Gigabit Ethernet, HDMI 2.0b
– Wireless: Wi-Fi 802.11ac, Bluetooth 5.0
– Model: 945-12897-2500-101
Samsung T7 Portable SSD 1TB

Adopted storage that behaves like internal storage: fast for disc images, small enough to hide behind the box.
Specs:
– Capacity: 1 TB (MU-PC1T0T/AM)
– Interface: USB 3.2 Gen 2, USB-C
– Speeds: Up to 1,050 MB/s read and 1,000 MB/s write as stated by Samsung
– Security: AES 256-bit hardware encryption
– Size: 3.3 x 2.2 x 0.3 inches, 2.08 ounces
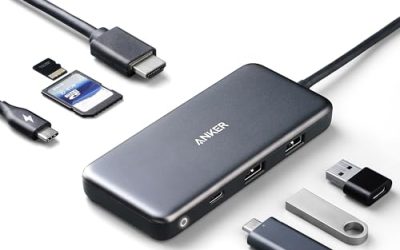
Sabrent 4-Port USB 3.0 Hub (HB-UM43)

Turns the Pro’s second port into room for a keyboard, a dongle and a spare drive, without unplugging the SSD.
Specs:
– Ports: 4x USB 3.0 Type-A
– Speed: Up to 5 Gbps shared
– Switches: Individual power switch and LED per port
– Cable: Built-in 2 ft cable
– Power: Bus-powered, no adapter included
8BitDo Pro 2 Bluetooth Controller
The retro-shaped pick: a proper D-pad for the 16-bit eras, twin sticks for Nintendo 64 and PSP.
Specs:
– Connectivity: Bluetooth, USB-C wired
– Sticks: Hall effect joysticks
– Extras: 2 pro back paddle buttons, motion controls, rumble
– Battery: 1,000 mAh rechargeable, up to 20 hours stated
– Compatibility: Android, Switch, Windows, macOS, Steam Deck
Xbox Wireless Controller, Carbon Black

The modern-layout pick, and the pad Moonlight sessions expect: pair it over Bluetooth or plug it into USB.
Specs:
– Model: QAT-00001
– Connectivity: Bluetooth, USB-C wired
– Controls: Hybrid D-pad, Share button, textured grip
– Audio: 3.5 mm headset jack
– Power: 2 AA batteries, up to 40 hours as stated by Microsoft
How to Choose
Choose the Pro over the tube if buying for this purpose: the extra RAM, double storage and USB ports remove the three frictions you would otherwise work around weekly. Choose adopted SSD storage if the Shield is a permanent fixture, removable storage only if the drive must shuttle to a PC often. Choose RetroArch alone if your library stops at PlayStation; add standalone apps when Nintendo 64, PSP or Dreamcast become regulars. Choose your controller by era: a D-pad-led pad for the cartridge generations, a twin-stick pad if Nintendo 64 and streaming share your evenings.
Who Should Skip
Skip the Shield if PlayStation 2, GameCube at raised resolutions or anything newer is the goal — a mini PC or a streamed desktop does that job honestly and this box does not. Skip it if you already own a capable Android handheld and a dock. And skip the tube for emulation if a Pro is available; its missing ports turn simple steps into projects.
FAQ
Is emulation on the Shield TV legal?
The emulators named here are legal software, distributed through the Play Store and their official project pages. Playing games and using BIOS files you dumped from your own discs, cartridges and consoles is the use they are built for. Downloading game files you do not own is a different matter, and this guide points to no game sources.
Does the regular Shield TV tube work for emulation?
For the cartridge eras and PlayStation, yes, with microSD storage and a Bluetooth controller. Its 2 GB of RAM and missing USB ports make Nintendo 64 and PSP less comfortable and storage clumsier, so it is a make-do option, not the recommendation.
Why do my PlayStation games show a black screen?
Almost always a missing BIOS file. Open the core’s information screen in RetroArch; it lists the exact files that core expects in the system folder. Add the files dumped from your own console, restart the core, and the same game will usually boot.
Final Verdict
A Shield TV Pro, RetroArch with a starter set of cores, an adopted SSD and one good controller make the most convincing retro console a streaming box can become — no sideloading, and an honest ceiling at the PSP and Dreamcast tier, with GameCube as a bonus and streaming covering the rest.