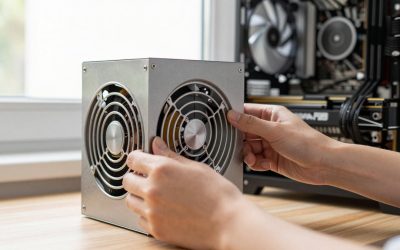
The fastest way to a clean gaming PC is to plan the route before you plug anything in: route power and data cables behind the motherboard tray, secure them with velcro straps at the case’s tie-down points, and keep every cable away from fans and the front of the GPU. Good cable management is mostly about airflow and access, and a tidy look follows from that.
- Safety First
- Quick Reference: Problem, Cause, Fix
- Step 1: Choose a Case With Real Routing Space
- Step 2: Do a Dry Fit Before Final Assembly
- Step 3: Route Behind the Motherboard Tray
- Step 4: Ties, Velcro and Combs
- Step 5: Handle the Visible Cables
- Step 6: Support the GPU
- Step 7: Protect Airflow
- Step 8: Front-Panel and Small Cables
- Step 9: Test Before Closing Up
- Frequently Asked Questions
Safety First
- Shut down, switch the power supply off at the rear switch and unplug the power cable before touching any cable inside the case.
- Never open a power supply unit. Cable work happens on the outside of it, at the modular ports and connectors.
- Use only the cables made for your power supply. Modular cable pinouts are not interchangeable between brands or even between series, and mismatched cables can damage components. Follow the power supply maker’s guidance.
- For graphics cards using the 12VHPWR or 12V-2×6 connector, seat the plug fully and avoid sharp bends right at the connector, as the GPU and PSU makers advise. If you see melted plastic or heat discoloration, stop using the system and contact the maker.
Quick Reference: Problem, Cause, Fix
| Problem | Common cause | Fix |
|---|---|---|
| Side panel will not close | Cable bundle too thick behind the tray | Re-route in flatter layers; remove unused cables |
| Cable sags in front of the GPU | No tie-down point used | Anchor with velcro to a case loop |
| Fan clicking | Cable touching blades | Move cable away and tie it down |
| Front panel header will not fit | Wrong orientation or pin shift | Check the motherboard manual diagram |
| Rear cables bulge | Excess length coiled behind the tray | Use shorter cables or bundle neatly in the PSU shroud |
| GPU slot sags | Heavy card with no support | Use the case’s GPU bracket or a support stand |
Step 1: Choose a Case With Real Routing Space
Many mid-tower cases from NZXT, Fractal Design, Lian Li, Corsair and others advertise rear space behind the motherboard tray, cutouts with grommets and built-in velcro straps. The maker’s specification pages list the rear clearance in millimeters. A larger gap makes routing much easier, so check that figure before you buy, especially for builds with many RGB or fan cables.
Step 2: Do a Dry Fit Before Final Assembly
Lay out the cables you actually need. A typical gaming build uses:
- The 24-pin motherboard power cable.
- The CPU power cable, 8-pin or 4+4-pin EPS, to the top of the motherboard.
- One or more PCIe power cables, or a 12VHPWR / 12V-2×6 cable, for the graphics card.
- SATA power if you use drives, plus the SATA data cables.
- Front panel and USB headers.
- Fan, pump and RGB cables.
Leave out modular cables you do not need. Fewer cables mean less clutter and better airflow.
Step 3: Route Behind the Motherboard Tray
- Install the power supply with its modular ports facing a direction that matches your case layout. Most cases route cables out of the PSU shroud toward the rear.
- Run the 24-pin cable through the nearest cutout, then flatten and straighten it before plugging it in.
- Route the CPU power cable through the top-left cutout near the CPU, usually closest to the connector.
- Route the GPU power cable through the cutout closest to the graphics card slot.
- Keep cable groups together: power with power, fan cables with fan cables, front-panel wiring separately.
- Secure bundles with velcro straps to the tie-down points. Do not overtighten.
Step 4: Ties, Velcro and Combs
| Method | Strength | Limit |
|---|---|---|
| Velcro straps | Reusable, gentle on cable insulation | Bulkier look |
| Zip ties | Tight and low-profile | Hard to remove; trim ends flush so they do not scratch |
| Cable combs | Keeps sleeved cables parallel and neat | Only for visible runs |
| Cable clips | Hold a single cable to a surface | Need a suitable mounting spot |
Do not crush cables with ties, and avoid pulling tightly on a connector where it plugs in. Cable strain can loosen the connection over time.
Step 5: Handle the Visible Cables
In a tempered glass case, the 24-pin, CPU 8-pin and GPU cables are often the ones everyone sees. Options for tidying them include:
- Sleeved extension cables: Aftermarket sets for the 24-pin, CPU and GPU connectors add colored sleeving that looks tidier. Buy extensions made for your specific power supply brand, or check the extension maker’s compatibility list, and follow the instructions for your connector type.
- Cable combs: They keep individual wires in neat parallel lines.
- Routing through the PSU shroud: Hiding excess length under the shroud keeps the visible area clean.
Be careful with extension cables on high-power GPU connectors. Poor extensions can add resistance and are a known concern, so follow the GPU and PSU maker’s advice about third-party cables.
Step 6: Support the GPU
Modern graphics cards are heavy and can sag in the PCIe slot. Many cases include a bracket, and support stands are sold separately. Supporting the card also takes strain off the power cable. Set any support gently so it does not push the card out of the slot.
Step 7: Protect Airflow
- Keep cables out of intake paths in front of fans.
- Do not block the rear or top exhaust.
- Route AIO radiator tubing so it does not rub against fan blades.
- Leave a small amount of slack in fan cables so they do not tug on headers.
- If you add many fans, consider daisy-chain or fan hub options the cooler or case maker supports.
Step 8: Front-Panel and Small Cables
Front-panel headers are small and easy to get wrong. Use the motherboard manual’s diagram, since pin layouts differ between models. Plug the front USB 3.0 header (a wide connector) and USB-C header as the manual shows; forcing a connector in the wrong orientation can bend pins. Bundle these into a single neat run along the bottom edge of the board.
Step 9: Test Before Closing Up
- Reconnect power, power on and watch that all fans spin.
- Confirm the system boots to BIOS and shows all drives and memory.
- Look for cable contact on fan blades before closing the side panel.
- Close the panels and make sure they sit flat without bulging.
Frequently Asked Questions
Does cable management improve cooling?
It can help by clearing the air path, but the effect is usually modest in a well-ventilated case. The larger benefit is easier maintenance and preventing cables from touching fans.
Are sleeved extension cables worth it?
They are mostly cosmetic and suit builds with a glass side panel. Use extensions made for your power supply and follow the maker’s guidance, especially for the graphics card connector.
How do I hide the 24-pin cable?
Route it through the nearest cutout behind the tray and flatten it. Secure it with a strap near the connector so it does not pull on the board.
Velcro or zip ties?
Velcro is reusable and gentler on cables, so it suits a build you will change. Zip ties give a tighter, cleaner look but are harder to undo.
Can I bend the GPU power cable sharply?
Avoid sharp bends right at the connector. For 12VHPWR and 12V-2×6 cables, follow the GPU and PSU maker’s guidance on bend distance, and stop using the system if the plug shows heat damage.
What if the side panel will not close?
Remove cables you do not use, flatten bundles and move thick runs to a deeper part of the rear space. If the case has a very shallow rear gap, consider shorter cables or a different case.