DOSBox recreates a complete DOS-era PC inside a window: the command prompt, the Sound Blaster, the graphics and memory model your old games expect. Getting a game running is rarely hard, but the first session usually stalls in the same three places — which build to install, how mounting a folder works, and why a game runs far too fast or slow once it starts. All three are documented mechanics of the program, and laid out in order the setup takes minutes.
As an Amazon Associate, we earn from qualifying purchases.
This guide follows the DOSBox project’s own wiki and manuals: the build choice first, then the mount workflow for folders, floppies and CD games, cycles explained honestly, the Sound Blaster defaults that end most sound problems before they start, and the conf file that saves your setup permanently. Every game discussed is a copy you already own.
This article contains affiliate links, and we may earn a commission if you buy through them, at no extra cost to you.
Quick Answer
Install DOSBox Staging, create one folder for all your DOS games, and start the program. Type MOUNT C followed by the folder’s path, then C: and the game’s EXE name to play. Leave cycles on auto and sound on the default Sound Blaster 16, mount CD images with IMGMOUNT, and save the mount lines in the conf file’s autoexec section.
Step 1: Choose Your Build Before Anything Else
Three builds share the DOSBox name, and they are not equally current. The original from dosbox.com is the one most old tutorials describe, but its newest release, version 0.74-3, dates to June 2019 and was published as a security release for the 0.74 line. It still runs the classic library well, yet development has moved to the forks — which use the same configuration concepts this guide covers.
DOSBox Staging is a continuation of the original codebase aimed squarely at games: modern libraries, sensible defaults, pixel-perfect output modes, and integrated MT-32 and General MIDI soundfont support that the original passes off to your operating system. It is actively maintained and is the build this guide assumes.
DOSBox-X aims wider: DOS applications, Windows 3.x and 9x installations, extra machine types such as PC-98, more sound hardware, save states and a menu bar. That breadth is useful, but it means more settings between you and a running game. Pick X when you need something on its list.
Step 2: Put Every Game in One Folder
Create a single folder on your real drive, such as C:\DOSGAMES, and give each game a subfolder with a short name of eight characters or fewer, the way DOS liked them. One root folder matters because of how mounting works: DOSBox treats it as an entire DOS hard drive, every subfolder a directory on that drive.
If your games are still on physical media, copy the files off first rather than playing from the disc: a copied folder cannot be scratched, and installs run faster. If a game refuses to save or drops out at launch, clearing the read-only flag on its files is the wiki’s first fix.
Step 3: Mount the Folder and Run the Game
Mounting is the one idea DOSBox insists you learn, and it is simple: a real folder becomes a drive letter inside the emulator. At the Z:> prompt, type:
MOUNT C C:\DOSGAMES
DOSBox answers that drive C is mounted as that directory. Type C: to move onto it, CD plus a folder name to enter it, then the game’s executable — usually an .EXE, sometimes a .BAT or .COM on older titles. That is the entire workflow; every other step hangs off it.
A folder of floppy files works the same way: MOUNT A C:\FLOPPIES -t floppy presents it as drive A, which installers that ask for disk swaps expect. Dragging a game’s EXE onto the DOSBox shortcut also works on Windows, but learn the typed version first — it teaches you the drive letters you need when something goes wrong.
Step 4: CD Games Need a Mounted Disc or an Image
Late DOS games shipped on CD-ROM and check for the disc while they run, so the folder mount alone is not enough. With an optical drive, mount the real disc:
MOUNT D E:\ -t cdrom
Replace E with your drive’s letter. The word cdrom must stay lowercase, and DOSBox confirms with an “MSCDEX installed” message — MSCDEX being the DOS CD-ROM driver, recreated inside the emulator. Most people instead image their disc once and mount the file:
IMGMOUNT D C:\DOSGAMES\GAME.ISO -t iso
One honest warning: a plain ISO holds only the data track, so games that play music off the disc as CD audio tracks will run silently. Image those discs in BIN/CUE format instead, which keeps the audio tracks, and point IMGMOUNT at the .cue file. Install from the mounted disc onto drive C, then keep both mount lines together — the installed game still wants its disc.
Step 5: Cycles, Explained Honestly
Cycles are how many emulated CPU instructions DOSBox attempts each millisecond, and this one setting decides whether a game feels right. Too few and everything crawls; too many and a game written for a slow machine races, or sound starts to skip because your real CPU cannot keep up. More is not better — correct is better.
The default, cycles=auto, is smarter than it looks. The manual describes it as running real-mode games at a fixed 3,000 cycles — roughly an early nineties pace — and switching protected-mode games, most mid-nineties titles onward, to max, meaning as fast as your hardware allows. Leave auto alone for most of a library.
Reach for a fixed value when a game is speed-sensitive: some older titles tie gameplay directly to CPU speed and become unplayable on max. Set something like cycles=fixed 5000 in the conf file, or adjust live with Ctrl+F11 and Ctrl+F12. If sound crackles after you raise cycles, you have passed what your machine can deliver — back down.
Step 6: Sound Works If You Accept the Defaults
Sound problems almost always come from telling a game’s setup program something different from what DOSBox presents. By default that is a Sound Blaster 16 at the era’s standard settings: base address 220, IRQ 7, DMA 1 and high DMA 5 — the values virtually every DOS setup program suggests on its own. Choose Sound Blaster 16 in the game’s setup, accept its defaults, and effects will simply work.
Music is a separate choice in most setup programs. AdLib and Sound Blaster FM music are generated inside DOSBox itself. Games offering General MIDI or Roland MT-32 music are where the builds differ: the original passes MIDI data through to your operating system, while Staging integrates MT-32 emulation and a soundfont player, and DOSBox-X adds further sound hardware. If a favourite game lists MT-32 music, that alone justifies Staging.
Step 7: Save the Whole Setup in the Conf File
Everything above becomes permanent in the plain-text conf file, which on Windows lives in your user profile’s DOSBox folder — the Start menu’s Edit Configuration shortcut opens it. Its final section, [autoexec], runs at every startup, like the old AUTOEXEC.BAT:
[autoexec]

MOUNT C C:\DOSGAMES

IMGMOUNT D C:\DOSGAMES\GAME.CUE -t iso

C:
Save, relaunch, and DOSBox boots with drive and disc mounted. Games that need unusual cycles or a different machine type get their own conf file copy, launched through a shortcut that points DOSBox at it with the -conf option, so one stubborn title never disturbs the library-wide settings. The [sdl] fullscreen option, or Alt+Enter, handles full-screen play, and aspect correction keeps 320×200 games at their intended proportions.
Hardware That Makes the Job Easier
LG GP65NB60 External DVD Writer Drive

The straightforward way to read a shelf of DOS CD games on a PC with no optical drive — mount the disc, or image it once and retire it.
- Format: External USB CD/DVD reader and writer
- Interface: USB 2.0, works in USB 3.0 ports
- Speeds: Up to 8x DVD write, 24x CD write
- Extras: M-DISC support; slim 14 mm body
Chuanganzhuo 3.5 Inch USB Floppy Disk Drive
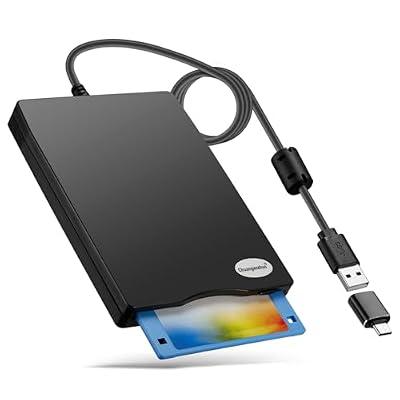
For games that only exist on old 3.5 inch floppies: copy the files into your games folder once, and the disks go back in the box.
- Media: 3.5 inch floppy disks, 1.44 MB format
- Interface: USB, Type A and Type C connectors
- Compatibility: Windows 11 through XP per the listing; not for Mac or Chrome devices
- Model: CAZED-006
Samsung T7 Portable SSD 1TB

A DOS library is small, but disc images add up. A fast portable drive keeps the whole collection in one movable place.
- Capacity: 1TB (model MU-PC1T0T/AM)
- Interface: USB 3.2 Gen 2 over USB-C
Keychron V1 Wired Mechanical Keyboard

DOS games are keyboard games, and a board with proper function keys beats a flat laptop keyboard for long sessions.
- Layout: 75 percent, 82 keys, wired
- Switches: Keychron K Pro Brown, hot-swappable
- Programmability: QMK and VIA macros and remapping
- Keycaps: Double-shot PBT; Mac and Windows sets included
8BitDo Pro 2 Bluetooth Controller
Flight sims and platformers of the era expected a joystick, and DOSBox maps modern pads through its joystick emulation.
- Connection: Bluetooth and wired USB-C
- Sticks: Hall Effect analog sticks (current version)
- Extras: Two remappable back buttons; 8BitDo Ultimate Software profiles
How to Choose
Choose Staging if the goal is playing DOS games with the least configuration: modern defaults, clean output options and built-in MT-32 support cover most libraries end to end. Choose DOSBox-X if your interests run past games into DOS applications, Windows 3.x or 9x installs, PC-98 software or unusual sound hardware — accepting a denser settings file as the price. Keep the original 0.74-3 only when an old guide or frontend assumes it. Either way, the workflow here transfers unchanged.
Who Should Skip
Skip DOSBox if your games came from a storefront that packages them: those releases usually bundle a preconfigured DOSBox, and your own copy duplicates their work. Skip it, too, if your target is an early Windows game rather than a DOS game — a different problem, handled by DOSBox-X’s Windows support or by other tools entirely. And if your collection is a handful of famous titles with modern source ports or remasters, those native versions serve you better.
FAQ
Do I need to install DOS itself first?
No. DOSBox is a self-contained recreation of a DOS PC, command shell included. There is no separate DOS installation step — install the emulator, mount a folder, run your games.
Why does my game run absurdly fast?
Its speed is tied to CPU speed and your cycles are set too high, usually because the game runs at max. Give it a fixed cycles value in its own conf file — a few thousand suits early nineties titles — or slow it live with Ctrl+F11.
Why does my CD game have sound effects but no music?
You most likely mounted an ISO image, which holds only the data track. Games that stream music as CD audio tracks need those tracks present, so re-image your disc as BIN/CUE and point IMGMOUNT at the .cue file.
Can I stop typing the mount commands every time?
Yes — that is what the conf file’s [autoexec] section is for. Put your MOUNT and IMGMOUNT lines there once and DOSBox runs them at every startup.
Final Verdict
DOSBox rewards ten minutes of setup with a library that simply works from then on. Install Staging, keep every game under one folder, mount it as drive C, image CD games in BIN/CUE so their music survives, leave cycles on auto and sound on the Sound Blaster 16 defaults, and write the arrangement into the conf file’s autoexec section. Do those things in that order and the emulator disappears, leaving the games as you remember them.