
Installing an M.2 NVMe SSD takes about ten minutes: power down, find a compatible M.2 slot, set the standoff to the right length, slide the drive in at a slight angle, press it flat, and secure it with one screw. Then boot, confirm the drive appears in the BIOS, and initialize and format it in Windows Disk Management if it is a new, blank drive. Check your motherboard manual first so you use the correct slot.
Before you start
This guide covers the physical installation and the Windows setup. If you are still deciding which drive fits your board, the form factor and interface rules are covered in a separate explainer. Here the assumption is that you already have a drive and want it working.
Gather these items:
- A small Phillips screwdriver, usually a #0 or #1 size
- The tiny M.2 mounting screw and standoff, which come with the motherboard (some boards use a tool-free latch instead)
- The motherboard manual, either printed or open on a phone
- A clean, well-lit surface and a way to avoid static, such as touching the bare metal of the case before handling parts
Turn the computer off, switch the power supply off at the back, unplug the power cable, and press the power button once to drain leftover charge. Open the side panel.
Step 1: Find the right M.2 slot
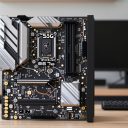
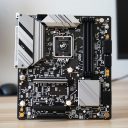
Boards with more than one M.2 slot rarely treat them equally. One slot may sit close to the processor and connect straight to it, while another is fed by the chipset and may run slower or share bandwidth. The manual’s storage page will mark each slot and list its supported interface and lengths.
Look for three details:
- Interface: PCIe, SATA, or both. An NVMe drive needs a slot wired for PCIe.
- Length: the slot should list support for your drive’s length, for example 2280.
- Shared resources: a note stating that a given slot disables certain SATA ports or splits lanes with another device.
Many boards put the primary M.2 slot beneath the graphics card. If the card blocks access, you may need to remove it temporarily. Other boards place a slot beneath a metal cover that doubles as a heatsink, and that cover needs to come off first.
Step 2: Remove the heatsink cover if there is one
Unscrew the cover’s retaining screws and lift it away. Peel the clear plastic film off the thermal pad underneath, if the pad has one. That film is a common oversight, and leaving it on prevents the pad from touching the drive. Keep the screws in a small dish so they do not disappear into the case.
Step 3: Set the standoff for your drive length
At the far end of the slot sits a small threaded post called a standoff. It is the support the drive’s free end rests on. Standoffs come in a few forms. Some boards ship with the standoff preinstalled at the 2280 position. Others include a loose standoff you move to the matching hole for your length, and some use a latch that rotates into position.
If your drive is 2280 and the board is already set for 2280, leave it alone. If your drive is shorter or longer, relocate the standoff to the correct hole using the manual’s diagram. Do not force a drive onto a standoff that is sitting at the wrong length.
Step 4: Insert the drive
- Hold the drive by its edges and avoid touching the gold contacts.
- Line up the notch on the drive with the key in the slot. It only fits one way.
- Slide the contact end firmly into the slot at roughly a 30-degree angle. The drive will sit tilted up at the free end.
- Gently press the free end down until it rests flat on the standoff.
- Insert the screw through the notch at the end of the drive and tighten until snug. The drive should not wobble, but stop before the screw is cranked hard, because the board and the drive can both be damaged by overtightening.
If the drive will not lie flat, the standoff is probably at the wrong length or the drive is not fully inserted. Remove it, check both, and try again.
Step 5: Add the heatsink and close up
Place the board’s cover or the drive’s included heatsink back over the drive. Use only one heatsink. If the drive already has a built-in heatsink and the board also has a cover, they can clash, so follow whichever the manuals say fits. Refit any graphics card you removed, close the case, reconnect the power cable, and switch the power supply back on.
Step 6: Confirm the drive in the BIOS
Turn the computer on and enter the BIOS or UEFI setup, usually by tapping Delete or F2 during startup (the on-screen prompt or the manual gives the exact key). Look for a storage or boot section that lists connected drives. A correctly seated NVMe drive normally appears there by model name.
If your board offers a setting for how the M.2 slot operates, such as PCIe versus SATA mode, leave it on automatic unless the manual says otherwise. Save and exit.
Step 7: Set up the drive in Windows
There are two common situations: using the new drive as extra storage, or using it as the system drive.
New drive as extra storage
- Right-click the Start button and open Disk Management.
- A prompt may appear asking you to initialize the disk. Choose GPT, which is the right choice for modern systems and large drives.
- Find the new disk, shown as unallocated space. Right-click it and choose New Simple Volume.
- Follow the wizard, accept the full size unless you want multiple partitions, pick a drive letter, and choose NTFS as the file system.
- Give the volume a name and finish. The drive then appears in File Explorer.
A quick format is fine for a brand-new drive.
New drive as the system drive
You have two paths, and they have different trade-offs.
| Approach | What it does | Good for | Watch out for |
|---|---|---|---|
| Fresh Windows install | Installs a clean copy of Windows on the new drive | Starting clean, removing old clutter, fixing a sluggish system | You reinstall apps and restore your files from a backup |
| Clone the old drive | Copies everything, including Windows and apps, to the new drive | Keeping your setup exactly as it is | Carries over existing problems; needs cloning software and correct boot order |
For a fresh install, create Windows installation media from the official download page on a USB stick, boot from it, and choose the new drive when the installer asks where to install. If you have an old drive still connected, it is safer to unplug it during installation so the installer does not place boot files on the wrong disk. Reconnect it afterward.
For cloning, use software from the drive maker or a reputable third-party tool, copy the old drive to the new one, then enter the BIOS and set the new drive as the first boot device. Leave the old drive disconnected for the first boot to confirm the new one starts Windows on its own. If the new drive is larger, you can extend the main partition in Disk Management afterward.
Step 8: Check that the drive is running as expected
Open Settings, go to the storage section, and confirm the drive appears with the expected capacity. Many drive makers also publish a free utility that reports health, temperature, and firmware version; checking that firmware is current is a reasonable habit. Avoid running long synthetic tests repeatedly on a new drive just for curiosity, since they add unnecessary writes.
Troubleshooting
| Symptom | Likely cause | What to try |
|---|---|---|
| Drive missing in BIOS | Not fully seated, wrong slot type, or slot disabled by a shared-lane setting | Power off, reseat the drive, try another M.2 slot, read the manual’s shared-resource note, update the BIOS if the manual suggests it |
| In BIOS but missing in Windows | Disk is blank and not initialized | Open Disk Management, initialize as GPT, create a new simple volume |
| Windows installer cannot see the drive | Missing storage driver in the installer | Load the driver from the board or drive maker’s support page through the installer’s driver option |
| Speeds lower than expected | Slot runs at a lower generation or fewer lanes, or the drive is nearly full or in a chipset-fed slot | Check the manual for the slot’s capability, move the drive to the primary slot, free up space |
| Speed drops during long transfers | The drive’s fast write buffer has filled, or it is overheating | Allow the transfer to finish, add airflow or a heatsink, check temperature in the maker’s utility |
| Thermal throttling | Drive sits under a hot graphics card with little airflow | Fit a heatsink, improve case airflow, move to a cooler slot |
| A SATA drive stopped working after install | The M.2 slot shares bandwidth with that SATA port | Move the SATA cable to another port as the manual indicates |
| Will not boot after cloning | Boot order or the old drive confusing the loader | Set the new drive first in the BIOS, disconnect the old drive for the first boot |
Cooling and care tips
- Keep airflow moving across the area around the slot. A drive hidden beneath a large graphics card benefits the most from a heatsink.
- Do not stack a motherboard cover and an aftermarket heatsink on the same drive unless both manufacturers say it is fine.
- Keep a recent backup of anything important. A new drive can fail like any other component, and an install is a good moment to confirm your backups are working.
- Update the BIOS and the drive’s firmware only when there is a reason, and follow the maker’s instructions closely.
Frequently asked questions
Do I need to turn off the power supply before installing an M.2 drive?
Yes, it is the safest approach. Shut the system down, flip the power supply switch off, and unplug it. This avoids any standby power on the board while you work.
Why does my new SSD not show up in File Explorer?
A brand-new drive is blank, and Windows will not show it until it has a volume. Open Disk Management, initialize the disk, then create and format a new simple volume. If it is missing from Disk Management as well, check the BIOS and reseat the drive.
Should I clone my old drive or reinstall Windows?
Cloning is faster and keeps your apps and settings. A fresh install gives you a clean start and avoids carrying over problems. If the old system runs well, cloning is reasonable; if it has been slow or unstable, a fresh install is usually the better path.
Can I install an M.2 drive without a screw?
Some boards use a tool-free latch. If yours has a screw and you have lost it, the drive can lift out of position and may not make reliable contact. Get the correct M.2 screw from the board’s hardware bag, the maker, or a computer parts supplier instead of leaving the drive unsecured.
Conclusion
A reliable install comes down to the right slot, the right standoff position, a snug screw, and a quick visit to the BIOS and Disk Management. If something does not appear, work backward: Windows volume, then BIOS detection, then the physical seating. Most problems resolve at one of those three points.