Affiliate disclosure: As an Amazon Associate we earn from qualifying purchases. This post contains affiliate links — if you buy through them we may earn a small commission at no extra cost to you. This never affects our recommendations.
Building a gaming PC is simpler than you think. Modern components are designed to be foolproof: parts only fit one way, and most connections are color-coded or keyed to prevent damage. If you can follow IKEA instructions, you can build a gaming PC. In fact, PC assembly is easier than furniture assembly — there’s no guess work about bolt tightness or complicated multi-step sequences.
This comprehensive step-by-step guide walks you through every stage of building a gaming PC, from workspace preparation through BIOS configuration. We’ve included exact tools, recommended component choices, common mistakes, and what to do if something goes wrong. By the end, you’ll have saved $100–$300 compared to prebuilt systems and gained deep knowledge of how your machine works.
Before You Start: Tools and Preparation
Tools You’ll Need

Essential:
- Phillips head screwdriver (magnetic tip prevents dropping screws) — precision magnetic screwdriver set
- Anti-static wristband (grounding cable) — optional but recommended for safety
Optional but helpful:
- Small LED flashlight (see into dark case areas)
- Motherboard manual (essential reference during assembly)
- Small container (holds screws so you don’t lose them)
- Lint-free cloth (cleaning components)
Workspace Preparation
Clear a large table or desk with adequate lighting. Avoid carpeted areas (static risk). Lay out all components before starting — don’t open sealed boxes mid-build. Have your motherboard manual nearby (download from manufacturer website if you don’t have physical copy).
Static precaution: Wear an anti-static wristband clipped to your case metal, OR periodically touch the case metal frame to discharge static. Modern components are surprisingly durable, but best not to risk it.
Step 1: Unbox and Inspect All Components
Before touching anything, verify you have:
- GPU (graphics card in protective box)
- CPU (processor in plastic shell)
- Motherboard (in anti-static bag)
- RAM sticks (in anti-static bag, usually 2 modules)
- SSD/NVMe (usually loose in small box)
- Power supply (heavy, usually in cardboard sleeve)
- Case (largest box)
- CPU cooler (in several small boxes/bags)
Damage check: Inspect the GPU for bent pins (front connector) or cracked fans. Check the motherboard for burn marks or corrosion. If anything looks damaged, contact the seller immediately.

iBUYPOWER Y40 PRO Gaming PC Desktop AMD Ryzen 7 7800X3D CPU, NVIDIA GeForce RTX 5060Ti 8GB GPU, 32GB DDR5 RGB 5200MHz RAM, 1TB NVMe SSD, Windows 11 Home, Computer w/Keyboard Mouse - Y40BA7N56T01
As an Amazon Associate we earn from qualifying purchases. Product prices and availability are accurate as of the date/time indicated.
Step 2: Install the Power Supply in the Case
Open your PC case by removing the side panels. Locate the PSU bay — usually at the bottom rear of the case. Some cases have a compartment door; others are open.
Orientation matters: If your case has ventilation holes at the bottom, face the PSU fan downward to pull cool air in. If the case is sealed underneath, face the fan upward.
Slide the PSU into the bay, align the mounting holes, and secure with four screws (provided with the case). Don’t plug in the power cable yet — keep it disconnected during assembly for safety.
Pro tip: Orient the PSU so the power cable port is easily accessible. You don’t want to plug in the power cable after the case is fully built.
Step 3: Assemble Components on the Motherboard (Bench Assembly)
Before installing the motherboard in the case, assemble the CPU, RAM, and M.2 SSD on the motherboard. This avoids awkward angles and is much easier. Keep the motherboard on its cardboard box, not in the case.
Install the CPU
Locate the CPU socket on the motherboard — it’s a large square socket with a gold or copper pin field. The socket has a retention lever on one side (usually a hinged metal clip).
CPU installation steps:
- Open the retention lever by pushing it upward (it pivots outward)
- Locate the alignment marker on the CPU (usually a gold triangle or notch on one corner)
- Locate the alignment key on the socket (matching notch or triangle)
- Hold the CPU by its edges (never touch the pins or pad side)
- Align the CPU markers with the socket markers
- Lower the CPU gently into the socket — it should slide in with zero resistance
Critical: If the CPU doesn’t slide in smoothly, STOP. Check alignment and try again. Never force the CPU into the socket. Forcing risks bent pins (permanent damage).
- Once seated, lower the retention lever firmly until it clicks
- The CPU should sit flush in the socket with no gaps

Socket types:
- AM5 (AMD Ryzen): Pin socket (gold pins on socket), flat CPU top
- LGA 1700 (Intel): Lands socket (flat pins on CPU, pads on socket), ILM retention
Don’t mix them up — they’re incompatible.
Install RAM
Locate the RAM slots (usually 2–4 long slots near the CPU socket, labeled “DIMM1”, “DIMM2”, etc.). Modern motherboards have color-coded slots (blue, white, blue, white pattern for example).
RAM installation steps:
- Open the retention clips on both ends of each RAM slot (they swing outward)
- Locate the notch on the bottom of the RAM stick
- Locate the key in the RAM slot (matching notch)
- Align the RAM stick so its notch matches the slot key
- Insert the RAM at a 45° angle, then press downward firmly
- The RAM should click into place and sit flush — the retention clips snap shut automatically
Critical: RAM is keyed to prevent incorrect insertion. If it won’t fit, check alignment. DDR5 notches are in a different position than DDR4 — you cannot install DDR5 in DDR4 slots or vice versa.
Recommendation for gaming: Install RAM in slots 1 and 3 (or 2 and 4, depending on motherboard). Refer to your motherboard manual for the correct configuration. Most modern boards run all slots, but some are optimized for specific slot pairs.

iBUYPOWER Slate Gaming PC Desktop Computer AMD Ryzen 7 9700F CPU, AMD Radeon RX 9060 8GB GPU, 16GB DDR5 RGB 5200MHz RAM, 1TB NVMe SSD, Windows 11 Home, Gamer Keyboard and Mouse - SBA7R9601
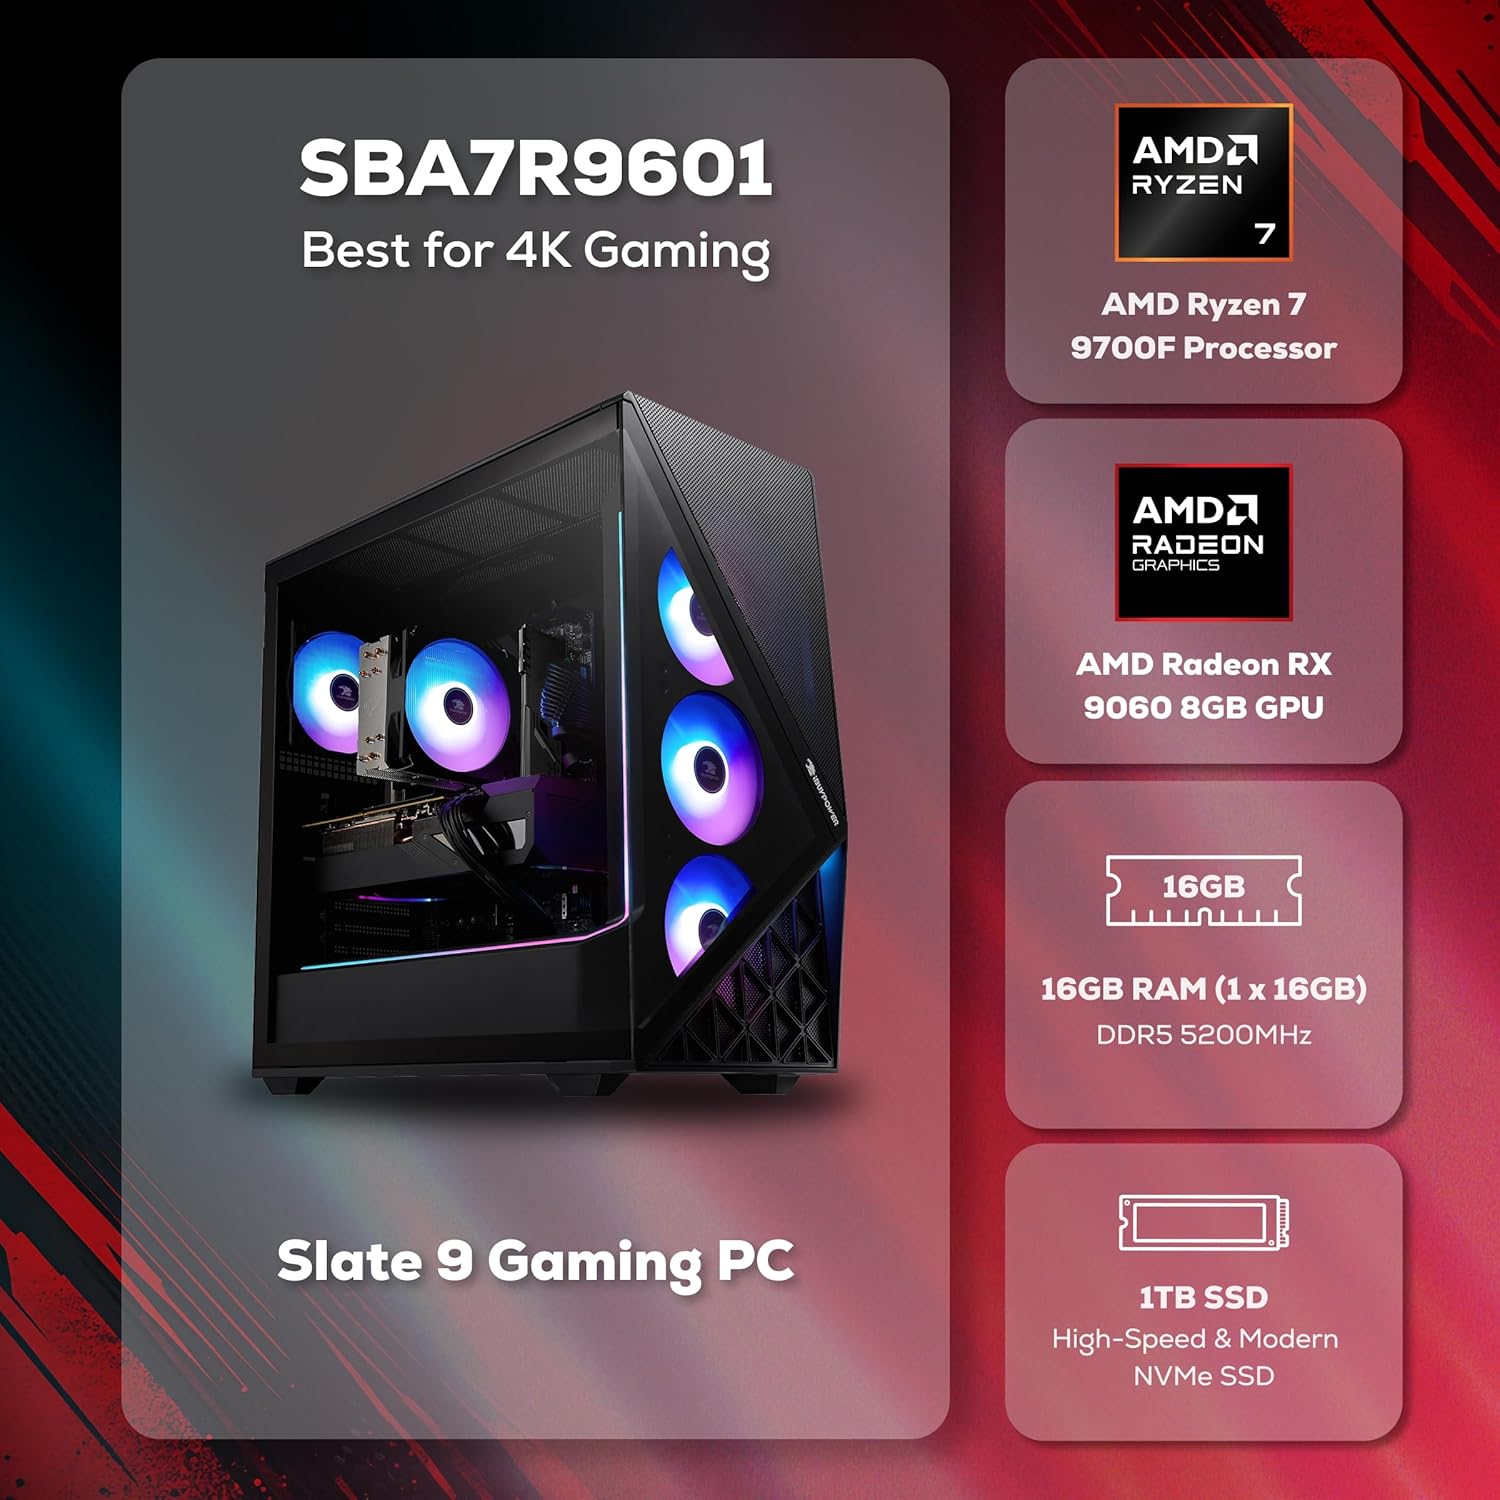


As an Amazon Associate we earn from qualifying purchases. Product prices and availability are accurate as of the date/time indicated.
Install M.2 SSD
Locate the M.2 slot(s) on the motherboard. Modern boards have 2–4 M.2 slots, usually horizontal and near the CPU. Refer to the manual if unsure.
M.2 installation steps:
- Remove the small brass standoff screw at the end of the M.2 slot (usually one screw)
- Remove the small standoff spacer (tiny brass peg)
- Hold the M.2 SSD by its edges (avoid touching the gold connector)
- Insert the SSD at a 30° angle into the slot
- Press down firmly until the SSD is horizontal
- Secure with the mounting screw
Critical: M.2 SSDs are small and easy to lose. Handle carefully. The key notch on the SSD must align with the ridge in the slot.
Performance note: PCIe 4.0 and 5.0 slots can run at high temperatures. Some boards include thermal pads or heatsinks for M.2 drives — apply if included.
Step 4: Install CPU Cooler (Critical Step)
The CPU cooler is critical — without it, your CPU overheats and will throttle or shut down. The exact installation depends on your cooler type (air vs. AIO).
Air Cooler Installation (Noctua, Thermalright, etc.)
CPU cooler mounting steps:
- Most modern air coolers come pre-mounted with the AM5 bracket on the heatsink
- Verify the bracket is seated (check heatsink manual)
- Apply thermal paste to the CPU: either a pea-sized dot in the center, or a thin X-pattern across the IHS (integrated heat spreader). Do not apply thermal paste to the entire CPU surface.
- Lower the heatsink onto the CPU and align with the bracket mounting holes
- Insert mounting bolts or screws and tighten evenly (hand-tight is sufficient — don’t over-tighten)
- Attach the heatsink fans to the heatsink using provided clips
Common mistake: Over-tightening the cooler. This crushes thermal paste and doesn’t improve cooling. Hand-tight is all you need.
AIO (All-in-One Liquid Cooler) Installation
- Most AIOs come with an AM5 mounting bracket pre-installed
- Apply thermal paste to the CPU (same as air cooler)
- Install the CPU block onto the CPU using the mounting bolts
- Route the pump/block cables to a motherboard fan header (labeled CPU_FAN)
- Route the radiator tube to the case back or top (depending on orientation)
- Secure the radiator to the case with mounting brackets
- Connect the radiator fans to a motherboard fan header (labeled SYS_FAN or similar)
Step 5: Install Motherboard in Case
Now that CPU, RAM, and cooler are mounted, install the motherboard in the case.
Motherboard installation steps:
- Locate the I/O shield (metal bracket with port cutouts) that came with the case
- Insert the I/O shield into the slot at the rear of the case (it clicks into place)
- Align the motherboard with the I/O shield and case screw holes
- The motherboard’s rear ports should align with the I/O shield cutouts — if they don’t, the shield is backwards
- Align the mounting holes (brass standoffs) with the motherboard screw holes
- Insert mounting screws and hand-tighten them first (don’t torque yet)
- Once all screws are in, tighten them in a crisscross pattern (similar to tightening car wheels)
Critical: Do not over-tighten. Motherboards are delicate. Snug is enough.
Step 6: Install the GPU
The GPU is the most intimidating component, but installation is simple.
GPU installation steps:
- Locate the top PCIe x16 slot (usually the topmost long slot, directly above the CPU)
- Release the retention clip at the end of the PCIe slot (it swings or slides outward)
- Remove the PCIe slot covers from the rear I/O panel (2–3 screws, depending on GPU width)
- Inspect the GPU front edge (near the power connector) — there’s usually a small notch or guide
- Hold the GPU by its edges, align it with the PCIe slot, and press firmly downward
- The GPU should slide into the slot and the retention clip should snap into place automatically
- Secure the GPU bracket to the case rear with 2–3 screws
Common mistake: Not pressing hard enough. Modern GPUs require firm pressure (100+ lbs) to fully seat. If it doesn’t click or feels loose, reseat it.

Power connections: GPUs require 6-pin, 8-pin, or 16-pin PCIe power connectors. Your PSU provides these cables. Refer to GPU manual for connector locations.
Step 7: Cable Management and Power Connections
Now connect all power cables. Modern modular PSUs have labeled connectors, making this foolproof.
Motherboard Power Connections
- 24-pin ATX power connector — large rectangular connector on the right side of the motherboard, usually labeled “ATX” or “PWR1”
- 8-pin CPU power connector — near the top of the motherboard, close to the CPU socket, usually labeled “CPU_PWR” or “EPS”
- Some motherboards have additional 4-pin connectors for CPU power — consult manual
GPU Power Connections
- Locate GPU power connectors on the GPU (side or top, near the bracket)
- Connect PCIe power cables from the PSU to the GPU (usually 8-pin and 8-pin, or 16-pin)
- Verify connectors are seated firmly (gentle tug should not disconnect)
SATA Power (if you have SATA drives)
Connect SATA power cables to any 2.5″ SSDs or 3.5″ HDDs. M.2 drives do not require power cables.
Front Panel Connectors
- Locate the small pin headers on the bottom-right of the motherboard (labeled “JFP1”, “J_PANEL1”, or similar)
- Connect case power button, reset button, and power LED according to your case documentation
- This is finicky but not critical — if you get it wrong, the case buttons just won’t work (no damage)
Storage Cables
No SATA data cables required if using only M.2 NVMe (no power connections needed either).
Step 8: Final Assembly Check
Before closing the case, verify:
- [ ] All power connectors are seated (24-pin ATX, 8-pin CPU, GPU power)
- [ ] RAM is fully seated (clips should be locked on both ends)
- [ ] CPU cooler is mounted and fans are secure
- [ ] GPU is fully inserted into PCIe slot and bracket is screwed to case
- [ ] No loose screws or tools inside the case
- [ ] Cables are routed away from fans (no cable hitting spinning fans)
- [ ] SSD is mounted and secured
- [ ] PSU switch is in the “On” position and power cable is plugged into wall
Step 9: First Boot
Close the case panels. Connect your monitor to the GPU (not the motherboard). This is critical — motherboards with integrated graphics will display through the motherboard outputs, but you want to use your discrete GPU.
Connect the power cable from the wall to the PSU. Flip the PSU power switch to “On” (rear rocker switch). Press the case power button.
If the system boots:
- You should see POST messages on the screen (motherboard starting up)
- Fans will spin up
- PSU fan and GPU fans will activate
- Within 5–10 seconds, you should see BIOS or Windows loading
If the system doesn’t boot: Check these in order:
- Is the PSU power switch ON (rear rocker)
- Is the power cable plugged into the wall and PSU
- Is the 24-pin ATX power connector fully seated on the motherboard
- Is the 8-pin CPU power connector fully seated
- Is the RAM fully seated (Try removing and reinserting)
- Is the GPU fully seated (Try reseating)
- Are you plugged into the GPU monitor output, not the motherboard
Step 10: BIOS Configuration (Critical)
Once the system boots, enter BIOS to enable important features:
Entering BIOS: Press Delete or F2 during POST (initial startup screen). Consult your motherboard manual for the exact key.
Critical BIOS Settings
Enable XMP/EXPO (Memory Overclocking):
- Locate “XMP” (Intel) or “EXPO” (AMD) settings in the Overclocking or Memory section
- Enable Profile 1 or the default profile
- Save and exit
- This enables your RAM to run at its rated speed (e.g., DDR5-6000)
Without XMP/EXPO enabled, your RAM will run at slow stock speeds.
Enable PCIe Gen 4/5 for NVMe:
- Locate M.2 slot settings
- Verify the slot is set to PCIe Gen 4 or Gen 5 (depending on your SSD)
- Save and exit
Verify CPU Temperature:
- Enter the monitoring or information screen
- Verify CPU temperature is 30–45°C at idle
- If above 60°C idle, the cooler may not be seated properly
Step 11: Install Operating System and Drivers
Once BIOS is configured, install Windows 11 Pro (or your preferred OS).
Windows Installation:
- Create a Windows installation USB on another computer (use Microsoft’s Media Creation Tool)
- Insert USB into your new PC
- Restart and boot from USB (press F12 or Delete during POST to select boot device)
- Follow Windows installation prompts
- Windows will recognize most hardware automatically; you may need to download GPU drivers afterward
GPU Drivers:
- Visit NVIDIA or AMD website (depending on GPU)
- Download the latest GPU driver for your specific model
- Install and restart
Component Recommendations by Price Tier
$900 Budget Build
- GPU: RTX 4070 (B0DHK5WQPM)
- CPU: Ryzen 5 7600 (B0BVNKWGGQ)
- Motherboard: MSI B650E Gaming WiFi
- Cooler: Arctic Liquid Freezer II 240mm AIO
$1,500 Mid-Range Build
- GPU: RTX 4070 Super (B0DHK5WQPM)
- CPU: Ryzen 5 9600X (B0D6NQD8XS)
- Motherboard: ASUS ROG Crosshair X870-E
- Cooler: Noctua NH-D15 G2 (B0DKFMSMYK)
$2,300 High-End 1440p Build
- GPU: RTX 4080 Super (B0DHK5WQPM)
- CPU: Ryzen 7 9800X3D (B0DKFMSMYK)
- Motherboard: ASUS ROG Crosshair X870-E
- Cooler: Noctua NH-D15 G2 + optional AIO for aesthetics
$3,800 4K Flagship Build
- GPU: RTX 4090 (B0DHK5WQPM)
- CPU: Ryzen 9 9950X3D (B0D6NMBJNV)
- Motherboard: ASUS ROG Crosshair X870-E Master
- Cooler: NZXT Kraken Z93 360mm AIO
Frequently Asked Questions
How long does it take to build a PC
First-time builders: 2–3 hours. Experienced builders: 30–45 minutes. Don’t rush — take breaks if needed.
Can I damage components by static electricity
It’s possible but rare with modern components. Wearing an anti-static wristband and touching the case metal occasionally is sufficient protection.
What if I install the CPU upside down
It won’t fit — CPU sockets are keyed to prevent this. AMD and Intel both use asymmetrical sockets, so incorrect orientation is mechanically impossible.
My system boots but then restarts immediately. What’s wrong
Check these: CPU cooler is mounted (most common cause of boot-loops), RAM is fully seated, and all power connectors are connected. If CPU cooler is loose, the system will thermal-throttle and restart.
Should I install the motherboard first or components first
Assemble CPU, RAM, and M.2 on the motherboard outside the case (bench assembly). Then install the motherboard in the case. This is easier than working inside the case with limited space.
Can I upgrade my PC later
Absolutely. AM5 motherboards support CPU upgrades through 2027+. You can swap GPUs, add RAM, upgrade SSD, and replace the PSU easily.
What’s the expected lifespan of a gaming PC
A 2026 gaming PC will remain relevant for 4–5 years for gaming. By 2030–2031, GPU upgrades will likely be needed. CPU and platform longevity is 5+ years.
Do I need to install Windows on my SSD, or can I use external storage
Install Windows on your SSD (fastest boot and best performance). External USB drives are slow for gaming.
Should I enable overclocking for my CPU
Not required. Stock settings are stable and optimized by manufacturers. Overclocking adds complexity with minimal gaming benefit for CPUs.
Final Verdict
Building a gaming PC is straightforward when you follow these steps. The worst mistakes are usually just reversed connections (which don’t fit) or insufficient cooler pressure (which shows up in temperatures). There’s very little you can permanently damage if you go slowly and double-check connections.
Your first build will take 2–3 hours. Your second will take 45 minutes. By the end, you’ll understand every component and gain confidence maintaining your system for years.
For next steps, see our guides to the best monitor for gaming, the best gaming mouse, the best gaming keyboard, and the best gaming chair to complete your setup. Also check best gaming PCs if you decide to go prebuilt instead, and review the best CPU for gaming if you’re still deciding on components.
Last updated: April 2026. Prices and availability may change. We independently test every product we recommend. When you buy through our links, we may earn a commission at no extra cost to you.

In a hurry See the top-rated How to Build Gaming PC deals available right now:
🛒 Check How To Build Gaming Pc Prices on Amazon →Quick Comparison Table
| Product | |
|---|---|
| iBUYPOWER Y40 PRO Black Gaming PC Desktop Computer AMD Ryzen 7 9800X3… | View on Amazon |
| iBUYPOWER Slate Black Gaming PC Desktop Computer Intel Core Ultra 7 2… | View on Amazon |
| iBUYPOWER Y40 PRO Gaming PC Desktop AMD Ryzen 7 7800X3D CPU, NVIDIA G… | View on Amazon |
| iBUYPOWER Element SE Gaming PC Desktop Computer AMD Ryzen 5 8400F CPU… | View on Amazon |
| iBUYPOWER Y70TI Gaming PC Desktop Computer with Hyte Touch Screen Cas… | View on Amazon |
| iBUYPOWER Slate Gaming PC Desktop Computer AMD Ryzen 7 9700F CPU, AMD… | View on Amazon |
Related Articles
Looking for more on this topic? Browse the hand-picked guides below — each one applies the same scoring rubric used in this review.


